computing - GreenAshPoignant wit and hippie ramblings that are pertinent to computinghttps://greenash.net.au/thoughts/topics/computing/2022-03-22T00:00:00ZI don't need a VPS anymore2022-03-22T00:00:00Z2022-03-22T00:00:00ZJazahttps://greenash.net.au/thoughts/2022/03/i-dont-need-a-vps-anymore/
I've paid for either a "shared hosting" subscription, or a VPS subscription, for my own use, for the last two decades. Mainly for serving web traffic, but also for backups, for Git repos, and for other bits and pieces.
No more defending against evil villains! Image source: Meme Generator
In its place, I've taken the plunge and fully embraced SaaS. In particular, I've converted most of my personal web sites, and most of the other web sites under my purview, to be statically generated, and to be hosted on Netlify. I've also moved various backups to S3 buckets, and I've moved various Git repos to GitHub.
And so, you may lament that I'm yet one more netizen who has Less Power™ and less control. Yet another lost soul, entrusting these important things to the corporate overlords. And you have a point. But the case against SaaS is one that's getting harder to justify with each passing year. My new setup is (almost entirely) free (as in beer). And it's highly available, and lightning-fast, and secure out-of-the-box. And sysadmin is now Somebody Else's Problem. And the amount of ownership and control that I retain, is good enough for me.
The number one thing that I loathed about managing my own VPS, was security. A fully-fledged Linux instance, exposed to the public Internet 24/7, is a big responsibility. There are plenty of attack vectors: SSH credentials compromise; inadequate firewall setup; HTTP or other DDoS'ing; web application-level vulnerabilities (SQL injection, XSS, CSRF, etc); and un-patched system-level vulnerabilities (Log4j, Heartbleed, Shellshock, etc). Unless you're an experienced full-time security specialist, and you're someone with time to spare (and I'm neither of those things), there's no way you'll ever be on top of all that.
With the new setup, I still have some responsibility for security, but only the level of responsibility that any layman has for any managed online service. That is, responsibility for my own credentials, by way of a secure password, which is (wherever possible) complimented with robust 2FA. And, for GitHub, keeping my private SSH key safe (same goes for AWS secret tokens for API access). That's it!
I was also never happy with the level of uptime guarantee or load handling offered by a VPS. If there was a physical hardware fault, or a data centre networking fault, my server and everything hosted on it could easily become unreachable (fortunately this seldom happened to me, thanks to the fine folks at BuyVM). Or if there was a sudden spike in traffic (malicious or not), my server's CPU / RAM could easily get maxxed out and become unresponsive. Even if all my sites had been static when they were VPS-hosted, these would still have been constant risks.
Don't worry. I've sent an email. Image source: YouTube
With the new setup, both uptime and load have a much higher guarantee level, as my sites are now all being served by a CDN, either CloudFront or Netlify's CDN (which is similar enough to CloudFront). Pretty much the most highly available, highly resilient services on the planet. (I could have hooked up CloudFront, or another CDN, to my old VPS, but there would have been non-trivial work involved, particularly for dynamic content; whereas, for S3 / CloudFront, or for Netlify, the CDN Just Works™).
And then there's cost. I had quite a chunky 4GB RAM VPS for the last few years, which was costing me USD$15 / month. Admittedly, that was a beefier box than I really needed, although I had more intensive apps running on it, several years ago, than I've had running over the past year or two. And I felt that it was worth paying a bit extra, if it meant a generous buffer against sudden traffic spikes that might gobble up resources.
Ain't nothin' like a beefy server setup. Image source: The Register
Whereas now, my main web site hosting service, Netlify, is 100% free! (There are numerous premium bells and whistles that Netlify offers, but I don't need them). And my main code hosting service, GitHub, is 100% free too. And AWS is currently costing me less than USD$1 / month (with most of that being S3 storage fees for my private photo collection, which I never stored on my old VPS, and for which I used to pay Flickr quite a bit more money than that anyway). So I consider the whole new setup to be virtually free.
Apart from the security burden, sysadmin is simply never something that I've enjoyed. I use Ubuntu exclusively as my desktop OS these days, and I've managed a number of different Linux server environments (of various flavours, most commonly Ubuntu) over the years, so I've picked up more than a thing or two when it comes to Linux sysadmin. However, I've learnt what I have, out of necessity, and purely as a means to an end. I'm a dev, and what I actually enjoy doing, and what I try to spend most of my time doing, is dev work. Hosting everything in SaaS land, rather than on a VPS, lets me focus on just that.
In terms of ownership, like I said, I feel that my new setup is good enough. In particular, even though the code and the content for my sites now has its source of truth in GitHub, it's Git, it's completely exportable and sync-able, I can pull those repos to my local machine and to at-home backups as often as I want. Same for my files for which the source of truth is now S3, also completely exportable and sync-able. And in terms of control, obviously Netlify / S3 / CloudFront don't give me as many knobs and levers as things like Nginx or gunicorn, but they give me everything that I actually need.
I think I own my new setup well enough. Image source: Wikimedia Commons
Purists would argue that I've never even done real self-hosting, that if you're serious about ownership and control, then you host on bare metal that's physically located in your home, and that there isn't much difference between VPS- and SaaS-based hosting anyway. And that's true: a VPS is running on hardware that belongs to some company, in a data centre that belongs to some company, only accessible to you via network infrastructure that belongs to many companies. So I was already a heretic, now I've slipped even deeper into the inferno. So shoot me.
20-30 years ago, deploying stuff online required your own physical servers. 10-20 years ago, deploying stuff online required at least your own virtual servers. It's 2022, and I'm here to tell you, that deploying stuff online purely using SaaS / IaaS offerings is an option, and it's often the quickest, the cheapest, and the best-quality option (although can't you only ever pick two of those? hahaha), and it quite possibly should be your go-to option.
]]>
How can we make AI that reasons?2019-03-23T00:00:00Z2019-03-23T00:00:00ZJazahttps://greenash.net.au/thoughts/2019/03/how-can-we-make-ai-that-reasons/
The past decade or so has been touted as a high point for achievements in Artificial Intelligence (AI). For the first time, computers have demonstrated formidable ability in such areas as image recognition, speech recognition, gaming, and (most recently) autonomous driving / piloting. Researchers and companies that are heavily invested in these technologies, at least, are in no small way lauding these successes, and are giving us the pitch that the current state-of-the-art is nothing less than groundbreaking.
However, as anyone exposed to the industry knows, the current state-of-the-art is still plagued by fundamental shortcomings. In a nutshell, the current generation of AI is characterised by big data (i.e. a huge amount of sample data is needed in order to yield only moderately useful results), big hardware (i.e. a giant amount of clustered compute resources is needed, again in order to yield only moderately useful results), and flawed algorithms (i.e. algorithms that, at the end of the day, are based on statistical analysis and not much else – this includes the latest Convolutional Neural Networks). As such, the areas of success (impressive though they may be) are still dwarfed by the relative failures, in areas such as natural language conversation, criminal justice assessment, and art analysis / art production.
In my opinion, if we are to have any chance of reaching a higher plane of AI – one that demonstrates more human-like intelligence – then we must lessen our focus on statistics, mathematics, and neurobiology. Instead, we must turn our attention to philosophy, an area that has traditionally been neglected by AI research. Only philosophy (specifically, metaphysics and epistemology) contains the teachings that we so desperately need, regarding what "reasoning" means, what is the abstract machinery that makes reasoning possible, and what are the absolute limits of reasoning and knowledge.
What is reason?
There are many competing theories of reason, but the one that I will be primarily relying on, for the rest of this article, is that which was expounded by 18th century philosopher Immanuel Kant, in his Critique of Pure Reason and other texts. Not everyone agrees with Kant, however his is generally considered the go-to doctrine, if for no other reason (no pun intended), simply because nobody else's theories even come close to exploring the matter in such depth and with such thoroughness.
Immanuel Kant's head (lots of philosophy inside) Image source:Wikimedia Commons
One of the key tenets of Kant's work, is that there are two distinct types of propositions: an analytic proposition, which can be universally evaluated purely by considering the meaning of the words in the statement; and a synthetic proposition, which cannot be universally evaluated, because its truth-value depends on the state of the domain in question. Further, Kant distinguishes between an a priori proposition, which can be evaluated without any sensory experience; and an a posteriori proposition, which requires sensory experience in order to be evaluated.
So, analytic a priori statements are basically tautologies: e.g. "All triangles have three sides" – assuming the definition of a triangle (a 2D shape with three sides), and assuming the definition of a three-sided 2D shape (a triangle), this must always be true, and no knowledge of anything in the universe (except for those exact rote definitions) is required.
Conversely, synthetic a posteriori statements are basically unprovable real-world observations: e.g. "Neil Armstrong landed on the Moon in 1969" – maybe that "small step for man" TV footage is real, or maybe the conspiracy theorists are right and it was all a hoax; and anyway, even if your name was Buzz Aldrin, and you had seen Neil standing there right next to you on the Moon, how could you ever fully trust your own fallible eyes and your own fallible memory? It's impossible for there to be any logical proof for such a statement, it's only possible to evaluate it based on sensory experience.
Analytic a posteriori statements, according to Kant, are impossible to form.
Which leaves what Kant is most famous for, his discussion of synthetic a priori statements. An example of such a statement is: "A straight line between two points is the shortest". This is not a tautology – the terms "straight line between two points" and "shortest" do not define each other. Yet the statement can be universally evaluated as true, purely by logical consideration, and without any sensory experience. How is this so?
Kant asserts that there are certain concepts that are "hard-wired" into the human mind. In particular, the concepts of space, time, and causality. These concepts (or "forms of sensibility", to use Kant's terminology) form our "lens" of the universe. Hence, we are able to evaluate statements that have a universal truth, i.e. statements that don't depend on any sensory input, but that do nevertheless depend on these "intrinsic" concepts. In the case of the above example, it depends on the concept of space (two distinct points can exist in a three-dimensional space, and the shortest distance between them must be a straight line).
Another example is: "Every event has a cause". This is also universally true; at least, it is according to the intrinsic concepts of time (one event happens earlier in time, and another event happens later in time), and causality (events at one point in space and time, affect events at a different point in space and time). Maybe it would be possible for other reasoning entities (i.e. not humans) to evaluate these statements differently, assuming that such entities were imbued with different "intrinsic" concepts. But it is impossible for a reasoning human to evaluate those statements any other way.
The actual machinery of reasoning, as Kant explains, consists of twelve "categories" of understanding, each of which has a corresponding "judgement". These categories / judgements are essentially logic operations (although, strictly speaking, they predate the invention of modern predicate logic, and are based on Aristotle's syllogism), and they are as follows:
Group
Categories / Judgements
Quantity
Unity
Universal All trees have leaves
Plurality
Particular Some dogs are shaggy
Totality
Singular This ball is bouncy
Quality
Reality
Affirmative Chairs are comfy
Negation
Negative No spoons are shiny
Limitation
Infinite Oranges are not blue
Relation
Inherence / Subsistence
Categorical Happy people smile
Causality / Dependence
Hypothetical If it's February, then it's hot
Community
Disjunctive Potatoes are baked or fried
Modality
Existence
Assertoric Sharks enjoy eating humans
Possibility
Problematic Beer might be frothy
Necessity
Apodictic 6 times 7 equals 42
The cognitive mind is able to evaluate all of the above possible propositions, according to Kant, with the help of the intrinsic concepts (note that these intrinsic concepts are not considered to be "innate knowledge", as defined by the rationalist movement), and also with the help of the twelve categories of understanding.
Reason, therefore, is the ability to evaluate arbitrary propositions, using such cognitive faculties as logic and intuition, and based on understanding and sensibility, which are bridged by way of "forms of sensibility".
AI with intrinsic knowledge
If we consider existing AI with respect to the above definition of reason, it's clear that the capability is already developed maturely in some areas. In particular, existing AI – especially Knowledge Representation (KR) systems – has no problem whatsoever with formally evaluating predicate logic propositions. Existing AI – especially AI based on supervised learning methods – also excels at receiving and (crudely) processing large amounts of sensory input.
So, at one extreme end of the spectrum, there are pure ontological knowledge-base systems such as Cyc, where virtually all of the input into the system consists of hand-crafted factual propositions, and where almost none of the input is noisy real-world raw data. Such systems currently require a massive quantity of carefully curated facts to be on hand, in order to make inferences of fairly modest real-world usefulness.
Then, at the other extreme, there are pure supervised learning systems such as Google's NASNet, where virtually all of the input into the system consists of noisy real-world raw data, and where almost none of the input is human-formulated factual propositions. Such systems currently require a massive quantity of raw data to be on hand, in order to perform classification and regression tasks whose accuracy varies wildly depending on the target data set.
What's clearly missing, is something to bridge these two extremes. And, if transcendental idealism is to be our guide, then that something is "forms of sensibility". The key element of reason that humans have, and that machines currently lack, is a "lens" of the universe, with fundamental concepts of the nature of the universe – particularly of space, time, and causality – embodied in that lens.
What fundamental facts about the universe would a machine require, then, in order to have "forms of sensibility" comparable to that of a human? Well, if we were to take this to the extreme, then a machine would need to be imbued with all the laws of mathematics and physics that exist in our universe. However, let's assume that going to this extreme is neither necessary nor possible, for various reasons, including: we humans are probably only imbued with a subset of those laws (the ones that apply most directly to our everyday existence); it's probably impossible to discover the full set of those laws; and, we will assume that, if a reasoning entity is imbued only with an appropriate subset of those laws, then it's possible to deduce the remainder of the laws (and it's therefore also possible to deduce all other facts relating to observable phenomena in the universe).
I would, therefore, like to humbly suggest, in plain English, what some of these fundamental facts, suitable for comprising the "forms of sensibility" of a reasoning machine, might be:
There are four dimensions: three space dimensions, and one time dimension
An object exists if it occupies one or more points in space and time
An object exists at zero or one points in space, given a particular point in time
An object exists at zero or more points in time, given a particular point in space
An event occurs at one point in space and time
An event is caused by one or more different events at a previous point in time
Movement is an event that involves an object changing its position in space and time
An object can observe its relative position in, and its movement through, space and time, using the space concepts of left, right, ahead, behind, up, and down, and using the time concepts of forward and backward
An object can move in any direction in space, but can only move forward in time
I'm not suggesting that the above list is really a sufficient number of intrinsic concepts for a reasoning machine, nor that all of the above facts are the correct choice nor correctly worded for such a list. But this list is a good start, in my opinion. If an "intelligent" machine were to be appropriately imbued with those facts, then that should be a sufficient foundation for it to evaluate matters of space, time, and causality.
There are numerous other intrinsic aspects of human understanding that it would also, arguably, be essential for a reasoning machine to possess. Foremost of these is the concept of self: does AI need a hard-wired idea of "I"? Other such concepts include matter / substance, inertia, life / death, will, freedom, purpose, and desire. However, it's a matter of debate, rather than a given, whether each of these concepts is fundamental to the foundation of human-like reasoning, or whether each of them is learned and acquired as part of intellectual experience.
Reasoning AI
A machine as discussed so far is a good start, but it's still not enough to actually yield what would be considered human-like intelligence. Cyc, for example, is an existing real-world system that basically already has all these characteristics – it can evaluate logical propositions of arbitrary complexity, based on a corpus (a much larger one than my humble list above) of intrinsic facts, and based on some sensory input – yet no real intelligence has emerged from it.
One of the most important missing ingredients, is the ability to hypothesise. That is, based on the raw sensory input of real-world phenomena, the ability to observe a pattern, and to formulate a completely new, original proposition expressing that pattern as a rule. On top of that, it includes the ability to test such a proposition against new data, and, when the rule breaks, to modify the proposition such that the rule can accommodate that new data. That, in short, is what is known as deductive reasoning.
A child formulates rules in this way. For example, a child observes that when she drops a drinking glass, the glass shatters the moment that it hits the floor. She drops a glass in this way several times, just for fun (plenty of fun for the parents too, naturally), and observes the same result each time. At some point, she formulates a hypothesis along the lines of "drinking glasses break when dropped on the floor". She wasn't born knowing this, nor did anyone teach it to her; she simply "worked it out" based on sensory experience.
Some time later, she drops a glass onto the floor in a different room of the house, still from shoulder-height, but it does not break. So she modifies the hypothesis to be "drinking glasses break when dropped on the kitchen floor" (but not the living room floor). But then she drops a glass in the bathroom, and in that case it does break. So she modifies the hypothesis again to be "drinking glasses break when dropped on the kitchen or the bathroom floor".
But she's not happy with this latest hypothesis, because it's starting to get complex, and the human mind strives for simple rules. So she stops to think about what makes the kitchen and bathroom floors different from the living room floor, and realises that the former are hard (tiled), whereas the latter is soft (carpet). So she refines the hypothesis to be "drinking glasses break when dropped on a hard floor". And thus, based on trial-and-error, and based on additional sensory experience, the facts that comprise her understanding of the world have evolved.
Some would argue that current state-of-the-art AI is already able to formulate rules, by way of feature learning (e.g. in image recognition). However, a "feature" in a neural network is just a number, either one directly taken from the raw data, or one derived based on some sort of graph function. So when a neural network determines the "features" that correspond to a duck, those features are just numbers that represent the average outline of a duck, the average colour of a duck, and so on. A neural network doesn't formulate any actual facts about a duck (e.g. "ducks are yellow"), which can subsequently be tested and refined (e.g. "bath toy ducks are yellow"). It just knows that if the image it's processing has a yellowish oval object occupying the main area, there's a 63% probability that it's a duck.
Another faculty that the human mind possesses, and that AI currently lacks, is intuition. That is, the ability to reach a conclusion based directly on sensory input, without resorting to logic as such. The exact definition of intuition, and how it differs from instinct, is not clear (in particular, both are sometimes defined as a "gut feeling"). It's also unclear whether or not some form of intuition is an essential ingredient of human-like intelligence.
It's possible that intuition is nothing more than a set of rules, that get applied either before proper logical reasoning has a chance to kick in (i.e. "first resort"), or after proper logical reasoning has been exhausted (i.e. "last resort"). For example, perhaps after a long yet inconclusive analysis of competing facts, regarding whether your Uncle Jim is telling the truth or not when he claims to have been to Mars (e.g. "Nobody has ever been to Mars", "Uncle Jim showed me his medal from NASA", "Mum says Uncle Jim is a flaming crackpot", "Uncle Jim showed me a really red rock"), your intuition settles the matter with the rule: "You should trust your own family". But, on the other hand, it's also possible that intuition is a more elementary mechanism, and that it can't be expressed in the form of logical rules at all: instead, it could simply be a direct mapping of "situations" to responses.
Is reason enough?
In order to test whether a hypothetical machine, as discussed so far, is "good enough" to be considered intelligent, I'd like to turn to one of the domains that current-generation AI is already pursuing: criminal justice assessment. One particular area of this domain, in which the use of AI has grown significantly, is determining whether an incarcerated person should be approved for parole or not. Unsurprisingly, AI's having input into such a decision has so far, in real life, not been considered altogether successful.
The current AI process for this is based almost entirely on statistical analysis. That is, the main input consists of simple numeric parameters, such as: number of incidents reported during imprisonment; level of severity of the crime originally committed; and level of recurrence of criminal activity. The input also includes numerous profiling parameters regarding the inmate, such as: racial / ethnic group; gender; and age. The algorithm, regardless of any bells and whistles it may claim, is invariably simply answering the question: for other cases with similar input parameters, were they deemed eligible for parole? And if so, did their conduct after release demonstrate that they were "reformed"? And based on that, is this person eligible for parole?
Current-generation AI, in other words, is incapable of considering a single such case based on its own merits, nor of making any meaningful decision regarding that case. All it can do, is compare the current case to its training data set of other cases, and determine how similar the current case is to those others.
A human deciding parole eligibility, on the other hand, does consider the case in question based on its own merits. Sure, a human also considers the numeric parameters and the profiling parameters that a machine can so easily evaluate. But a human also considers each individual event in the inmate's history as a stand-alone fact, and each such fact can affect the final decision differently. For example, perhaps the inmate seriously assaulted other inmates twice while imprisoned. But perhaps he also read 150 novels, and finished a university degree by correspondence. These are not just statistics, they're facts that must be considered, and each fact must refine the hypothesis whose final form is either "this person is eligible for parole", or "this person is not eligible for parole".
A human is also influenced by morals and ethics, when considering the character of another human being. So, although the question being asked is officially: "is this person eligible for parole?", the question being considered in the judge's head may very well actually be: "is this person good or bad?". Should a machine have a concept of ethics, and/or of good vs bad, and should it apply such ethics when considering the character of an individual human? Most academics seem to think so.
According to Kant, ethics is based on a foundation of reason. But that doesn't mean that a reasoning machine is automatically an ethical machine, either. Does AI need to understand ethics, in order to possess what we would consider human-like intelligence?
Although decisions such as parole eligibility are supposed to be objective and rational, a human is also influenced by emotions, when considering the character of another human being. Maybe, despite the evidence suggesting that the inmate is not reformed, the judge is stirred by a feeling of compassion and pity, and this feeling results in parole being granted. Or maybe, despite the evidence being overwhelmingly positive, the judge feels fear and loathing towards the inmate, mainly because of his tough physical appearance, and this feeling results in parole being denied.
Should human-like AI possess the ability to be "stirred" by such emotions? And would it actually be desirable for AI to be affected by such emotions, when evaluating the character of an individual human? Some such emotions might be considered positive, while others might be considered negative (particularly from an ethical point of view).
I think the ultimate test in this domain – perhaps the "Turing test for criminal justice assessment" – would be if AI were able to understand, and to properly evaluate, this great parole speech, which is one of my personal favourite movie quotes:
There's not a day goes by I don't feel regret. Not because I'm in here, or because you think I should. I look back on the way I was then: a young, stupid kid who committed that terrible crime. I want to talk to him. I want to try and talk some sense to him, tell him the way things are. But I can't. That kid's long gone and this old man is all that's left. I got to live with that. Rehabilitated? It's just a bulls**t word. So you can go and stamp your form, Sonny, and stop wasting my time. Because to tell you the truth, I don't give a s**t.
In the movie, Red's parole was granted. Could we ever build an AI that could also grant parole in that case, and for the same reasons? On top of needing the ability to reason with real facts, and to be affected by ethics and by emotion, properly evaluating such a speech requires the ability to understand humour – black humour, no less – along with apathy and cynicism. No small task.
Conclusion
Sorry if you were expecting me to work wonders in this article, and to actually teach the world how to build artificial intelligence that reasons. I don't have the magic answer to that million dollar question. However, I hope I have achieved my aim here, which was to describe what's needed in order for it to even be possible for such AI to come to fruition.
It should be clear, based on what I've discussed here, that most current-generation AI is based on a completely inadequate foundation for even remotely human-like intelligence. Chucking big data at a statistic-crunching algorithm on a fat cluster might be yielding cool and even useful results, but it will never yield intelligent results. As centuries of philosophical debate can teach us – if only we'd stop and listen – human intelligence rests on specific building blocks. These include, at the very least, an intrinsic understanding of time, space, and causality; and the ability to hypothesise based on experience. If we are to ever build a truly intelligent artificial agent, then we're going to have to figure out how to imbue it with these things.
]]>
Running a real Windows install in VirtualBox on Linux2016-02-01T00:00:00Z2016-02-01T00:00:00ZJazahttps://greenash.net.au/thoughts/2016/02/running-a-real-windows-install-in-virtualbox-on-linux/
Having a complete Windows (or Mac) desktop running within Linux has been possible for some time now, thanks to the wonders of Virtual Machine (VM) technology. However, the typical approach is to mount and boot a VM image, where the guest OS and hard disk are just files on the host filesystem. In this case, the guest OS can't be natively booted and run, because it doesn't occupy its own disk or partition on the physical hardware, and therefore it can't be picked up by the BIOS / boot manager.
I've been installing Windows and Linux on the same machine, in a dual-boot setup, for many years now. In this case, I boot natively into either one or the other of the installed OSes. However, I haven't run one "real" OS (i.e. an OS that's installed on a physical disk or partition) inside the other via a VM. At least, not until now.
At my new job this year, I discovered that it's possible to do such a thing, using a feature of VirtualBox called "Raw Disk Access". With surprisingly few hiccups, I got this running with Linux Mint 17.3 as the host, and with Windows 8.1 as the guest. Each OS is installed on a separate physical hard disk. I run Windows inside the VM most of the time, but I can still boot natively into the very same install of Windows at any time, if necessary.
Instructions
This should go without saying, but please back up all your data before proceeding. What I'm explaining here is dangerous, and if anything goes wrong, you are likely to lose data on your PC.
If installing the two OSes on the same physical disk, then wipe the disk and create partitions for each OS as necessary (as is standard for dual-boot installs). (You can also shrink an existing Windows partition and then create the Linux partitions with the resulting free space, but this is more dangerous). If installing on different physical disks, then just keep reading.
Install Windows on its respective disk or partition (if it's not installed already, e.g. included with a home PC, SOE configured copy on a corporate PC). Windows should boot by default.
Go into your PC's BIOS setup (e.g. by pressing F12 when booting up), and ensure that "Secure Boot" and "Fast Boot" are disabled (if present), and ensure that "Launch CSM" / "Launch PXE OpROM" (or similar) are enabled (if present).
Install your preferred flavour of Linux on the other disk or partition. After doing this, GRUB should boot on startup, and it should let you choose to load Windows or Linux.
Install VirtualBox on Debian-based systems (e.g. Mint, Ubuntu) with:
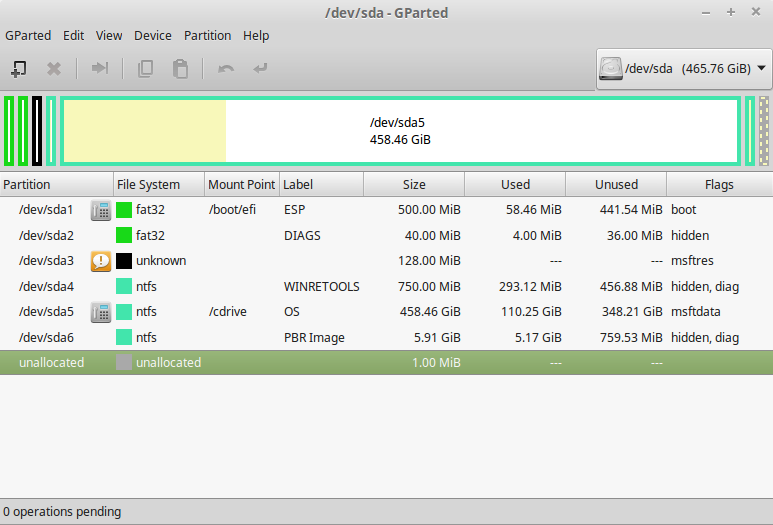
Use a tool such as fdisk or parted to determine the partitions that the VM will need to access. In my case, for my Windows disk, it was partitions 1 (boot / EFI), 4 (recovery), and 5 (OS / "C drive").
Partition table of my Windows disk as shown in GParted.
Use this command (with your own filename / disk / partitions specified) to create the "raw disk", which is effectively a file that acts as a pointer to a disk / partition on which an OS is installed:
Create a new VM in the VirtualBox GUI, with the OS and version that correspond to your install of Windows. In the "Storage" settings for the VM, add a hard disk (when prompted, click "Choose existing disk"), and point it to the .vmdk file that you created.
VirtualBox treats the "raw" .vmdk file as if it were a virtual disk contained in a file.
Start up your VM. You should see the same desktop that you have when you boot Windows natively!
Install VirtualBox Guest Additions as you would for a normal Windows VM, in order to get the usual VM bells and whistles (i.e. resizable window, mouse / clipboard integration, etc).
After you've been running your "real" Windows in the VM for a while, it will ask you to "Activate Windows". It will do this even if your Windows install is already activated when running natively. This is because Windows sees itself running within the VM, and sees "different hardware" (i.e. it thinks it's been installed on a second physical machine). You will have to activate Windows a second time within the VM (e.g. using a corporate bulk license key, by calling Microsoft, etc).
Done
That's all there is to it. I should acknowledge that this guide is based on various other guides with similar instructions. Most online sources seem to very strongly warn that running Windows in this way is dangerous and can corrupt your system. Personally, I've now been running "raw" Windows in a VM like this every day for several weeks, with no major issues. The VM does crash sometimes (once every few days for me), as VMs do, and as Windows does. But nothing more serious than that.
I guess I should also warn readers of the potential dangers of this setup. It worked for me, but YMMV. I've also heard rumour that on Windows 8 and higher, the problems of Windows not being able to adapt itself to boot on "different hardware" each startup (the real physical hardware, vs the hardware presented by VirtualBox) are much less than they used to be. Certainly doesn't seem to be an issue for me.
At any rate, I'm now happy; at least, as happy as someone who runs Windows in a VM all day can physically be. Hey, at least it's Linux outside that box on my screen. Good luck in having your cake and eating it, too.
]]>
Storing Flask uploaded images and files on Amazon S32015-04-20T00:00:00Z2015-04-20T00:00:00ZJazahttps://greenash.net.au/thoughts/2015/04/storing-flask-uploaded-images-and-files-on-amazon-s3/Flask is still a relative newcomer in the world of Python frameworks (it recently celebrated its fifth birthday); and because of this, it's still sometimes trailing behind its rivals in terms of plugins to scratch a given itch. I recently discovered that this was the case, with storing and retrieving user-uploaded files on Amazon S3.
For static files (i.e. an app's seldom-changing CSS, JS, and images), Flask-Assets and Flask-S3 work together like a charm. For more dynamic files, there exist numerous snippets of solutions, but I couldn't find anything to fill in all the gaps and tie it together nicely.
Due to a pressing itch in one of my projects, I decided to rectify this situation somewhat. Over the past few weeks, I've whipped up a bunch of Python / Flask tidbits, to handle the features that I needed:
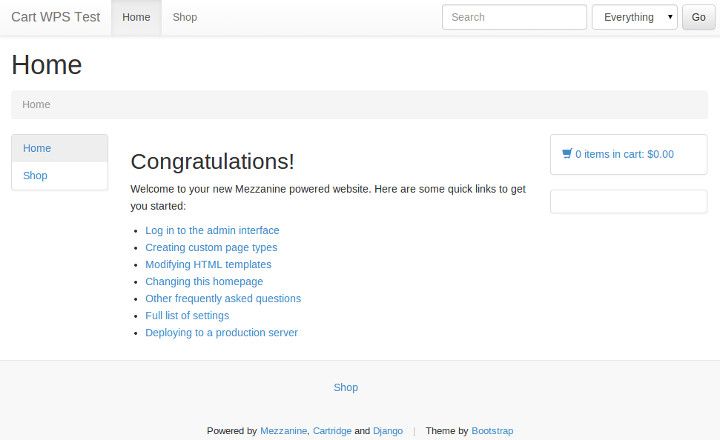
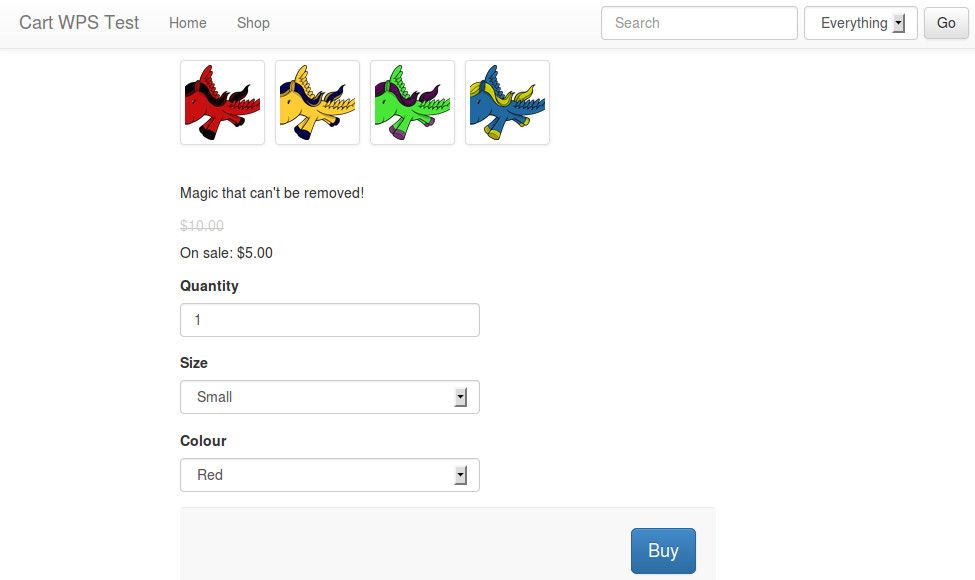
I've also published an example app, that demonstrates how all these tools can be used together. Feel free to dive straight into the example code on GitHub; or read on for a step-by-step guide of how this Flask S3 tool suite works.
Using s3-saver
The key feature across most of this tool suite, is being able to use the same code for working with local and with S3-based files. Just change a single config option, or a single function argument, to switch from one to the other. This is critical to the way I need to work with files in my Flask projects: on my development environment, everything should be on the local filesystem; but on other environments (especially production), everything should be on S3. Others may have the same business requirements (in which case you're in luck). This is most evident with s3-saver.
Here's a sample of the typical code you might use, when working with s3-saver:
from io import BytesIO
from os import path

from flask import current_app as app
from flask import Blueprint
from flask import flash
from flask import redirect
from flask import render_template
from flask import url_for
from s3_saver import S3Saver

from project import db
from library.prefix_file_utcnow import prefix_file_utcnow
from foo.forms import ThingySaveForm
from foo.models import Thingy


mod = Blueprint('foo', __name__)


@mod.route('/', methods=['GET', 'POST'])
def home():
    """Displays the Flask S3 Save Example home page."""

    model = Thingy.query.first() or Thingy()

    form = ThingySaveForm(obj=model)

    if form.validate_on_submit():
        image_orig = model.image
        image_storage_type_orig = model.image_storage_type
        image_bucket_name_orig = model.image_storage_bucket_name

        # Initialise s3-saver.
        image_saver = S3Saver(
            storage_type=app.config['USE_S3'] and 's3' or None,
            bucket_name=app.config['S3_BUCKET_NAME'],
            access_key_id=app.config['AWS_ACCESS_KEY_ID'],
            access_key_secret=app.config['AWS_SECRET_ACCESS_KEY'],
            field_name='image',
            storage_type_field='image_storage_type',
            bucket_name_field='image_storage_bucket_name',
            base_path=app.config['UPLOADS_FOLDER'],
            static_root_parent=path.abspath(
                path.join(app.config['PROJECT_ROOT'], '..')))

        form.populate_obj(model)

        if form.image.data:
            filename = prefix_file_utcnow(model, form.image.data)

            filepath = path.abspath(
                path.join(
                    path.join(
                        app.config['UPLOADS_FOLDER'],
                        app.config['THINGY_IMAGE_RELATIVE_PATH']),
                    filename))

            # Best to pass in a BytesIO to S3Saver, containing the
            # contents of the file to save. A file from any source
            # (e.g. in a Flask form submission, a
            # werkzeug.datastructures.FileStorage object; or if
            # reading in a local file in a shell script, perhaps a
            # Python file object) can be easily converted to BytesIO.
            # This way, S3Saver isn't coupled to a Werkzeug POST
            # request or to anything else. It just wants the file.
            temp_file = BytesIO()
            form.image.data.save(temp_file)

            # Save the file. Depending on how S3Saver was initialised,
            # could get saved to local filesystem or to S3.
            image_saver.save(
                temp_file,
                app.config['THINGY_IMAGE_RELATIVE_PATH'] + filename,
                model)

            # If updating an existing image,
            # delete old original and thumbnails.
            if image_orig:
                if image_orig != model.image:
                    filepath = path.join(
                        app.config['UPLOADS_FOLDER'],
                        image_orig)

                    image_saver.delete(filepath,
                        storage_type=image_storage_type_orig,
                        bucket_name=image_bucket_name_orig)

                glob_filepath_split = path.splitext(path.join(
                    app.config['MEDIA_THUMBNAIL_FOLDER'],
                    image_orig))
                glob_filepath = glob_filepath_split[0]
                glob_matches = image_saver.find_by_path(
                    glob_filepath,
                    storage_type=image_storage_type_orig,
                    bucket_name=image_bucket_name_orig)

                for filepath in glob_matches:
                    image_saver.delete(
                        filepath,
                        storage_type=image_storage_type_orig,
                        bucket_name=image_bucket_name_orig)
        else:
            model.image = image_orig

        # Handle image deletion
        if form.image_delete.data and image_orig:
            filepath = path.join(
                app.config['UPLOADS_FOLDER'], image_orig)

            # Delete the file. In this case, we have to pass in
            # arguments specifying whether to delete locally or on
            # S3, as this should depend on where the file was
            # originally saved, rather than on how S3Saver was
            # initialised.
            image_saver.delete(filepath,
                storage_type=image_storage_type_orig,
                bucket_name=image_bucket_name_orig)

            # Also delete thumbnails
            glob_filepath_split = path.splitext(path.join(
                app.config['MEDIA_THUMBNAIL_FOLDER'],
                image_orig))
            glob_filepath = glob_filepath_split[0]

            # S3Saver can search for files too. When searching locally,
            # it uses glob(); when searching on S3, it uses key
            # prefixes.
            glob_matches = image_saver.find_by_path(
                glob_filepath,
                storage_type=image_storage_type_orig,
                bucket_name=image_bucket_name_orig)

            for filepath in glob_matches:
                image_saver.delete(filepath,
                                   storage_type=image_storage_type_orig,
                                   bucket_name=image_bucket_name_orig)

            model.image = ''
            model.image_storage_type = ''
            model.image_storage_bucket_name = ''

        if form.image.data or form.image_delete.data:
            db.session.add(model)
            db.session.commit()
            flash('Thingy %s' % (
                      form.image_delete.data and 'deleted' or 'saved'),
                  'success')
        else:
            flash(
                'Please upload a new thingy or delete the ' +
                    'existing thingy',
                'warning')

        return redirect(url_for('foo.home'))

    return render_template('home.html',
                           form=form,
                           model=model)
As is hopefully evident in the sample code above, the idea with s3-saver is that as little S3-specific code as possible is needed, when performing operations on a file. Just find, save, and delete files as usual, per the user's input, without worrying about the details of that file's storage back-end.
s3-saver uses the excellent Python boto library, as well as Python's built-in file handling functions, so that you don't have to. As you can see in the sample code, you don't need to directly import either boto, or the file-handling functions such as glob or os.remove. All you need to import is io.BytesIO, and os.path, in order to be able to pass s3-saver the parameters that it needs.
Using url-for-s3
This is a simple utility function, that generates a URL to a given S3-based file. It's designed to match flask.url_for as closely as possible, so that one can be swapped out for the other with minimal fuss.
from __future__ import print_function

from flask import url_for
from url_for_s3 import url_for_s3

from project import db


class Thingy(db.Model):
    """Sample model for flask-s3-save-example."""

    id = db.Column(db.Integer(), primary_key=True)
    image = db.Column(db.String(255), default='')
    image_storage_type = db.Column(db.String(255), default='')
    image_storage_bucket_name = db.Column(db.String(255), default='')

    def __repr__(self):
        return 'A thingy'

    @property
    def image_url(self):
        from flask import current_app as app
        return (self.image
            and '%s%s' % (
                app.config['UPLOADS_RELATIVE_PATH'],
                self.image)
            or None)

    @property
    def image_url_storageaware(self):
        if not self.image:
            return None

        if not (
                self.image_storage_type
                and self.image_storage_bucket_name):
            return url_for(
                'static',
                filename=self.image_url,
                _external=True)

        if self.image_storage_type != 's3':
            raise ValueError((
                'Storage type "%s" is invalid, the only supported ' +
                'storage type (apart from default local storage) ' +
                'is s3.') % self.image_storage_type)

        return url_for_s3(
            'static',
            bucket_name=self.image_storage_bucket_name,
            filename=self.image_url)
The above sample code illustrates how I typically use url_for_s3. For a given instance of a model, if that model's file is stored locally, then generate its URL using flask.url_for; otherwise, switch to url_for_s3. Only one extra parameter is needed: the S3 bucket name.
I can then easily show the "storage-aware URL" for this model in my front-end templates.
Using flask-thumbnails-s3
In my use case, the majority of the files being uploaded are images, and most of those images need to be resized when displayed in the front-end. Also, ideally, the dimensions for resizing shouldn't have to be pre-specified (i.e. thumbnails shouldn't only be able to get generated when the original image is first uploaded); new thumbnails of any size should get generated on-demand per the templates' needs. The front-end may change according to the design / branding whims of clients and other stakeholders, further on down the road.
flask-thumbnails handles just this workflow for local files; so, I decided to fork it and to create flask-thumbnails-s3, which works the same as flask-thumbnails when set to use local files, but which can also store and retrieve thumbnails on a S3 bucket.
    {% if image %}
    <div>
    <img src="{{ image|thumbnail(size,
                                 crop=crop,
                                 quality=quality,
                                 storage_type=storage_type,
                                 bucket_name=bucket_name) }}"
        alt="{{ alt }}" title="{{ title }}" />
    </div>
    {% endif %}
Like its parent project, flask-thumbnails-s3 is most commonly invoked by way of a template filter. If a thumbnail of the given original file exists, with the specified size and attributes, then it's returned straightaway; if not, then the original file is retrieved, a thumbnail is generated, and the thumbnail is saved to the specified storage back-end.
At the moment, flask-thumbnails-s3 blocks the running thread while it generates a thumbnail and saves it to S3. Ideally, this task would get sent to a queue, and a "dummy" thumbnail would be returned in the immediate request, until the "real" thumbnail is ready in a later request. The Sorlery plugin for Django uses the queued approach. It would be cool if flask-thumbnails-s3 (optionally) did the same. Anyway, it works without this fanciness for now; extra contributions welcome!
(By the way, in my testing, this is much less of a problem if your Flask app is deployed on an Amazon EC2 box, particularly if it's in the same region as your S3 bucket; unsurprisingly, there appears to be much less latency between an EC2 server and S3, than there is between a non-Amazon server and S3).
Using flask-admin-s3-upload
The purpose of flask-admin-s3-upload is basically to provide the same 'save' functionality as s3-saver, but automatically within Flask-Admin. It does this by providing alternatives to the flask_admin.form.upload.FileUploadField and flask_admin.form.upload.ImageUploadField classes, namely flask_admin_s3_upload.S3FileUploadField and flask_admin_s3_upload.S3ImageUploadField.
(Anecdote: I actually wrote flask-admin-s3-upload before any of the other tools in this suite, because I began by working with a part of my project that has no custom front-end, only a Flask-Admin based management console).
Using the utilities provided by flask-admin-s3-upload is fairly simple:
from os import path

from flask_admin_s3_upload import S3ImageUploadField

from project import admin, app, db
from foo.models import Thingy
from library.admin_utils import ProtectedModelView
from library.prefix_file_utcnow import prefix_file_utcnow


class ThingyView(ProtectedModelView):
    column_list = ('image',)
    form_excluded_columns = ('image_storage_type',
                             'image_storage_bucket_name')

    form_overrides = dict(
        image=S3ImageUploadField)

    form_args = dict(
        image=dict(
            base_path=app.config['UPLOADS_FOLDER'],
            relative_path=app.config['THINGY_IMAGE_RELATIVE_PATH'],
            url_relative_path=app.config['UPLOADS_RELATIVE_PATH'],
            namegen=prefix_file_utcnow,
            storage_type_field='image_storage_type',
            bucket_name_field='image_storage_bucket_name',
        ))

    def scaffold_form(self):
        form_class = super(ThingyView, self).scaffold_form()
        static_root_parent = path.abspath(
            path.join(app.config['PROJECT_ROOT'], '..'))

        if app.config['USE_S3']:
            form_class.image.kwargs['storage_type'] = 's3'

        form_class.image.kwargs['bucket_name'] = \
            app.config['S3_BUCKET_NAME']
        form_class.image.kwargs['access_key_id'] = \
            app.config['AWS_ACCESS_KEY_ID']
        form_class.image.kwargs['access_key_secret'] = \
            app.config['AWS_SECRET_ACCESS_KEY']
        form_class.image.kwargs['static_root_parent'] = \
            static_root_parent

        return form_class


admin.add_view(ThingyView(Thingy, db.session, name='Thingies'))
Note that flask-admin-s3-upload only handles saving, not deleting (the same as the regular Flask-Admin file / image upload fields only handle saving). If you wanted to handle deleting files in the admin as well, you could (for example) use s3-saver, and hook it in to one of the Flask-Admin event callbacks.
In summary
I'd also like to mention: one thing that others have implemented in Flask, is direct JavaScript-based upload to S3. Implementing this sort of functionality in my tool suite would be a great next step; however, it would have to play nice with everything else I've built (particularly with flask-thumbnails-s3), and it would have to work for local- and for S3-based files, the same as all the other tools do. I don't have time to address those hurdles right now – another area where contributions are welcome.
I hope that this article serves as a comprehensive guide, of how to use the Flask S3 tools that I've recently built and contributed to the community. Any questions or concerns, please drop me a line.
]]>
Conditionally adding HTTP response headers in Flask and Apache2014-12-29T00:00:00Z2014-12-29T00:00:00ZJazahttps://greenash.net.au/thoughts/2014/12/conditionally-adding-http-response-headers-in-flask-and-apache/
For a Flask-based project that I'm currently working on, I just added some front-end functionality that depends on Font Awesome. Getting Font Awesome to load properly (in well-behaved modern browsers) shouldn't be much of a chore. However, my app spans multiple subdomains (achieved with the help of Flask's Blueprints per-subdomain feature), and my static assets (CSS, JS, etc) are only served from one of those subdomains. And as it turns out (and unlike cross-domain CSS / JS / image requests), cross-domain font requests are forbidden unless the font files are served with an appropriate Access-Control-Allow-Origin HTTP response header. For example, this is the error message that's shown in Google Chrome for such a request:
Font from origin 'http://foo.local' has been blocked from loading by Cross-Origin Resource Sharing policy: No 'Access-Control-Allow-Origin' header is present on the requested resource. Origin 'http://bar.foo.local' is therefore not allowed access.
As a result of this, I had to quickly learn how to conditionally add custom HTTP response headers based on the URL being requested, both for Flask (when running locally with Flask's built-in development server), and for Apache (when running in staging and production). In a typical production Flask setup, it's impossible to do anything at the Python level when serving static files, because these are served directly by the web server (e.g. Apache, Nginx), without ever hitting WSGI. Conversely, in a typical development setup, there is no web server running separately to the WSGI app, and so playing around with static files must be done at the Python level.
The code
For a regular Flask request that's handled by one of the app's custom routes, adding another header to the HTTP response would be a simple matter of modifying the flask.Response object before returning it. However, static files (in a development setup) are served by Flask's built-in app.send_static_file() function, not by any route that you have control over. So, instead, it's necessary to intercept the response object via Flask's API.
Fortunately, this interception is easily accomplished, courtesy of Flask's app.after_request() function, which can either be passed a callback function, or used as a decorator. Here's what did the trick for me:
import re

from flask import Flask
from flask import request


app = Flask(__name__)

def add_headers_to_fontawesome_static_files(response):
    """
    Fix for font-awesome files: after Flask static send_file() does its
    thing, but before the response is sent, add an
    Access-Control-Allow-Origin: *
    HTTP header to the response (otherwise browsers complain).
    """

    if (request.path and
        re.search(r'\.(ttf|woff|svg|eot)$', request.path)):
        response.headers.add('Access-Control-Allow-Origin', '*')

    return response

if app.debug:
    app.after_request(add_headers_to_fontawesome_static_files)
For a production setup, the above Python code achieves nothing, and it's therefore necessary to add something like this to the config file for the app's VirtualHost:
<VirtualHost *:80>
  # ...

  Alias /static /path/to/myapp/static
  <Location /static>
    Order deny,allow
    Allow from all
    Satisfy Any

    SetEnvIf Request_URI "\.(ttf|woff|svg|eot)$" is_font_file
    Header set Access-Control-Allow-Origin "*" env=is_font_file
  </Location>
</VirtualHost>
Done
And there you go: an easy way to add custom HTTP headers to any response, in two different web server environments, based on a conditional request path. So far, cleanly serving cross-domain font files is all that I've neede this for. But it's a very handy little snippet, and no doubt there are plenty of other scenarios in which it could save the day.
]]>
First experiences developing a single-page JS-driven web app2014-08-26T00:00:00Z2014-08-26T00:00:00ZJazahttps://greenash.net.au/thoughts/2014/08/first-experiences-developing-a-single-page-js-driven-web-app/
For the past few months, my main dev project has been a custom tool that imports metric data from a variety of sources (via APIs), and that generates reports showing that data in numerous graphical and tabular formats. The app is private (and is still in alpha), so I'm afraid I can't go into more detail than that at this time.
I decided (and I was encouraged by stakeholders) to build the tool as a single-page application, i.e. as a web app where almost all of the front-end is powered by JavaScript, and where the page is redrawn via AJAX calls and client-side templates. This was my first experience developing such an app; as such, I'd like to reflect on the choices I made, and on my understanding of the technology as it stands now.
Drowning in frameworks
I never saw one before in my life, and I hope I never see one of those fuzzy miserable things again. Image source:Memory Alpha (originally from Star Trek TOS Season 2 Ep 13).
Building single-page applications is all the rage these days; as such, a gazillion frameworks have popped up, all promising to take the pain out of the dev work for you. In reality, when your problem is that you need to create an app, and you think: "I know, I'll go and choose a JS framework", now you have two problems.
Actually, that's not the full story either. When you choose the wrong JS* framework – due to it being unsuitable for your project, and/or due to your failing to grok it – and you have to look for a framework a second time, and port the code you've already started writing… now you've got three problems!
(* I'd prefer to just refer to these frameworks as "JS", rather than use the much-bandied-about term "MVC", because not all such frameworks are MVC, and because one's project may be unsuitable for client-side MVC anyway).
Ah, the joy of first-time blunders.
I started by choosing Ember.js. It's one of the most popular frameworks at the moment. It does everything you could possibly need for your funky new JS app. Turns out that: (a) Ember was complete overkill for my relatively simple app; and (b) despite my best efforts, I failed to grok Ember, and I felt that my time would be better spent switching to something else and thereafter working more efficiently, than continuing to grapple with Ember's philosophy and complexity.
In the end, I settled on Sammy.js. This is one of the lesser-known frameworks out there. It boasts far less features than Ember.js (and even so, I haven't used all that Sammy.js offers either). It doesn't get in the way of my app's functionality. Many of its features are just a thin wrapper on top of jQuery, which I already know intimately. It adds a few bits 'n' pieces into my existing JS ecosystem, to give my app more structure and more interactivity; rather than nuking my existing ecosystem, and making me feel like single-page JS is a whole new language.
My advice to others who are choosing a whiz-bang JS framework for the first time: don't necessarily go with the most popular or the most full-featured framework you find (although don't discard such options either); think long and hard about what your app will actually do (more on that below), and choose an appropriate framework for your use-case; and make liberal use of online resources such as reviews (I also found TodoMVC extremely useful, plus I used its well-written code samples as the foundation for my own code).
What seems to be the problem?
Nothing to see here, people. Image source:Funny Junk (originally from South Park).
Ok, so you're going to write a single-page JS app. What will your app actually do? "Single-page JS app" can mean anything; and if we're trying to find the appropriate tool for the job, then the job itself needs to be clearly defined. So, let's break it down a bit.
Is the app (mainly) read-write, or is it read-only? This is a critical question, possibly more so than anything else. One of the biggest challenges with rich JS apps, is synchronising data between client and server. If data is only flowing one day (downstream), that's a whole lot less complexity than if data is flowing upstream as well.
Turns out that JS frameworks, in general, have dedicated a lot of their feature set to supporting read-write apps. They usually do this by having "models" (the "M" in "MVC"), which are the "source of truth" on the client-side; and by "binding" these models to elements in the DOM. When the value of a DOM element changes, that triggers a model data change, which in turn (often) triggers a server-side data update. Conversely, when new data arrives from the server, the model data is updated accordingly, and that update then propagates automatically to a value in the DOM.
Even the quintessential "Todo app" example has two-way data. Turns out, however, that my app only has one-way data. My app is all about sending queries to the server (with some simple filters), and receiving metric data in response. What's more, the received data is aggregate data (ready to be rendered as charts and tables), not individual entities that can easily be stored in a model. So, turns out that my life is easier without worrying about models or event bindings at all. Receive JSON, pipe it to the chart renderer (NVD3 for most charts), end of story.
Can displayed data change dynamically within a single JS route, or can it only change when the route changes? Once again, the former entails a lot more complexity than the latter. In my app's case, each JS route (handled by Sammy.js, same as with other frameworks, as "the part of the URL after the hash character") is a single report (containing one or more graphs and tables). The report elements themselves aren't dynamic (except that hovering over various graph elements shows more info). Changing the filters of the current report, or going to a different report, involves executing a new JS route.
So, if data isn't changing dynamically within a single JS route, why bother with complex event bindings? Some simple "old-skool" jQuery event handlers may be all that's necessary.
In summary, in the case of my app, all that it really needed in a JS framework was: client-side routing (which Sammy.js provides using nice, simple callbacks); local storage (Sammy.js has a thin wrapper on top of the HTML5 local storage API); AJAX communication (Sammy.js has a thin wrapper on top of jQuery for this); and templating (out-of-the-box Sammy.js supports John Resig's JS micro-templating system). And that's already a whole lot of funky new client-side components to learn and use. Why complicate things further?
All in all, I enjoyed building my first single-page JS app, and I'm reasonably happy with how it turned out to be architected. The front-end uses Sammy.js, D3.js/NVD3, and Bootstrap. The back-end uses Flask (Python) and MongoDB. Other than the login page and the admin pages, the app only has one non-JSON server-side route (the home page), and the rest is handled with client-side routes. The client-side is fairly simple, compared to many rich JS apps being built today; but then again, every app is unique.
I think that right now, we're still in Wild West times as far as building single-page apps goes. In particular, there are way too many frameworks in abundance; as the space matures, no doubt most of these frameworks will die off, and only a handful will thrive in the long-term. There's also a shortage of good advice about design patterns for single-page apps so far, although Mixu's book is a great foundation resource.
Single-page JS technology has plenty of advantages: it can lead to a more responsive, more beautiful app; and, when done right, its JS component can be architected just as cleanly and correctly as everything would be (traditionally) architected on the server-side. Remember, though, that it's just one piece in the puzzle, and that it only needs to be as complex as the app you're building.
]]>
Australian LGA to postcode mappings with PostGIS and Intersects2014-07-12T00:00:00Z2014-07-12T00:00:00ZJazahttps://greenash.net.au/thoughts/2014/07/australian-lga-to-postcode-mappings-with-postgis-and-intersects/
For a recent project, I needed to know the LGAs (Local Government Areas) of all postcodes in Australia, and vice versa. As it turns out, there is no definitive Australia-wide list containing this data anywhere. People have been discussing the issue for some time, with no clear outcome. So, I decided to get creative.
If you want the full story: I imported both the LGA boundaries data and the Postal Area boundaries data from the ABS, into PostGIS, and I did an "Intersects" query on the two datasets. I exported the results of this query to CSV. Done! And all perfectly reproducible, using freely available public data sets, and using free and open-source software tools.
The process
I started by downloading the Geo data that I needed, from the ABS. My source was the page Australian Statistical Geography Standard (ASGS): Volume 3 - Non ABS Structures, July 2011. This was the most recent page that I could find on the ABS, containing all the data that I needed. I downloaded the files "Local Government Areas ASGS Non ABS Structures Ed 2011 Digital Boundaries in MapInfo Interchange Format", and "Postal Areas ASGS Non ABS Structures Ed 2011 Digital Boundaries in MapInfo Interchange Format".
Big disclaimer: I'm not an expert at anything GIS- or spatial-related, I'm a complete n00b at this. I decided to download the data I needed in MapInfo format. It's also available on the ABS web site in ArcGIS Shapefile format. I could have downloaded the Shapefiles instead – they can also be imported into PostGIS, using the same tools that I used. I chose the MapInfo files because I did some quick Googling around, and I got the impression that MapInfo files are less complex and are somewhat more portable. I may have made the wrong choice. Feel free to debate the merits of MapInfo vs ArcGIS files for this task, and to try this out yourself using ArcGIS instead of MapInfo. I'd be interested to see the difference in results (theoretically there should be no difference… in practice, who wants to bet there is?).
I then had to install PostGIS (I already had Postgres installed) and related tools on my local machine (running Ubuntu 12.04). I'm not providing PostGIS installation instructions here, there's plenty of information available elsewhere to help you get set up with all the tools you need, for your specific OS / requirements. Installing PostGIS and related tools can get complicated, so if you do decide to try all this yourself, don't say I didn't warn you. Ubuntu is probably one of the easier platforms on which to install it, but there are plenty of guides out there for Windows and Mac too.
Once I was all set up, I imported the data files into a PostGIS-enabled Postgres database with these commands:
If you're interested in the OGR Toolkit (ogr2ogr and friends), there are plenty of resources available; in particular, this OGR Toolkit guide was very useful for me.
After playing around with a few different map projections, I decided that EPSG:4283 was probably the correct one to use as an argument to ogr2ogr. I based my decision on seeing the MapInfo projection string "CoordSys Earth Projection 1, 116" in the header of the ABS data files, and then finding this list of common Australian-used map projections. Once again: I am a total n00b at this. I know very little about map projections (except that it's a big and complex topic). Feel free to let me know if I've used completely the wrong projection for this task.
I renamed the imported tables to 'lga' and 'postcodes' respectively, and I then ran this from the psql shell, to find all LGAs that intersect with all postal areas, and to export the result to a CSV:
\copy (SELECT     l.state_name_2011,
                  l.lga_name_2011,
                  p.poa_code_2011
       FROM       lga l
       INNER JOIN postcodes p
       ON         ST_Intersects(
                      l.wkb_geometry,
                      p.wkb_geometry)
       ORDER BY   l.state_name_2011,
                  l.lga_name_2011,
                  p.poa_code_2011)
TO '/path/to/lga_postcodes.csv' WITH CSV HEADER;
Final remarks
That's about it! Also, some notes of mine (mainly based on the trusty Wikipedia page Local Government in Australia):
There's no data for the ACT, since the ACT has no LGAs
Almost the entire Brisbane and Gold Coast metro areas, respectively, are one LGA
Some areas of Australia aren't part of any LGA (although they're all remote areas with very small populations)
Quite a large number of valid Australian postcodes are not part of any LGA (because they're for PO boxes, for bulk mail handlers, etc, and they don't cover a geographical area as such, in the way that "normal" postcodes do)
I hope that this information is of use, to anyone else who needs to link up LGAs and postcodes in a database or in a GIS project.
]]>
Sharing templates between multiple Drupal views2014-04-24T00:00:00Z2014-04-24T00:00:00ZJazahttps://greenash.net.au/thoughts/2014/04/sharing-templates-between-multiple-drupal-views/
Do you have multiple views on your Drupal site, where the content listing is themed to look exactly the same? For example, say you have a custom "search this site" view, a "featured articles" view, and an "articles archive" view. They all show the same fields — for example, "title", "image", and "summary". They all show the same content types – except that the first one shows "news" or "page" content, whereas the others only show "news".
If your design is sufficiently custom that you're writing theme-level Views template files, then chances are that you'll be in danger of creating duplicate templates. I've committed this sin on numerous sites over the past few years. On many occasions, my Views templates were 100% identical, and after making a change in one template, I literally copy-pasted and renamed the file, to update the other templates.
Until, finally, I decided that enough is enough – time to get DRY!
Being less repetitive with your Views templates is actually dead simple. Let's say you have three identical files – views-view-fields--search_this_site.tpl.php, views-view-fields--featured_articles.tpl.php, and views-view-fields--articles_archive.tpl.php. Here's how you clean up your act:
Delete the latter two files.
Add this to your theme's template.php file:
<?php
function mytheme_preprocess_views_view_fields(&$vars) {
  if (in_array(
    $vars['view']->name, array(
      'search_this_site',
      'featured_articles',
      'articles_archive'))) {
    $vars['theme_hook_suggestions'][] =
      'views_view_fields__search_this_site';
  }
}
Clear your cache (that being the customary final step when doing anything in Drupal, of course).
I've found that views-view-fields.tpl.php-based files are the biggest culprits for duplication; but you might have some other Views templates in need of cleaning up, too, such as:
<?php
function mytheme_preprocess_views_view(&$vars) {
  if (in_array(
    $vars['view']->name, array(
      'search_this_site',
      'featured_articles',
      'articles_archive'))) {
    $vars['theme_hook_suggestions'][] =
      'views_view__search_this_site';
  }
}
And, if your views include a search / filtering form, perhaps also:
<?php
function mytheme_preprocess_views_exposed_form(&$vars) {
  if (in_array(
    $vars['view']->name, array(
      'search_this_site',
      'featured_articles',
      'articles_archive'))) {
    $vars['theme_hook_suggestions'][] =
      'views_exposed_form__search_this_site';
  }
}
That's it – just a quick tip from me for today. You can find out more about this technique on the Custom Theme Hook Suggestions documentation page, although I couldn't find an example for Views there, nor anywhere else online for that matter; hence this article. Hopefully this results in a few kilobytes saved, and (more importantly) a lot of unnecessary copy-pasting of template files saved, for fellow Drupal devs and themers.
]]>
The cost of building a "perfect" custom Drupal installation profile2014-04-16T00:00:00Z2014-04-16T00:00:00ZJazahttps://greenash.net.au/thoughts/2014/04/the-cost-of-building-a-perfect-custom-drupal-installation-profile/
With virtually everything in Drupal, there are two ways to accomplish a task: The Easy Way, or The Right™ Way.
Deploying a new Drupal site for the first time is no exception. The Easy Way – and almost certainly the most common way – is to simply copy your local version of the database to production (or staging), along with user-uploaded files. (Your code needs to be deployed too, and The Right™ Way to deploy it is with version-control, which you're hopefully using… but that's another story.)
The Right™ Way to deploy a Drupal site for the first time (at least since Drupal 7, and "with hurdles" since Drupal 6), is to only deploy your code, and to reproduce your database (and ideally also user-uploaded files) with a custom installation profile, and also with significant help from the Features module.
The Right Way can be a deep rabbit hole, though. Image source:SIX Nutrition.
I've been churning out quite a lot of Drupal sites over the past few years, and I must admit, the vast majority of them were deployed The Easy Way. Small sites, single developer, quick turn-around. That's usually the way it rolls. However, I've done some work that's required custom installation profiles, and I've also been trying to embrace Features more; and so, for my most recent project – despite it being "yet another small-scale, one-dev site" – I decided to go the full hog, and to build it 100% The Right™ Way, just for kicks. In order to force myself to do things properly, I re-installed my dev site from scratch (and thus deleted my dev database) several times a day; i.e. I continuously tested my custom installation profile during dev.
Does it give me a warm fuzzy feeling, as a dev, to be able to install a perfect copy of a new site from scratch? Hell yeah. But does that warm fuzzy feeling come at a cost? Hell yeah.
What's involved
For our purposes, the contents of a typical Drupal database can be broken down into three components:
Critical configuration
Secondary configuration
Content
Critical configuration is: (a) stuff that should be set immediately upon site install, because important aspects of the site depend on it; and (b) stuff that cannot or should not be managed by Features. When building a custom installation profile, all critical configuration should be set with custom code that lives inside the profile itself, either in its hook_install() implementation, or in one of its hook_install_tasks() callbacks. The config in this category generally includes: the default theme and its config; the region/theme for key blocks; user roles, basic user permissions, and user variables; date formats; and text formats. This config isn't all that hard to write (see Drupal core's built-in installation profiles for good example code), and it shouldn't need much updating during dev.
Secondary configuration is: (a) stuff that can be set after the main install process has finished; and (b) stuff that's managed by Features. These days, thanks to various helpers such as Strongarm and Features Extra, there isn't much that can't be exported and managed in this way. All secondary configuration should be set in exportable definitions in Features-generated modules, which need to be added as dependencies in the installation profile's .info file. On my recent project, this included: many variables; content types; fields; blocks (including Block Class classes and block content); views; vocabularies; image styles; nodequeues; WYSIWYG profiles; and CER presets.
Secondary config isn't hard to write – in fact, it writes itself! However, it is a serious pain to maintain. Every time that you add or modify any piece of secondary content on your dev site, you need to perform the following workflow:
Does an appropriate feature module already exist for this config? If not, create a new feature module, export it to your site's codebase, and add the module as a dependency to the installation profile's .info file.
Is this config new? If so, manually add it to the relevant feature.
For all new or updated config: re-create the relevant feature module, thus re-exporting the config.
I found that I got in the habit of checking my site's Features admin page, before committing whatever code I was about to commit. I re-exported all features that were flagged with changes, and I tried to remember if there was any new config that needed to be added to a feature, before going ahead and making the commit. Because I decided to re-install my dev site from scratch regularly, and to scrap my local database, I had no choice but to take this seriously: if there was any config that I forgot to export, it simply got lost in the next re-install.
Content is stuff that is not config. Content depends on all critical and secondary config being set. And content is not managed by Features: it's managed by users, once the site is deployed. (Content can now be managed by Features, using the UUID module – but I haven't tried that approach, and I'm not particularly convinced that it's The Right™ Way.) On my recent project, content included: nodes (of course); taxonomy terms; menu items; and nodequeue mappings.
An important part of handing over a presentable site to the client, in my experience, is that there's at least some demo / structural content in place. So, in order to handle content in my "continuously installable" setup, I wrote a bunch of custom Drush commands, which defined all the content in raw PHP using arrays / objects, and which imported all the content using Drupal's standard API functions (i.e. node_save() and friends). This also included user-uploaded files (i.e. images and documents): I dumped all these into a directory outside of my Drupal root, and imported them using the Field API and some raw file-copying snippets.
All rosy?
The upside of it all: I lived the dream on this project. I freed myself from database state. Everything I'd built was safe and secure within the code repo, and the only thing that needed to be deployed to staging / production was the code itself.
Join me, comrades! Join me and all Drupal sites will be equal! (But some more equal than others).
(Re-)installing the site consisted of little more than running (something similar to) these Drush commands:
drush cc all
drush site-install --yes mycustomprofile --account-mail=info@blaaaaaaaa.com --account-name=admin --account-pass=blaaaaaaa
drush features-revert-all --yes
drush mymodule-install-content
The downside of it: constantly maintaining exported features and content-in-code eats up a lot of time. As a rough estimate, I'd say that it resulted in me spending about 30% more time on the project than I would have otherwise. Fortunately, the project was still delivered ahead of schedule and under budget; had constraints been tighter, I probably couldn't have afforded the luxury of this experiment.
Unfortunately, Drupal just isn't designed to store either configuration or content in code. Doing either is an uphill battle. Maintaining all config and content in code was virtually impossible in Drupal 5 and earlier; it had numerous hurdles in Drupal 6; and it's possible (and recommended) but tedious in Drupal 7. Drupal 8 – despite the enormous strides forward that it's making with the Configuration Management Initiative (CMI) – will still, at the end of the day, treat the database rather than code as the "source of truth" for config. Therefore, I assert that, although it will be easier than ever to manage all config in code, the "configuration management" and "continuous deployment" problems still won't be completely solved in Drupal 8.
I've been working increasingly with Django over the past few years, where configuration only exists in code (in Python settings, in model classes, in view callables, etc), and where only content exists in the database (and where content has also been easily exportable / deployable using fixtures, since before Drupal "exportables" were invented); and in that world, these are problems that simply don't exist. There's no need to ever synchronise between the "database version" of config and the "code version" of config. Unfortunately, Drupal will probably never reach this Zen-like ideal, because it seems unlikely that Drupal will ever let go of the database as a config store altogether.
Anyway, despite the fact that a "perfect" installation profile probably isn't justifiable for most smaller Drupal projects, I think that it's still worthwhile, in the same way that writing proper update scripts is still worthwhile: i.e. because it significantly improves quality; and because it's an excellent learning tool for you as a developer.
]]>
Using PayPal WPS with Cartridge (Mezzanine / Django)2014-03-31T00:00:00Z2014-03-31T00:00:00ZJazahttps://greenash.net.au/thoughts/2014/03/using-paypal-wps-with-cartridge-mezzanine-django/
I recently built a web site using Mezzanine, a CMS built on top of Django. I decided to go with Mezzanine (which I've never used before) for two reasons: it nicely enhances Django's admin experience (plus it enhances, but doesn't get in the way of, the Django developer experience); and there's a shopping cart app called Cartridge that's built on top of Mezzanine, and for this particular site (a children's art class business in Sydney) I needed shopping cart / e-commerce functionality.
This suite turned out to deliver virtually everything I needed out-of-the-box, with one exception: Cartridge currently lacks support for payment methods that require redirecting to the payment gateway and then returning after payment completion (such as PayPal Website Payments Standard, or WPS). It only supports payment methods where payment is completed on-site (such as PayPal Website Payments Pro, or WPP). In this case, with the project being small and low-budget, I wanted to avoid the overhead of dealing with SSL and on-site payment, so PayPal WPS was the obvious candidate.
Turns out that, with a bit of hackery, making Cartridge play nice with WPS isn't too hard to achieve. Here's how you go about it.
I'm assuming that you've already got an environment set up, that's equipped for Django development. I.e. you've already installed Python (my examples here are tested on Python 2.7), a database engine (preferably SQLite on your local environment), pip (recommended), and virtualenv (recommended). If you want to implement these examples fully, then as well as a dev environment with these basics set up, you'll also need a server to which you can deploy a Django site, and on which you can set up a proper public domain or subdomain DNS (because the PayPal API won't actually talk to your localhost, it refuses to do that).
You'll also need a PayPal (regular and "sandbox") account, which you will use for authenticating with the PayPal API.
Here are the basic dependencies for the project. I've copy-pasted this straight out of my requirements.txt file, which I install on a virtualenv using pip install -E . -r requirements.txt (I recommend you do the same):
Note:for dcramer/django-paypal, which has no versioned releases, I'm using the latest git commit as of writing this. I recommend that you check for a newer commit and update your requirements accordingly. For the other dependencies, you should also be able to update version numbers to latest stable releases without issues (although Mezzanine 3.0.x / Cartridge 0.9.x is only compatible with Django 1.6.x, not Django 1.7.x which is still in beta as of writing this).
Once you've got those dependencies installed, make sure this Mezzanine-specific setting is in your settings.py file:
# If True, the south application will be automatically added to the
# INSTALLED_APPS setting.
USE_SOUTH = True
Then, let's get a new project set up per Mezzanine's standard install:
(When it asks "Would you like to install an initial demo product and sale?", I've gone with "yes" for my test / demo project; feel free to do the same, if you'd like some products available out-of-the-box with which to test checkout / payment).
This will get the Mezzanine foundations installed for you. The basic configuration of the Django / Mezzanine settings file, I leave up to you. If you have some experience already with Django (and if you've got this far, then I assume that you do), you no doubt have a standard settings template already in your toolkit (or at least a standard set of settings tweaks), so feel free to use it. I'll be going over the settings you'll need specifically for this app, in just a moment.
Fire up ye 'ol runserver, open your browser at http://localhost:8000/, and confirm that the "Congratulations!" default Mezzanine home page appears for you. Also confirm that you can access the admin. And that's the basics set up!
At this point, you should also be able to test out adding an item to your cart and going to checkout. After entering some billing / delivery details, on the 'payment details' screen it should ask for credit card details. This is the default Cartridge payment setup: we'll be switching this over to PayPal shortly.
Configure Django settings
I'm not too fussed about what else you have in your Django settings file (or in how your Django settings are structured or loaded, for that matter); but if you want to follow along, then you should have certain settings configured per the following guidelines (note: much of these instructions are virtually the same as the cartridge-payments install instructions):
Your TEMPLATE_CONTEXT_PROCESSORS is to include (as well as 'mezzanine.conf.context_processors.settings'):
Set a value for the PAYPAL_CURRENCY setting, for example:
# Currency type.
PAYPAL_CURRENCY = "AUD"
Set a value for the PAYPAL_BUSINESS setting, for example:
# Business account email. Sandbox emails look like this.
PAYPAL_BUSINESS = 'cartwpstest@blablablaaaaaaa.com'
Set a value for the PAYPAL_RECEIVER_EMAIL setting, for example:
PAYPAL_RECEIVER_EMAIL = PAYPAL_BUSINESS
Set a value for the PAYPAL_RETURN_WITH_HTTPS setting, for example:
# Use this to enable https on return URLs.  This is strongly recommended! (Except for sandbox)
PAYPAL_RETURN_WITH_HTTPS = False
Configure the PAYPAL_RETURN_URL setting to this:
# Function that returns args for `reverse`.
# URL is sent to PayPal as the for returning to a 'complete' landing page.
PAYPAL_RETURN_URL = lambda cart, uuid, order_form: ('shop_complete', None, None)
Configure the PAYPAL_IPN_URL setting to this:
# Function that returns args for `reverse`.
# URL is sent to PayPal as the URL to callback to for PayPal IPN.
# Set to None if you do not wish to use IPN.
PAYPAL_IPN_URL = lambda cart, uuid, order_form: ('paypal.standard.ipn.views.ipn', None, {})
Configure the PAYPAL_SUBMIT_URL setting to this:
# URL the secondary-payment-form is submitted to
# For real use set to 'https://www.paypal.com/cgi-bin/webscr'
PAYPAL_SUBMIT_URL = 'https://www.sandbox.paypal.com/cgi-bin/webscr'
After doing this, you'll probably need to manually create a migration in order to get this field added to your database (per Mezzanine's field injection caveat docs), and you'll then need to apply that migration (in this example, I'm adding the migration to an app called 'content' in my project):
Although it shouldn't be necessary, I've found that I need to copy the templates provided by explodes/cartridge-payments into my project's templates directory, otherwise they're ignored and Cartridge's default payment template still gets used:
Place the following code somewhere in your codebase (per the django-paypal docs, I placed it in the models.py file for one of my apps):
# ...

from importlib import import_module

from mezzanine.conf import settings

from cartridge.shop.models import Cart, Order, ProductVariation, \
DiscountCode
from paypal.standard.ipn.signals import payment_was_successful

# ...


def payment_complete(sender, **kwargs):
    """Performs the same logic as the code in
    cartridge.shop.models.Order.complete(), but fetches the session,
    order, and cart objects from storage, rather than relying on the
    request object being passed in (which it isn't, since this is
    triggered on PayPal IPN callback)."""

    ipn_obj = sender

    if ipn_obj.custom and ipn_obj.invoice:
        s_key, cart_pk = ipn_obj.custom.split(',')
        SessionStore = import_module(settings.SESSION_ENGINE) \
                           .SessionStore
        session = SessionStore(s_key)

        try:
            cart = Cart.objects.get(id=cart_pk)
            try:
                order = Order.objects.get(
                    transaction_id=ipn_obj.invoice)
                for field in order.session_fields:
                    if field in session:
                        del session[field]
                try:
                    del session["order"]
                except KeyError:
                    pass

                # Since we're manually changing session data outside of
                # a normal request, need to force the session object to
                # save after modifying its data.
                session.save()

                for item in cart:
                    try:
                        variation = ProductVariation.objects.get(
                            sku=item.sku)
                    except ProductVariation.DoesNotExist:
                        pass
                    else:
                        variation.update_stock(item.quantity * -1)
                        variation.product.actions.purchased()

                code = session.get('discount_code')
                if code:
                    DiscountCode.objects.active().filter(code=code) \
                        .update(uses_remaining=F('uses_remaining') - 1)
                cart.delete()
            except Order.DoesNotExist:
                pass
        except Cart.DoesNotExist:
            pass

payment_was_successful.connect(payment_complete)
This little snippet that I whipped up, is the critical spoonful of glue that gets PayPal WPS playing nice with Cartridge. Basically, when a successful payment is realised, PayPal WPS doesn't force the user to redirect back to the original web site, and therefore it doesn't rely on any redirection in order to notify the site of success. Instead, it uses PayPal's IPN (Instant Payment Notification) system to make a separate, asynchronous request to the original web site – and it's up to the site to receive this request and to process it as it sees fit.
This code uses the payment_was_successful signal that django-paypal provides (and that it triggers on IPN request), to do what Cartridge usually takes care of (for other payment methods), on success: i.e. it clears the user's shopping cart; it updates remaining quantities of products in stock (if applicable); it triggers Cartridge's "product purchased" actions (e.g. email an invoice / receipt); and it updates a discount code (if applicable).
Apply a hack to cartridge-payments (file lib/python2.7/site-packages/payments/multipayments/forms/paypal.py) per this diff:
After line 25 (charset = forms.CharField(widget=forms.HiddenInput(), initial='utf-8')), add this:
Apply a hack to django-paypal (file src/django-paypal/paypal/standard/forms.py) per these instructions:
After line 15 ("%H:%M:%S %b. %d, %Y PDT",), add this:
                      "%H:%M:%S %d %b %Y PST",    # note this
                      "%H:%M:%S %d %b %Y PDT",    # and that
That should be all you need, in order to get checkout with PayPal WPS working on your site. So, deploy everything that's been done so far to your online server, log in to the Django admin, and for some of the variations for the sample product in the database, add values for "number in stock".
Then, log out of the admin, and navigate to the "shop" section of the site. Try out adding an item to your cart.
Basic Django / Mezzanine / Cartridge site: adding an item to shopping cart.
Once on the "your cart" page, continue by clicking "go to checkout". On the "billing details" page, enter sample billing information as necessary, then click "next". On the "payment" page, you should see a single button labelled "pay with pay-pal".
Click the button, and you should be taken to the PayPal (sandbox, unless configured otherwise) payment landing page. For test cases, log in with a PayPal test account, and click 'Pay Now' to try out the process.
If payment is successful, you should see the PayPal confirmation page, saying "thanks for your order". Click the link labelled "return to email@here.com" to return to the Django site. You should see Cartridge's "order complete" page.
Basic Django / Mezzanine / Cartridge site: order complete screen.
And that's it, you're done! You should be able to verify that the IPN callback was triggered, by checking that the "number in stock" has decreased to reflect the item that was just purchased, and by confirming that an order email / confirmation email was received.
Finished process
I hope that this guide is of assistance, to anyone else who's looking to integrate PayPal WPS with Cartridge. The difficulties associated with it are also documented in this mailing list thread (to which I posted a rough version of what I've illustrated in this article). Feel free to leave comments here, and/or in that thread.
Hopefully the hacks necessary to get this working at the moment, will no longer be necessary in the future; it's up to the maintainers of the various projects to get the fixes for these committed. Ideally, the custom signal implementation won't be necessary either in the future: it would be great if Cartridge could work out-of-the-box with PayPal WPS. Unfortunately, the current architecture of Cartridge's payment system simply isn't designed for something like IPN, it only plays nicely with payment methods that keep the user on the Django site the entire time. In the meantime, with the help of this article, you should at least be able to get it working, even if more custom code is needed than what would be ideal.
]]>
Symfony2: as good as PHP gets?2013-10-16T00:00:00Z2013-10-16T00:00:00ZJazahttps://greenash.net.au/thoughts/2013/10/symfony2-as-good-as-php-gets/
I've been getting my hands dirty with Symfony2 of late. At the start of the year, I was introduced to it when I built an app using Silex (a Symfony2 distribution). The special feature of my app was that it allows integration between Silex and Drupal 7.
More recently, I finished another project, which I decided to implement using Symfony2 Standard Edition. Similar to my earlier project, it had the business requirement that it needed tight integration with a Drupal site; so, for this new project, I decided to write a Symfony2 Drupal integration bundle.
Overall, I'm quite impressed with Symfony2 (in its various flavours), and I enjoy coding in it. I've been struggling to enjoy coding in Drupal (and PHP in general) – the environment that I know best – for quite some time. That's why I've been increasingly turning to Django (and other Python frameworks, e.g. Flask), for my dev projects. Symfony2 is a very welcome breath of fresh air in the PHP world.
However, I can't help but think: is Symfony2 "as good as PHP gets"? By that, I mean: Symfony2 appears to have borrowed many of the best practices that have evolved in the non-PHP world, and to have implemented them about as well as they physically can be implemented in PHP (indeed, the same could be said of PHP itself of late). But, PHP being so inferior to most of its competitors in so many ways, PHP implementations are also doomed to being inferior to their alternatives.
Pragmatism
I try to be a pragmatic programmer – I believe that I'm getting more pragmatic, and less sentimental, as I continue to mature as a programmer. That means that my top concerns when choosing a framework / environment are:
Which one helps me get the job done in the most efficient manner possible? (i.e. which one costs my client the least money right now)
Which one best supports me in building a maintainable, well-documented, re-usable solution? (i.e. which one will cost my client the least money in the long-term)
Which one helps me avoid frustrations such as repetitive coding, reverse-engineering, and manual deployment steps? (i.e. which one costs me the least headaches and knuckle-crackings)
Symfony2 definitely gets more brownie points from me than Drupal does, on the pragmatic front. For projects whose data model falls outside the standard CMS data model (i.e. pages, tags, assets, links, etc), I need an ORM (which Drupal's field API is not). For projects whose business logic falls outside the standard CMS business logic model (i.e. view / edit pages, submit simple web forms, search pages by keyword / tag / date, etc), I need a request router (which Drupal's menu API is not). It's also a nice added bonus to have a view / template system that gives me full control over the output without kicking and screaming (as is customary for Drupal's theme system).
However, Symfony2 Standard Edition is a framework, and Drupal is a CMS. Apples and oranges.
Django is a framework. It's also been noted already, by various other people, that many aspects of Symfony2 were inspired by their counterparts in Django (among other frameworks, e.g. Ruby on Rails). So, how about comparing Symfony2 with Django?
Although they're written in different languages, Symfony2 and Django actually have quite a lot in common. In particular, Symfony2's Twig template engine is syntactically very similar to the Django template language; in fact, it's fairly obvious that Twig's syntax was ripped off from inspired by that of Django templates (Twig isn't the first Django-esque template engine, either, so I guess that if imitation is the highest form of flattery, then the Django template language should be feeling thoroughly flattered by now).
The request routing / handling systems of Symfony2 and Django are also fairly similar. However, there are significant differences in their implementation styles; and in my personal opinion, the Symfony2 style feels more cumbersome and less elegant than the Django style.
For example, here's the code you'd need to implement a basic 'Hello World' callback:
In Symfony2
app/AppKernel.php (in AppKernel->registerBundles()):
<?php
$bundles = array(
    // ...

    new Hello\Bundle\HelloBundle(),
);
<?php
namespace Hello\Bundle\Controller;

use Symfony\Component\HttpFoundation\Response;

class DefaultController extends Controller
{
    /**
     * @Route("/")
     */
    public function indexAction()
    {
        return new Response('Hello World');
    }
}
In Django
project/settings.py:
INSTALLED_APPS = [
    # ...

    'hello',
]
project/urls.py:
from django.conf.urls import *

from hello.views import index

urlpatterns = patterns('',
    # ...

    url(r'^$', index, name='hello'),
)
project/hello/views.py:
from django.http import HttpResponse

def index(request):
    return HttpResponse("Hello World")
As you can see above, the steps involved are basically the same for each system. First, we have to register with the framework the "thing" that our Hello World callback lives in: in Symfony2, the "thing" is called a bundle; and in Django, it's called an app. In both systems, we simply add it to the list of installed / registered "things". However, in Symfony2, we have to instantiate a new object, and we have to specify the namespace path to the class; whereas in Django, we simply add the (path-free) name of the "thing" to a list, as a string.
Next, we have to set up routing to our request callback. In Symfony2, this involves using a configuration language (YAML), rather than the framework's programming language (PHP); and it involves specifying the "path" to the callback, as well as the format in which the callback is defined ("annotation" in this case). In Django, it involves importing the callback "callable" as an object, and adding it to the "urlpatterns" list, along with a regular expression defining its URL path.
Finally, there's the callback itself. In Symfony2, the callback lives in a FooController.php file within a bundle's Controller directory. The callback itself is an "action" method that lives within a "controller" class (you can have multiple "actions", in this example there's just one). In Django, the callback doesn't have to be a method within a class: it can be any Python "callable", such as a "class object"; or, as is the case here, a simple function.
I could go on here, and continue with more code comparisons (e.g. database querying / ORM system, form system, logging); but I think what I've shown is sufficient for drawing some basic observations. Feel free to explore Symfony2 / Django code samples in more depth if you're still curious.
Funny language
Basically, my criticism is not of Symfony2, as such. My criticism is more of PHP. In particular, I dislike both the syntax and the practical limitations of the namespace system that was introduced in PHP 5.3. I've blogged before about what bugs me in a PHP 5.3-based framework, and after writing that article I was accused that my PHP 5.3 rants were clouding my judgement of the framework. So, in this article I'd like to more clearly separate language ranting from framework ranting.
Language rant
In the PHP 5.3+ namespace system:
The namespace delimiter is the backslash character; whereas in other (saner) languages it's the dot character
You have to specify the "namespace path" using the "namespace" declaration at the top of every single file in your project that contains namespaced classes; whereas in other (saner) languages the "namespace path" is determined automatically based on directory structure
You can only import namespaces using their absolute path, resulting in overly verbose "use" declarations all over the place; wheras in other (saner) languages relative (and wildcard) namespace imports are possible
Framework rant
In Symfony2:
You're able to define configuration (e.g. routing callbacks) in multiple formats, with the preferred format being YAML (although raw PHP configuration is also possible), resulting in an over-engineered config system, and unnecessary extra learning for an invented format in order to perform configuration in the default way
Only a class method can be a routing callback, a class itself or a stand-alone function cannot be a callback, as the routing system is too tightly coupled with PHP's class- and method-based namespace system
An overly complex and multi-levelled directory structure is needed for even the simplest projects, and what's more, overly verbose namespace declarations and import statements are found in almost every file; this is all a reflection of Symfony2's dependence on the PHP 5.3+ namespace system
In summary
Let me repeat: I really do think that Symfony2 is a great framework. I've done professional work with it recently. I intend to continue doing professional work with it in the future. It ticks my pragmatic box of supporting me in building a maintainable, well-documented, re-usable solution. It also ticks my box of avoiding reverse-engineering and manual deployment steps.
However, does it help me get the job done in the most efficient manner possible? If I have to work in PHP, then yes. If I have the choice of working in Python instead, then no. And does it help me avoid frustrations such as repetitive coding? More-or-less: Symfony2 project code isn't too repetitive, but it certainly isn't as compact as I'd like my code to be.
Symfony2 is brimming with the very best of what cutting-edge PHP has to offer. But, at the same time, it's hindered by its "PHP-ness". I look forward to seeing the framework continue to mature and to evolve. And I hope that Symfony2 serves as an example to all programmers, working in all languages, of how to build the most robust product possible, within the limits of that product's foundations and dependencies.
]]>
Configuring Silex (Symfony2) and Monolog to email errors2013-03-30T00:00:00Z2013-03-30T00:00:00ZJazahttps://greenash.net.au/thoughts/2013/03/configuring-silex-symfony2-and-monolog-to-email-errors/
There's a pretty good documentation page on how to configure Monolog to email errors in Symfony2. This, and all other documentation that I could find on the subject, works great if: (a) you're using the Symfony2 Standard Edition; and (b) you want to send emails with Swift Mailer. However, I couldn't find anything for my use case, in which: (a) I'm using Silex; and (b) I want to send mail with PHP's native mail handler (Swift Mailer is overkill for me).
Turns out that, after a bit of digging and poking around, it's not so hard to cobble together a solution that meets this use case. I'm sharing it here, in case anyone else finds themselves with similar needs in the future.
The code
Assuming that you've installed both Silex and Monolog (by adding silex/silex and monolog/monolog to the require section of your composer.json file, or by some alternate install method), you'll need something like this for your app's bootstrap code (in my case, it's in my project/app.php file):
I've got some code here for determining the current environment (which can be prod, staging or dev), and for only enabling the error emailing functionality for environments other than dev. Up to you whether you want / need that functionality; plus, this example is just one of many possible ways to implement it.
That's about it, really. Using this code, you can have a Silex app which logs errors to a file (the usual) when running in your dev environment, but that also sends an error email to one or more addresses, when running in your other environments. Not rocket science – but, in my opinion, it's an important setup to be able to achieve in pretty much any web framework (i.e. regardless of your technology stack, receiving email notification of critical errors is a recommended best practice); and it doesn't seem to be documented anywhere so far for Silex.
]]>
Show a video's duration with Media: YouTube and Computed Field2013-03-28T00:00:00Z2013-03-28T00:00:00ZJazahttps://greenash.net.au/thoughts/2013/03/show-a-videos-duration-with-media-youtube-and-computed-field/
I build quite a few Drupal sites that use embedded YouTube videos, and my module of choice for handling this is Media: YouTube, which is built upon the popular Media module. The Media: YouTube module generally works great; but on one site that I recently built, I discovered one of its shortcomings. It doesn't let you display a YouTube video's duration.
I thought up a quick, performant and relatively easy way to solve this. With just a few snippets of custom code, and the help of the Computed Field module, showing video duration (in hours / minutes / seconds) for a Media: YouTube managed asset, is a walk in the park.
Getting set up
First up, install the Media: YouTube module (and its dependent modules) on a Drupal 7 site of your choice. Then, add a YouTube video field to one of the site's content types. For this example, I added a field called 'Video' (field_video) to my content type 'Page' (page). Be sure to select a 'field type' of 'File', and a 'widget' of type 'Media file selector'. In the field settings, set 'Allowed remote media types' to just 'Video', and set 'Allowed URI schemes' to just 'youtube://'.
To configure video display, go to 'Administration > Configuration > Media > File types' in your site admin, and for 'Video', click on 'manage file display'. You should be on the 'default' tab. For 'Enabled displays', enable just 'YouTube Video'. Customise the other display settings to your tastes.
Add a YouTube video to one of your site's pages. For this example, I've chosen one of the many clips highlighting YouTube's role as the zenith of modern society's intellectual capacity: a dancing duck.
To show the video within your site's theme, open up your theme's template.php file, and add the following preprocess function (in this example, my theme is called foobar):
And add the following snippet to your node.tpl.php file or equivalent (in my case, I added it to my node--page.tpl.php file):
<!-- template stuff bla bla bla -->

<?php if (!empty($video)): ?>
  <?php print $video; ?>
<?php endif; ?>

<!-- more template stuff bla bla bla -->
The duck should now be dancing for you:
Embrace The Duck.
Getting the duration
On most sites, you won't have any need to retrieve and display the video's duration by itself. As you can see, the embedded YouTube element shows the duration pretty clearly, and that's adequate for most use cases. However, if your client wants the duration shown elsewhere (other than within the embedded video area), or if you're just in the mood for putting the duration between a spantabulously vomitive pair of <font color="pink"><blink>2:48</blink></font> tags, then keep reading.
Unfortunately, the Media: YouTube module doesn't provide any functionality whatsoever for getting a video's duration (or much other video metadata, for that matter). But, have no fear, it turns out that a quick code snippet for querying a YouTube video's duration, based on video ID, is pretty quick and painless in bare-bones PHP. Add this to a custom module on your site (in my case, I added it to my foobar_page.module):
<?php
/**
 * Gets a YouTube video's duration, based on video ID.
 *
 * Copied (almost exactly) from:
 * http://stackoverflow.com/questions/9167442/
 * get-duration-from-a-youtube-url/9167754#9167754
 *
 * @param $video_id
 *   YouTube video ID.
 *
 * @return
 *   Video duration (or FALSE on failure).
 */
function foobar_page_get_youtube_video_duration($video_id) {
  $data = @file_get_contents('http://gdata.youtube.com/feeds/api/videos/'
  . $video_id . '?v=2&alt=jsonc');
  if ($data === FALSE) {
    return FALSE;
  }

  $obj = json_decode($data);
  return $obj->data->duration;
}
Great – turns out that querying the YouTube API for the duration is very easy. But we don't want to perform an external HTTP request, every time we want to display a video's duration: that would be a potential performance issue (and, in the event that YouTube is slow or unavailable, it would completely hang the page loading process). What we should do instead, is only query the duration from YouTube when we save a node (or other entity), and then store the duration locally for easy retrieval later.
Storing the duration
There are a number of possibilities, for how to store this data. Using Drupal's variable_get() and variable_set() functionality is one option (with either one variable per duration value, or with all duration values stored in a single serialized variable). However, that has numerous disadvantages: it would negatively affect performance (both for retrieving duration values, and for the whole Drupal site); and, at the end of the day, it's an abuse of the Drupal variable system, which is only meant to be used for one-off values, not for values that are potentially set for every node on your site (sadly, it would be far from the first such case of abuse of the Drupal variable system – but the fact that other people / other modules do it, doesn't make it any less dodgy).
Patching the Media: YouTube module to have an extra database field for video duration, and making the module retrieve and store this value, would be another option. However, that would be a lot more work and a lot more code; it would also mean having a hacked version of the module, until (if and when) a patch for the module (that we'd have to submit and refine) gets committed on drupal.org. Plus, it would mean learning a whole lot more about the Field API, the Media module, and the File API than any sane person would care to subject his/her self to.
Enter the Computed Field module. With the help of this handy module, we have the possibility of implementing a better, faster, nicer solution.
Add this to a custom module on your site (in my case, I added it to my foobar_page.module):
Next, install the Computed Field module on your Drupal site. Add a new field to your content type, called 'Video duration' (field_video_duration), with 'field type' and 'widget' of type 'Computed'. On the settings page for this field, you should see the message: "This field is COMPUTED using computed_field_field_video_duration_compute()". In the 'database storage settings', ensure that 'Data type' is 'text', and that 'Data length' is '255'. You can leave all other settings for this field at their defaults.
Re-save the node that has YouTube video content, in order to retrieve and save the new computed field value for the duration.
Displaying the duration
For the formatting of the duration (the raw value of which is stored in seconds), in hours:minutes:seconds format, here's a dodgy custom function that I whipped up. Use it, or don't – totally your choice. If you choose to use, then add this to a custom module on your site:
<?php
/**
 * Formats the given time value in h:mm:ss format (if it's >= 1 hour),
 * or in mm:ss format (if it's < 1 hour).
 *
 * Based on Drupal's format_interval() function.
 *
 * @param $interval
 *   Time interval (in seconds).
 *
 * @return
 *   Formatted time value.
 */
function foobar_page_format_time_interval($interval) {
  $units = array(
    array('format' => '%d', 'value' => 3600),
    array('format' => '%d', 'value' => 60),
    array('format' => '%02d', 'value' => 1),
  );

  $granularity = count($units);
  $output = '';
  $has_value = FALSE;
  $i = 0;

  foreach ($units as $unit) {
    $format = $unit['format'];
    $value = $unit['value'];
    $new_val = floor($interval / $value);
    $new_val_formatted = ($output !== '' ? ':' : '') .
                         sprintf($format, $new_val);
    if ((!$new_val && $i) || $new_val) {
      $output .= $new_val_formatted;

      if ($new_val) {
        $has_value = TRUE;
      }
    }

    if ($interval >= $value && $has_value) {
      $interval %= $value;
    }

    $granularity--;
    $i++;

    if ($granularity == 0) {
      break;
    }
  }

  return $output ? $output : '0:00';
}
Update your mytheme_preprocess_node() function, with some extra code for making the formatted video duration available in your node template:
<?php
/**
 * Preprocessor for node.tpl.php template file.
 */
function foobar_preprocess_node(&$vars) {
  if ($vars['node']->type == 'page' &&
      !empty($vars['node']->field_video['und'][0]['fid'])) {
    $video_file = file_load($vars['node']->field_video['und'][0]['fid']);
    $vf = file_view_file($video_file, 'default', '');
    $vars['video'] = drupal_render($vf);

    if (!empty($vars['node']->field_video_duration['und'][0]['value'])) {
      $vars['video_duration'] = foobar_page_format_time_interval(
        $vars['node']->field_video_duration['und'][0]['value']);
    }
  }
}
Finally, update your node.tpl.php file or equivalent:
<!-- template stuff bla bla bla -->

<?php if (!empty($video)): ?>
  <?php print $video; ?>
<?php endif; ?>

<?php if (!empty($video_duration)): ?>
  <p><strong>Duration:</strong> <?php print $video_duration; ?></p>
<?php endif; ?>

<!-- more template stuff bla bla bla -->
Reload the page on your site, and lo and behold:
We have duration!
Final remarks
I hope this example comes in handy, for anyone else who needs to display YouTube video duration metadata in this way.
I'd also like to strongly note, that what I've demonstrated here isn't solely applicable to this specific use case. With some modification, it could easily be applied to various different related use cases. Other than duration, you could retrieve / store / display any of the other metadata fields available via the YouTube API (e.g. date video uploaded, video category, number of comments). Or, you could work with media from another source, using another Drupal media-enabled module (e.g. Media: Vimeo). Or, you could store externally-queried data for some completely different field. I encourage you to experiment and to use your imagination, when it comes to the Computed Field module. The possibilities are endless.
]]>
Rendering a Silex (Symfony2) app via Drupal 72013-01-25T00:00:00Z2013-01-25T00:00:00ZJazahttps://greenash.net.au/thoughts/2013/01/rendering-a-silex-symfony2-app-via-drupal-7/
There's been a lot of talk recently regarding the integration of the Symfony2 components, as a fundamental part of Drupal 8's core system. I won't rabble on repeating the many things that have already been said elsewhere; however, to quote the great Bogeyman himself, let me just say that "I think this is the beginning of a beautiful friendship".
On a project I'm currently working on, I decided to try out something of a related flavour. I built a stand-alone app in Silex (a sort of Symfony2 distribution); but, per the project's requirements, I also managed to heavily integrate the app with an existing Drupal 7 site. The app does almost everything on its own, except that: it passes its output to drupal_render_page() before returning the request; and it checks that a Drupal user is currently logged-in and has a certain Drupal user role, for pages where authorisation is required.
The result is: an app that has its own custom database, its own routes, its own forms, its own business logic, and its own templates; but that gets rendered via the Drupal theming system, and that relies on Drupal data for authentication and authorisation. What's more, the implementation is quite clean (minimal hackery involved) – only a small amount of code is needed for the integration, and then (for the most part) Drupal and Silex leave each other alone to get on with their respective jobs. Now, let me show you how it's done.
Drupal setup
To start with, set up a new bare-bones Drupal 7 site. I won't go into the details of Drupal installation here. If you need help with setting up a local Apache VirtualHost, editing your /etc/hosts file, setting up a MySQL database / user, launching the Drupal installer, etc, please refer to the Drupal installation guide. For this guide, I'll be using a Drupal 7 instance that's been installed to the /www/d7silextest directory on my local machine, and that can be accessed via http://d7silextest.local.
D7 Silex test site after initial setup.
Once you've got that (or something similar) up and running, and if you're keen to follow along, then keep up with me as I outline further Drupal config steps. Firstly, go to administration > people > permissions > roles, create a new role called 'administrator' (if it doesn't exist already). Then, assign the role to user 1.
Next, download the patches from Need DRUPAL_ROOT in include of template.php and Need DRUPAL_ROOT when rendering CSS include links, and apply them to your Drupal codebase. Note: these are some bugs in core, where certain PHP files are being included without properly appending the DRUPAL_ROOT prefix. As of writing, I've submitted these patches to drupal.org, but they haven't yet been committed. Please check the status of these issue threads – if they're now resolved, then you may not need to apply the patches (check exactly which version of Drupal you're using, as of Drupal 7.19 the patches are still needed).
If you're using additional Drupal contrib or custom modules, they may also have similar bugs. For example, I've also submitted Need DRUPAL_ROOT in require of include files for the Revisioning module (not yet committed as of writing), and Need DRUPAL_ROOT in require of og.field.inc for the Organic Groups module (now committed and applied in latest stable release of OG). If you find any more DRUPAL_ROOT bugs, that prevent an external script such as Symfony2 from utilising Drupal from within a subdirectory, then please patch these bugs yourself, and submit patches to drupal.org as I've done.
Enable the menu module (if it's not already enabled), and define a 'Page' content type (if not already defined). Create a new 'Page' node (in my config below, I assume that it's node 1), with a menu item (e.g. in 'main menu'). Your new test page should look something like this:
D7 Silex test site with test page.
That's sufficient Drupal configuration for the purposes of our example. Now, let's move on to Silex.
Silex setup
To start setting up your example Silex site, create a new directory, which is outside of your Drupal site's directory tree. In this article, I'm assuming that the Silex directory is at /www/silexd7test. Within this directory, create a composer.json file with the following:
Get Composer (if you don't have it), by executing this command:
curl -s http://getcomposer.org/installer | php
Once you've got Composer, installing Silex is very easy, just execute this command from your Silex directory:
php composer.phar install
Next, create a new directory called web in your silex root directory; and create a file called web/index.php, that looks like this:
<?php

/**
 * @file
 * The PHP page that serves all page requests on a Silex installation.
 */


require_once __DIR__ . '/../vendor/autoload.php';

$app = new Silex\Application();

$app['debug'] = TRUE;

$app->get('/', function() use($app) {
  return '<p>You should see this outputting ' .
    'within your Drupal site!</p>';
});

$app->run();
That's a very basic Silex app ready to go. The app just defines one route (the 'home page' route), which outputs the text You should see this outputting within your Drupal site! on request. The Silex app that I actually built and integrated with Drupal did a whole more of this – but for the purposes of this article, a "Hello World" example is all we need.
To see this app in action, in your Drupal root directory create a symlink to the Silex web folder:
ln -s /www/silexd7test/web/ silexd7test
Now you can go to http://d7silextest.local/silexd7test/, and you should see something like this:
Silex serving requests stand-alone, under Drupal web path.
So far, the app is running under the Drupal web path, but it isn't integrated with the Drupal site at all. It's just running its own bootstrap code, and outputting the response for the requested route without any outside help. We'll be changing that shortly.
Integration
Open up the web/index.php file again, and change it to look like this:
<?php

/**
 * @file
 * The PHP page that serves all page requests on a Silex installation.
 */


require_once __DIR__ . '/../vendor/autoload.php';

$app = new Silex\Application();

$app['debug'] = TRUE;

$app['drupal_root'] = '/www/d7silextest';
$app['drupal_base_url'] = 'http://d7silextest.local';
$app['is_embedded_in_drupal'] = TRUE;
$app['drupal_menu_active_item'] = 'node/1';

/**
 * Bootstraps Drupal using DRUPAL_ROOT and $base_url values from
 * this app's config. Bootstraps to a sufficient level to allow
 * session / user data to be accessed, and for theme rendering to
 * be invoked..
 *
 * @param $app
 *   Silex application object.
 * @param $level
 *   Level to bootstrap Drupal to. If not provided, defaults to
 *   DRUPAL_BOOTSTRAP_FULL.
 */
function silex_bootstrap_drupal($app, $level = NULL) {
  global $base_url;

  // Check that Drupal bootstrap config settings can be found.
  // If not, throw an exception.
  if (empty($app['drupal_root'])) {
    throw new \Exception("Missing setting 'drupal_root' in config");
  }
  elseif (empty($app['drupal_base_url'])) {
    throw new \Exception("Missing setting 'drupal_base_url' in config");
  }

  // Set values necessary for Drupal bootstrap from external script.
  // See:
  // http://www.csdesignco.com/content/using-drupal-data-functions-
  // and-session-variables-external-php-script
  define('DRUPAL_ROOT', $app['drupal_root']);
  $base_url = $app['drupal_base_url'];

  // Bootstrap Drupal.
  require_once DRUPAL_ROOT . '/includes/bootstrap.inc';
  if (is_null($level)) {
    $level = DRUPAL_BOOTSTRAP_FULL;
  }
  drupal_bootstrap($level);

  if ($level == DRUPAL_BOOTSTRAP_FULL &&
  !empty($app['drupal_menu_active_item'])) {
    menu_set_active_item($app['drupal_menu_active_item']);
  }
}

/**
 * Checks that an authenticated and non-blocked Drupal user is tied to
 * the current session. If not, deny access for this request.
 *
 * @param $app
 *   Silex application object.
 */
function silex_limit_access_to_authenticated_users($app) {
  global $user;

  if (empty($user->uid)) {
    $app->abort(403, 'You must be logged in to access this page.');
  }
  if (empty($user->status)) {
    $app->abort(403, 'You must have an active account in order to ' .
      'access this page.');
  }
  if (empty($user->name)) {
    $app->abort(403, 'Your session must be tied to a username to ' .
    'access this page.');
  }
}

/**
 * Checks that the current user is a Drupal admin (with 'administrator'
 * role). If not, deny access for this request.
 *
 * @param $app
 *   Silex application object.
 */
function silex_limit_access_to_admin($app) {
  global $user;

  if (!in_array('administrator', $user->roles)) {
    $app->abort(403,
                'You must be an administrator to access this page.');
  }
}

$app->get('/', function() use($app) {
  silex_bootstrap_drupal($app);
  silex_limit_access_to_authenticated_users($app);
  silex_limit_access_to_admin($app);

  $ret = '<p>You should see this outputting within your ' .
         'Drupal site!</p>';

  return !empty($app['is_embedded_in_drupal']) ?
    drupal_render_page($ret) :
    $ret;
});

$app->run();
A number of things have been added to the code in this file, so let's examine them one-by-one. First of all, some Drupal-related settings have been added to the Silex $app object. The drupal_root and drupal_base_url settings, are the critical ones that are needed in order to bootstrap Drupal from within Silex. Because the Silex script is in a different filesystem path from the Drupal site, and because it's also being served from a different URL path, these need to be manually set and passed on to Drupal.
The is_embedded_in_drupal setting allows the rendering of the page via drupal_render_page() to be toggled on or off. The script could work fine without this, and with rendering via drupal_render_page() hard-coded to always occur; allowing it to be toggled is just a bit more elegant. The drupal_menu_active_item setting, when set, triggers the Drupal menu path to be set to the path specified (via menu_set_active_item()).
The route handler for our 'home page' path now calls three functions, before going on to render the page. The first one, silex_bootstrap_drupal(), is pretty self-explanatory. The second one, silex_limit_access_to_authenticated_users(), checks the Drupal global $user object to ensure that the current user is logged-in, and if not, it throws an exception. Similarly, silex_limit_access_to_admin() checks that the current user has the 'administrator' role (with failure resulting in an exception).
To test the authorisation checks that are now in place, log out of the Drupal site, and visit the Silex 'front page' at http://d7silextest.local/silexd7test/. You should see something like this:
Silex denying access to a page because Drupal user is logged out
The drupal_render_page() function is usually – in the case of a Drupal menu callback – passed a callback (a function name as a string), and rendering is then delegated to that callback. However, it also accepts an output string as its first argument; in this case, the passed-in string is outputted directly as the content of the 'main page content' Drupal block. Following that, all other block regions are assembled, and the full Drupal page is themed for output, business as usual.
To see the Silex 'front page' fully rendered, and without any 'access denied' message, log in to the Drupal site, and visit http://d7silextest.local/silexd7test/ again. You should now see something like this:
Silex serving output that's been passed through drupal_render_page().
And that's it – a Silex callback, with Drupal theming and Drupal access control!
Final remarks
The example I've walked through in this article, is a simplified version of what I implemented for my recent real-life project. Some important things that I modified, for the purposes of keeping this article quick 'n' dirty:
Changed the route handler and Drupal bootstrap / access-control functions, from being methods in a Silex Controller class (implementing Silex\ControllerProviderInterface) in a separate file, to being functions in the main index.php file
Changed the config values, from being stored in a JSON file and loaded via Igorw\Silex\ConfigServiceProvider, to being hard-coded into the $app object in raw PHP
Took out logging for the app via Silex\Provider\MonologServiceProvider
My real-life project is also significantly more than just a single "Hello World" route handler. It defines its own custom database, which it accesses via Doctrine's DBAL and ORM components. It uses Twig templates for all output. It makes heavy use of Symfony2's Form component. And it includes a number of custom command-line scripts, which are implemented using Symfony2's Console component. However, most of that is standard Silex / Symfony2 stuff which is not so noteworthy; and it's also not necessary for the purposes of this article.
I should also note that although this article is focused on Symfony2 / Silex, the example I've walked through here could be applied to any other PHP script that you might want to integrate with Drupal 7 in a similar way (as long as the PHP framework / script in question doesn't conflict with Drupal's function or variable names). However, it does make particularly good sense to integrate Symfony2 / Silex with Drupal 7 in this way, because: (a) Symfony2 components are going to be the foundation of Drupal 8 anyway; and (b) Symfony2 components are the latest and greatest components available for PHP right now, so the more projects you're able to use them in, the better.
]]>
Node.js itself is blocking, only its I/O is non-blocking2012-11-15T00:00:00Z2012-11-15T00:00:00ZJazahttps://greenash.net.au/thoughts/2012/11/nodejs-itself-is-blocking-only-its-io-is-non-blocking/
I've recently been getting my feet wet, playing around with Node.js (yes, I know – what took me so long?). I'm having a lot of fun, learning new technologies by the handful. It's all very exciting.
I just thought I'd stop for a minute, however, to point out one important detail of Node.js that had me confused for a while, and that seems to have confused others, too. More likely than not, the first feature of Node.js that you heard about, was its non-blocking I/O model.
Now, please re-read that last phrase, and re-read it carefully. Non. Blocking. I/O. You will never hear anywhere, from anyone, that Node.js is non-blocking. You will only hear that it has non-blocking I/O. If, like me, you're new to Node.js, and you didn't stop to think about what exactly "I/O" means (in the context of Node.js) before diving in (and perhaps you weren't too clear on "non-blocking", either), then fear not.
What exactly – with reference to Node.js – is blocking, and what is non-blocking? And what exactly – also with reference to Node.js – is I/O, and what is not I/O? Let me clarify, for me as much as for you.
Blocking vs non-blocking
Let's start by defining blocking. A line of code is blocking, if all functionality invoked by that line of code must terminate before the next line of code executes.
This is the way that all traditional procedural code works. Here's a super-basic example of some blocking code in JavaScript:
In this example, the first line of code is blocking. Therefore, the first line must finish doing everything we told it to do, before our CPU gives the second line of code the time of day. Therefore, we are guaranteed to get this output:
Peking duck
Coconut lychee
Now, let me introduce you to Kev the Kook. Rather than just outputting the above lines to console, Kev wants to thoroughly cook his Peking duck, and exquisitely prepare his coconut lychee, before going ahead and brashly telling the guests that the various courses of their dinner are ready. Here's what we're talking about:
function prepare_peking_duck() {
  var duck = slaughter_duck();
  duck = remove_feathers(duck);
  var oven = preheat_oven(180, 'Celsius');
  duck = marinate_duck(duck, "Mr Wu's secret Peking herbs and spices");
  duck = bake_duck(duck, oven);
  serve_duck_with(duck, 'Spring rolls');
}

function prepare_coconut_lychee() {
  bowl = get_bowl_from_cupboard();
  bowl = put_lychees_in_bowl(bowl);
  bowl = put_coconut_milk_in_bowl(bowl);
  garnish_bowl_with(bowl, 'Peanut butter');
}

prepare_peking_duck();
console.log('Peking duck is ready');

prepare_coconut_lychee();
console.log('Coconut lychee is ready');
In this example, we're doing quite a bit of grunt work. Also, it's quite likely that the first task we call will take considerably longer to execute than the second task (mainly because we have to remove the feathers, that can be quite a tedious process). However, all that grunt work is still guaranteed to be performed in the order that we specified. So, the Peking duck will always be ready before the coconut lychee. This is excellent news, because eating the coconut lychee first would simply be revolting, everyone knows that it's a dessert dish.
Now, let's suppose that Kev previously had this code implemented in server-side JavaScript, but in a regular library that provided only blocking functions. He's just decided to port the code to Node.js, and to re-implement it using non-blocking functions.
Up until now, everything was working perfectly: the Peking duck was always ready before the coconut lychee, and nobody ever went home with a sour stomach (well, alright, maybe the peanut butter garnish didn't go down so well with everyone… but hey, just no pleasing some folks). Life was good for Kev. But now, things are more complicated.
In contrast to blocking, a line of code is non-blocking, if the next line of code may execute before the line of functionality invoked by that line of code has terminated.
Back to Kev's Chinese dinner. It turns out that in order to port the duck and lychee code to Node.js, pretty much all of his high-level functions will have to call some non-blocking Node.js library functions. And the way that non-blocking code essentially works is: if a function calls any other function that is non-blocking, then the calling function itself is also non-blocking. Sort of a viral, from-the-inside-out effect.
Kev hasn't really got his head around this whole non-blocking business. He decides, what the hell, let's just implement the code exactly as it was before, and see how it works. To his great dismay, though, the results of executing the original code with Node.js non-blocking functions is not great:
Peking duck is ready
Coconut lychee is ready

/path/to/prepare_peking_duck.js:9
    duck.toString();
         ^
TypeError: Cannot call method 'toString' of undefined
    at remove_feathers (/path/to/prepare_peking_duck.js:9:8)
This output worries Kev for two reasons. Firstly, and less importantly, it worries him because there's an error being thrown, and Kev doesn't like errors. Secondly, and much more importantly, it worries him because the error is being thrown after the program successfully outputs both "Peking duck is ready" and "Coconut lychee is ready". If the program isn't able to get past the end of remove_feathers() without throwing a fatal error, then how could it possibly have finished the rest of the duck and lychee preparation?
The answer, of course, is that all of Kev's dinner preparation functions are now effectively non-blocking. This means that the following happened when Kev ran his script:
Called prepare_peking_duck()
  Called slaughter_duck()
    Non-blocking code in slaughter_duck() doesn't execute until
    after current blocking code is done. Is supposed to return an int,
    but actually returns nothing
  Called remove_feathers() with return value of slaughter_duck()
  as parameter
    Non-blocking code in remove_feathers() doesn't execute until
    after current blocking code is done. Is supposed to return an int,
    but actually returns nothing
  Called other duck-preparation functions
    They all also contain non-blocking code, which doesn't execute
    until after current blocking code is done
Printed 'Peking duck is ready'
Called prepare_coconut_lychee()
  Called lychee-preparation functions
    They all also contain non-blocking code, which doesn't execute
    until after current blocking code is done
Printed 'Coconut lychee is ready'
Returned to prepare_peking_duck() context
  Returned to slaughter_duck() context
    Executed non-blocking code in slaughter_duck()
  Returned to remove_feathers() context
    Error executing non-blocking code in remove_feathers()
Before too long, Kev works out – by way of logical reasoning – that the execution flow described above is indeed what is happening. So, he comes to the realisation that he needs to re-structure his code to work the Node.js way: that is, using a whole lotta callbacks.
After spending a while fiddling with the code, this is what Kev ends up with:
This runs without errors. However, it produces its output in the wrong order – this is what it spits onto the console:
Coconut lychee is ready
Peking duck is ready
This output is possible because, with the code in its current state, the execution of both of Kev's preparation routines – the Peking duck preparation, and the coconut lychee preparation – are sent off to run as non-blocking routines; and whichever one finishes executing first gets its callback fired before the other. And, as mentioned, the Peking duck can take a while to prepare (although utilising a cloud-based grid service for the feather plucking can boost performance).
Now, as we already know, eating the coconut lychee before the Peking duck causes you to fart a Szechuan Stinker, which is classified under international law as a chemical weapon. And Kev would rather not be guilty of war crimes, simply on account of a small culinary technical hiccup.
This final execution-ordering issue can be fixed easily enough, by converting one remaining spot to use a nested callback pattern:
prepare_peking_duck(function(err) {
  console.log('Peking duck is ready');
  prepare_coconut_lychee(function(err) {
    console.log('Coconut lychee is ready');
  });
});
Finally, Kev can have his lychee and eat it, too.
I/O vs non-I/O
I/O stands for Input/Output. I know this because I spent four years studying Computer Science at university.
Actually, that's a lie. I already knew what I/O stood for when I was about ten years old.
But you know what I did learn at university? I learnt more about I/O than what the letters stood for. I learnt that the technical definition of a computer program, is: an executable that accepts some discrete input, that performs some processing, and that finishes off with some discrete output.
Actually, that's a lie too. I already knew that from high school computer classes.
You know what else is a lie? (OK, not exactly a lie, but at the very least it's confusing and incomplete). The description that Node.js folks give you for "what I/O means". Have a look at any old source (yes, pretty much anywhere will do). Wherever you look, the answer will roughly be: I/O is working with files, doing database queries, and making web requests from your app.
As I said, that's not exactly a lie. However, that's not what I/O is. That's a set of examples of what I/O is. If you want to know what the definition of I/O actually is, let me tell you: it's any interaction that your program makes with anything external to itself. That's it.
I/O usually involves your program reading a piece of data from an external source, and making it available as a variable within your code; or conversely, taking a piece of data that's stored as a variable within your code, and writing it to an external source. However, it doesn't always involve reading or writing data; and (as I'm trying to emphasise), it doesn't need to involve that, in order to fall within the definition of I/O for your program.
At a basic technical level, I/O is nothing more than any instance of your program invoking another program on the same machine. The simplest example of this, is executing another program via a command-line statement from your program. Node.js provides the non-blocking I/O function child_process.exec() for this purpose; running shell commands with it is pretty easy.
The most common and the most obvious example of I/O, reading and writing files, involves (under the hood) your program invoking the various utility programs provided by all OSes for interacting with files. open is another program somewhere on your system. read, write, close, stat, rename, unlink – all individual utility programs living on your box.
From this perspective, a DBMS is just one more utility program living on your system. (At least, the client utility lives on your system – where the server lives, and how to access it, is the client utility's problem, not yours). When you open a connection to a DB, perform some queries (regardless of them being read or write queries), and then close the connection, the only really significant point (for our purposes) is that you're making various invocations to a program that's external to your program.
Similarly, all network communication performed by your program is nothing more than a bunch of invocations to external utility programs. Although these utility programs provide the illusion (both to the programmer and to the end-user) that your program is interacting directly with remote sources, in reality the direct interaction is only with the utilities on your machine for opening a socket, port mapping, TCP / UDP packet management, IP addressing, DNS lookup, and all the other gory details.
And, of course, working with HTTP is simply dealing with one extra layer of utility programs, on top of all the general networking utility programs. So, when you consider it from this point of view, making a JSON API request to an online payment broker over SSL, is really no different to executing the pwd shell command. It's all I/O!
I hope I've made it crystal-clear by now, what constitutes I/O. So, conversely, you should also now have a clearer idea of exactly what constitutes non-I/O. In a nutshell: any code that does not invoke any external programs, any code that is completely insular and that performs all processing internally, is non-I/O code.
The philosophy behind Node.js, is that most database-driven web apps – what with their being database-driven, and web-based, and all – don't actually have a whole lot of non-I/O code. In most such apps, the non-I/O code consists of little more than bits 'n' pieces that happen in between the I/O bits: some calculations after retrieving data from the database; some rendering work after performing the business logic; some parsing and validation upon receiving incoming API calls or form submissions. It's rare for web apps to perform any particularly intensive tasks, without the help of other external utilities.
Some programs do contain a lot of non-I/O code. Typically, these are programs that perform more heavy processing based on the direct input that they receive. For example, a program that performs an expensive mathematical computation, such as finding all Fibonacci numbers up to a given value, may take a long time to execute, even though it only contains non-I/O code (by the way, please don't write a Fibonacci number app in Node.js). Similarly, image processing utility programs are generally non-I/O, as they perform a specialised task using exactly the image data provided, without outside help.
Putting it all together
We should now all be on the same page, regarding blocking vs non-blocking code, and regarding I/O vs non-I/O code. Now, back to the point of this article, which is to better explain the key feature of Node.js: its non-blocking I/O model.
As others have explained, in Node.js everything runs in parallel, except your code. What this means is that all I/O code that you write in Node.js is non-blocking, while (conversely) all non-I/O code that you write in Node.js is blocking.
So, as Node.js experts are quick to point out: if you write a Node.js web app with non-I/O code that blocks execution for a long time, your app will be completely unresponsive until that code finishes running. As I said: please, no Fibonacci in Node.js.
When I started writing in Node.js, I was under the impression that the V8 engine it uses automagically makes your code non-blocking, each time you make a function call. So I thought that, for example, changing a long-running while loop to a recursive loop would make my (completely non-I/O) code non-blocking. Wrong! (As it turns out, if you'd like a language that automagically makes your code non-blocking, apparently Erlang can do it for you – however, I've never used Erlang, so can't comment on this).
In fact, the secret to non-blocking code in Node.js is not magic. It's a bag of rather dirty tricks, the most prominent (and the dirtiest) of which is the process.nextTick() function.
As others have explained, if you need to write truly non-blocking processor-intensive code, then the correct way to do it is to implement it as a separate program, and to then invoke that external program from your Node.js code. Remember:
Not in your Node.js code == I/O == non-blocking
I hope this article has cleared up more confusion than it's created. I don't think I've explained anything totally new here, but I believe I've explained a number of concepts from a perspective that others haven't considered very thoroughly, and with some new and refreshing examples. As I said, I'm still brand new to Node.js myself. Anyway, happy coding, and feel free to add your two cents below.
]]>
Batch updating Drupal 7 field data2012-11-08T00:00:00Z2012-11-08T00:00:00ZJazahttps://greenash.net.au/thoughts/2012/11/batch-updating-drupal-7-field-data/
On a number of my recently-built Drupal sites, I've become a fan of using the Computed Field module to provide a "search data" field, as a Views exposed filter. This technique has been documented by other folks here and there (I didn't invent it), so I won't cover its details here. Basically, it's a handy way to create a search form that searches exactly the fields you're interested in, thus providing you with more fine-grained control than the core Drupal search module, and with much less installation / configuration overhead than Apache Solr.
On one such site, which has about 4,000+ nodes that are searchable via this technique, I needed to add another field to the index, and re-generate the Computed Field data for every node. This data normally only gets re-generated when each individual node is saved. In my case, that would not be sufficient - I needed the entire search index refreshed immediately.
The obvious solution, would be to whip up a quick script that loops through all the nodes in question, and that calls node_save() on each pass through the loop. However, this solution has two problems. Firstly, node_save() is really slow (particularly when the node has a lot of other fields, such as was my case). So slow, in fact, that in my case I was fighting a losing battle against PHP "maximum execution time exceeded" errors. Secondly, node_save() is slow unnecessarily, as it re-saves all the data for all a node's fields (plus it invokes a bazingaful of hooks), whereas we only actually need to re-save the data for one field (and we don't need any hooks invoked, thanks).
In the interests of both speed and cutting-out-the-cruft, therefore, I present here an alternative solution: getting rid of the middle man (node_save()), and instead invoking the field_storage_write callback directly. Added bonus: I've implemented it using the Batch API functionality available via Drupal 7's hook_update_N().
Show me the code
The below code uses a (pre-defined) Computed field called field_search_data, and processes nodes of type event, news or page. It also sets the limit per batch run to 50 nodes. Naturally, all of this should be modified per your site's setup, when borrowing the code.
<?php
/**
 * Batch update computed field values for 'field_search_data'.
 */
function mymodule_update_7000(&$sandbox) {
  $entity_type = 'node';
  $field_name = 'field_search_data';
  $langcode = 'und';
  $storage_module = 'field_sql_storage';

  $field_id = db_query('SELECT id FROM {field_config} WHERE ' .
  'field_name = :field_name', array(
    ':field_name' => $field_name
    ))->fetchField();

  $field = field_info_field($field_name);
  $types = array(
    'event',
    'news',
    'page',
  );

  // Go through all published nodes in all of the above node types,
  // and generate a new 'search_data' computed value.
  $instance = field_info_instance($entity_type,
                                  $field_name,
                                  $bundle_name);

  if (!isset($sandbox['progress'])) {
    $sandbox['progress'] = 0;
    $sandbox['last_nid_processed'] = -1;
    $sandbox['max'] = db_query('SELECT COUNT(*) FROM {node} WHERE ' .
      'type IN (:types) AND status = 1 ORDER BY nid', array(
        ':types' => $types
      ))->fetchField();

    // I chose to delete existing data for this field, so I can
    // clearly monitor in phpMyAdmin the field data being re-generated.
    // Not necessary to do this.
    // NOTE: do not do this if you have actual important data in
    // this field! In my case it's just a search index, so it's OK.
    // May not be so cool in your case.
    db_query('TRUNCATE TABLE {field_data_' . $field_name . '}');
    db_query('TRUNCATE TABLE {field_revision_' . $field_name . '}');
  }

  $limit = 50;
  $result = db_query_range('SELECT nid FROM {node} WHERE ' .
    'type IN (:types) AND status = 1 AND nid > :lastnid ORDER BY nid',
    0, $limit, array(
      ':types' => $types,
      ':lastnid' => $sandbox['last_nid_processed']
    ));

  while ($nid = $result->fetchField()) {
    $entity = node_load($nid);

    if (!empty($entity->nid)) {
      $items = isset($entity->{$field_name}[$langcode]) ?
                 $entity->{$field_name}[$langcode] :
                 array();

      _computed_field_compute_value($entity_type, $entity, $field,
                                    $instance, $langcode, $items);

      if ($items !== array() ||
          isset($entity->{$field_name}[$langcode])) {
        $entity->{$field_name}[$langcode] = $items;

        // This only writes the data for the single field we're
        // interested in to the database. Much less expensive than
        // the easier alternative, which would be to node_save()
        // every node.
        module_invoke($storage_module, 'field_storage_write',
                      $entity_type, $entity, FIELD_STORAGE_UPDATE,
                      array($field_id));
      }
    }

    $sandbox['progress']++;
    $sandbox['last_nid_processed'] = $nid;
  }

  if (empty($sandbox['max'])) {
    $sandbox['#finished'] = 1.0;
  }
  else {
    $sandbox['#finished'] = $sandbox['progress'] / $sandbox['max'];
  }

  if ($sandbox['#finished'] == 1.0) {
    return t('Updated \'search data\' computed field values.');
  }
}
The feature of note in this code, is that we're updating Field API data without calling node_save(). We're doing this by manually generating the new Computed Field data, via _computed_field_compute_value(); and by then invoking the field_storage_write callback with the help of module_invoke().
Unfortunately, doing it this way is a bit complicated - these functions expect a whole lot of Field API and Entity API parameters to be passed to them, and preparing all these parameters is no walk in the park. Calling node_save() takes care of all this legwork behind the scenes.
This approach still isn't lightning-fast, but it performs significantly better than its alternative. Plus, by avoiding the usual node hook invocations, we also avoid any unwanted side-effects of simulating a node save operation (e.g. creating a new revision, affecting workflow state).
To execute the procedure as it's implemented here, all you need to do is visit update.php in your browser (or run drush updb from your terminal), and it will run as a standard Drupal database update. In my case, I chose to implement it in hook_update_N(), because: it gives me access to the Batch API for free; it's guaranteed to run only once; and it's protected by superuser-only access control. But, for example, you could also implement it as a custom admin page, calling the Batch API from a menu callback within your module.
Just one example
The use case presented here – a Computed Field used as a search index for Views exposed filters – is really just one example of how this technique could come in handy. What I'm trying to provide in this article, is a code template that can be applied to any scenario in which a single field (or a small number of fields) needs to be modified across a large volume of existing nodes (or other entities).
I can think of quite a few other potential scenarios. A custom "phone" field, where a region code needs to be appended to all existing data. A "link" field, where any existing data missing a "www" prefix needs to have it added. A node reference field, where certain saved Node IDs need to be re-mapped to new values, because the old pages have been archived. Whatever your specific requirement, I hope this code snippet makes your life a bit easier, and your server load a bit lighter.
]]>
Introducing the Drupal Handy Block module2012-06-08T00:00:00Z2012-06-08T00:00:00ZJazahttps://greenash.net.au/thoughts/2012/06/introducing-the-drupal-handy-block-module/
I've been noticing more and more lately, that for every new Drupal site I build, I define a lot of custom blocks. I put the code for these blocks in one or more custom modules, and most of them are really simple. For me, at least, the most common task that these blocks perform, is to display one or more fields of the node (or other entity) page currently being viewed; and in second place, is the task of displaying a list of nodes from a nodequeue (as I'm rather a Nodequeue module addict, I tend to have nodequeues strewn all over my sites).
In short, I've gotten quite bored of copy-pasting the same block definition code over and over, usually with minimal changes. I also feel that such simple block definitions don't warrant defining a new custom module – as they have zero interesting logic / functionality, and as their purpose is purely presentational, I'd prefer to define them at the theme level. Additionally, every Drupal module has both administrative overhead (need to install / enable it on different environments, need to manage its deployment, etc), and performance overhead (every extra PHP include() call involves opening and reading a new file from disk, and every enabled Drupal module is a minimum of one extra PHP file to be included); so, less enabled modules means a faster site.
To make my life easier – and the life of anyone else in the same boat – I've written the Handy Block module. (As the project description says,) if you often have a bunch of custom modules on your site, that do nothing except implement block hooks (along with block callback functions), for blocks that do little more than display some fields for the entity currently being viewed, then Handy Block should… well, it should come in handy! You'll be able to do the same thing in just a few lines of your template.php file; and then, you can delete those custom modules of yours altogether.
The custom module way
Let me give you a quick example. Your page node type has two fields, called sidebar_image and sidebar_text. You'd like these two fields to display in a sidebar block, whenever they're available for the page node currently being viewed.
Using a custom module, how would you achieve this?
First of all, you have to build the basics for your new custom module. In this case, let's say you want to call your module pagemod – you'll need to start off by creating a pagemod directory (in, for example, sites/all/modules/custom), and writing a pagemod.info file that looks like this:
name = Page Mod
description = Custom module that does bits and pieces for page nodes.
core = 7.x
files[] = pagemod.module
You'll also need an almost-empty pagemod.module file:
<?php

/**
 * @file
 * Custom module that does bits and pieces for page nodes.
 */
Your module now exists – you can enable it if you want. Now, you can start building your sidebar block – let's say that you want to call it sidebar_snippet. First off, you need to tell Drupal that the block exists, by implementing hook_block_info() (note: this and all following code goes in pagemod.module, unless otherwise indicated):
Next, you need to define what gets shown in your new block. You do this by implementing hook_block_view():
<?php
/**
 * Implements hook_block_view().
 */
function pagemod_block_view($delta = '') {
  switch ($delta) {
    case 'sidebar_snippet':
      return pagemod_sidebar_snippet_block();
  }
}
To keep things clean, it's a good idea to call a function for each defined block in hook_block_view(), rather than putting all your code directly in the hook function. Right now, you only have one block to render; but before you know it, you may have fifteen. So, let your block do its stuff here:
<?php
/**
 * Displays the sidebar snippet on page nodes.
 */
function pagemod_sidebar_snippet_block() {
  // Pretend that your module also contains this function - for code
  // example, see handyblock_get_curr_page_node() in handyblock.module.
  $node = pagemod_get_curr_page_node();
  if (empty($node->nid) || !($node->type == 'page')) {
    return;
  }

  if (!empty($node->field_sidebar_image['und'][0]['uri'])) {
    // Pretend that your module also contains this function - for code
    // example, see tpl_field_vars_styled_image_url() in
    // tpl_field_vars.module
    $image_url = pagemod_styled_image_url($node->field_sidebar_image
                                          ['und'][0]['uri'],
                                          'sidebar_image');

    $body = '';
    if (!empty($node->field_sidebar_text['und'][0]['safe_value'])) {
      $body = $node->field_sidebar_text['und'][0]['safe_value'];
    }

    $block['content'] = array(
      '#theme' => 'pagemod_sidebar_snippet',
      '#image_url' => $image_url,
      '#body' => $body,
    );

    return $block;
  }
}
Almost done. Drupal now recognises that your block exists, which means that you can enable your block and assign it to a region on the administer -> structure -> blocks page. Drupal will execute the code you've written above, when it tries to display your block. However, it won't yet display anything much, because you've defined your block as having a custom theme function, and that theme function hasn't been written yet.
Because you're an adherent of theming best practices, and you like to output all parts of your page using theme templates rather than theme functions, let's register this themable item, and let's define it as having a template:
And, as the final step, you'll need to create a pagemod-sidebar-snippet.tpl.php file (also in your pagemod module directory), to actually output your block:
Give your Drupal cache a good ol' clear, and voila – it sure took a while, but you've finally got your sidebar block built and displaying.
The Handy Block way
Now, to contrast, let's see how you'd achieve the same result, using the Handy Block module. No need for any of the custom pagemod module stuff above. Just enable Handy Block, and then place this code in your active theme's template.php file:
The MYTHEME_handyblock() callback automatically takes care of all three of the Drupal hook implementations that you previously had to write manually: hook_block_info(), hook_block_view(), and hook_theme(). The MYTHEME_handyblock_BLOCKNAME_alter() callback lets you do whatever you want to your block, after automatically providing the current page node as context, and setting the block's theme callback (in this case, the callback is controlling the block's visibility based on whether an image is available or not; and it's populating the block with the image and text fields).
Handy Block has done the "paperwork" (i.e. the hook implementations), such that Drupal expects a handyblock-sidebar-snippet.tpl.php file for this block (in your active theme's directory). So, let's create one (looks the same as the old pagemod-sidebar-snippet.tpl.php template):
After completing these steps, clear your Drupal cache, and assign your block to a region – and hey presto, you've got your custom block showing. Only this time, no custom module was needed, and significantly fewer lines of code were written.
In summary
Handy Block is not rocket science. (As the project description says,) this is a convenience module, for module developers and for themers. All it really does, is automate a few hook implementations for you. By implementing the Handy Block theme callback function, Handy Block implements hook_theme(), hook_block_info(), and hook_block_view() for you.
Handy Block is for Drupal site builders, who find themselves building a lot of blocks that:
Display more than just static text (if that's all you need, just use the 'add block' feature in the Drupal core block module)
Display something which is pretty basic (e.g. fields of the node currently being viewed), but which does require some custom code (albeit code that doesn't warrant a whole new custom module on your site)
Require a custom theme template
I should also mention that, before starting work on Handy Block, I had a look around for similar existing Drupal modules, and I found two interesting candidates. Both can be used to do the same thing that I've demonstrated in this article; however, I decided to go ahead and write Handy Block anyway, and I did so because I believe Handy Block is a better tool for the job (for the target audience that I have in mind, at least). Nevertheless, I encourage you to have a look at the competition as well.
The first alternative is CCK Blocks. This module lets you achieve similar results to Handy Block – however, I'm not so keen on it for several reasons: all its config is through the Admin UI (and I want my custom block config in code); it doesn't let you do anything more than output fields of the entity currently being viewed (and I want other options too, e.g. output a nodequeue); and it doesn't allow for completely custom templates for each block (although overriding its templates would probably be adequate in many cases).
The second alternative is Bean. I'm actually very impressed with what this module has to offer, and I'm hoping to take it for a spin sometime soon. However, for me, it seems that the Bean module is too far in the opposite extreme (compared to CCK Blocks) – whereas CCK blocks is too "light" and only has an admin UI for configuration, the Bean module is too complicated for simple use cases, as it requires implementing no small amount of code, within some pretty complex custom hooks. I decided against using Bean, because: it requires writing code within custom modules (not just at the theme layer); it's designed for things more complicated than just outputting fields of the entity currently being viewed (e.g. for performing custom Entity queries in a block, but without the help of Views); and it's above the learning curve of someone who primarily wears a Drupal themer hat.
Apart from the administrative and performance benefits of defining custom blocks in your theme's template.php file (rather than in a custom module), doing all the coding at the theme level also has another advantage. It makes custom block creation more accessible to people who are primarily themers, and who are reluctant (at best) module developers. This is important, because those big-themer-hat, small-developer-hat people are the primary target audience of this module (with the reverse – i.e. big-developer-hat, small-themer-hat people – being the secondary target audience).
Such people are scared and reluctant to write modules; they're more comfortable sticking to just the theme layer. Hopefully, this module will make custom block creation more accessible, and less daunting, for such people (and, in many cases, custom block creation is a task that these people need to perform quite often). I also hope that the architecture of this module – i.e. a callback function that must be implemented in the active theme's template.php file, not in a module – isn't seen as a hack or as un-Drupal-like. I believe I've justified fairly thoroughly, why I made this architecture decision.
I also recommend that you use Template Field Variables in conjunction with Handy Block (see my previous article about Template Field Variables). Both of them are utility modules for themers. The idea is that, used stand-alone or used together, these modules make a Drupal themer's life easier. Happy theming, and please let me know your feedback about the module.
]]>
Introducing the Drupal Template Field Variables module2012-05-29T00:00:00Z2012-05-29T00:00:00ZJazahttps://greenash.net.au/thoughts/2012/05/introducing-the-drupal-template-field-variables-module/
Drupal 7's new Field API is a great feature. Unfortunately, theming an entity and its fields can be quite a daunting task. The main reason for this, is that the field variables that get passed to template files are not particularly themer-friendly. Themers are HTML markup and CSS coders; they're not PHP or Drupal coders. When themers start writing their node--page.tpl.php file, all they really want to know is: How do I output each field of this page [node type], exactly where I want, and with minimal fuss?
It is in the interests of improving the Drupal Themer Experience, therefore, that I present the Template Field Variables module. (As the project description says,) this module takes the mystery out of theming fieldable entities. For each field in an entity, it extracts the values that you actually want to output (from the infamous "massive nested arrays" that Drupal provides), and it puts those values in dead-simple variables.
What we've got
Let me tell you a story, about an enthusiastic fledgling Drupal themer. The sprightly lad has just added a new text field, called byline, to his page node type in Drupal 7. He wants to output this field at the bottom of his node--page.tpl.php file, in a blockquote tag.
Using nothing but Drupal 7 core, how does he do it?
He's got two options. His first option — the "Drupal 7 recommended" option — is to use the Render API, to hide the byline from the spot where all the node's fields get outputted by default; and to then render() it further down the page.
Well, says the budding young themer, that sure sounds easy enough. So, the themer goes and reads up on how to use the Render API, finds the example snippets of hide($content['bla']); and print render($content['bla']);, and whips up a template file:
<?php
/* My node--page.tpl.php file. It rocks. */
?>

<?php // La la la, do some funky template stuff. ?>

<?php // Don't wanna show this in the spot where Drupal vomits
      // out content by default, let's call hide(). ?>
<?php hide($content['field_byline']); ?>

<?php // Now Drupal can have a jolly good ol' spew. ?>
<?php print render($content); ?>

<?php // La la la, more funky template stuff. ?>

<?php // This is all I need in order to output the byline at the
      // bottom of the page in a blockquote, right? ?>
<blockquote><?php print render($content['field_byline']); ?></blockquote>
Now, let's see what page output that gives him:
<!-- La la la, this is my page output. -->
<!-- La la la, Drupal spewed out all my fields here. -->
<!-- La la... hey!! What the..?! Why has Drupal spewed out a -->
<!-- truckload of divs, and a label, that I didn't order? -->
<!-- I just want the byline, $#&%ers!! -->
<blockquote><div class="field field-name-field-byline field-type-text field-label-above"><div class="field-label">Byline: </div><div class="field-items"><div class="field-item even">It's hip to be about something</div></div></div></blockquote>
Our bright-eyed Drupal theming novice was feeling pretty happy with his handiwork so far. But now, disappointment lands. All he wants is the actual value of the byline. No div soup. No random label. He created a byline field. He saved a byline value to a node. Now he wants to output the byline, and only the byline. What more could possibly be involved, in such a simple task?
He racks his brains, searching for a solution. He's not a coder, but he's tinkered with PHP before, and he's pretty sure it's got some thingamybob that lets you cut stuff out of a string that you don't want. After a bit of googling, he finds the code snippets he needs. Ah! He exclaims. This should do the trick:
<?php // I knew I was born to be a Drupal ninja. Behold my
// marvellous creation! ?>
<blockquote><?php print str_replace('<div class="field field-name-field-byline field-type-text field-label-above"><div class="field-label">Byline: </div><div class="field-items"><div class="field-item even">', '', str_replace('</div></div></div>', '', render($content['field_byline']))); ?></blockquote>
Now, now, Drupal veterans – don't cringe. I know you've all seen it in a real-life project. Perhaps you even wrote it yourself, once upon a time. So, don't be too quick to judge the young grasshopper harshly.
However, although the str_replace() snippet does indeed do the trick, even our newbie grasshopper recognises it for the abomination and the kitten-killer that it is, and he cannot live knowing that a git blame on line 47 of node--page.tpl.php will forever reveal the awful truth. So, he decides to read up a bit more, and he finally discovers that the recommended solution is to create your own field.tpl.php override file. So, he whips up a one-line field--field-byline.tpl.php file:
<?php print render($item); ?>
And, at long last, he's got the byline and just the byline outputting… and he's done it The Drupal Way!
The newbie themer begins to feel more at ease. He's happy that he's learnt how to build template files in a Drupal 7 theme, without resorting to hackery. To celebrate, he snacks on juicy cherries dipped in chocolate-flavoured custard.
But a niggling concern remains at the back of his mind. Perhaps what he's done is The Drupal Way, but he's still not convinced that it's The Right Way. It seems like a lot of work — calling hide(); in one spot, having to call print render(); (not just print) further down, having to override field.tpl.php — and all just to output a simple little byline. Is there really no one-line alternative?
Ever optimistic, the aspiring Drupal themer continues searching, until at last he discovers that it is possible to access the raw field values from a node template. And so, finally, he settles for a solution that he's more comfortable with:
<?php
/* My node--page.tpl.php file. It rocks. */
?>

<?php // La la la, do some funky template stuff. ?>

<?php // Still need hide(), unless I manually output all my node fields,
// and don't call print render($content);
// grumble grumble... ?>
<?php hide($content['field_byline']); ?>

<?php // Now Drupal can have a jolly good ol' spew. ?>
<?php print render($content); ?>

<?php // La la la, more funky template stuff. ?>

<?php // Yay - I actually got the raw byline value to output here! ?>
<blockquote><?php print check_plain($node->field_byline[$node->language][0]['value']); ?></blockquote>
And so the sprightly young themer goes on his merry way, and hacks up .tpl.php files happily ever after.
Why all that sucks
That's the typical journey of someone new to Drupal theming, and/or new to the Field API, who wants to customise the output of fields for an entity. It's flawed for a number of reasons:
We're making themers learn how to make function calls unnecessarily. It's OK to make them learn function calls if they need to do something fancy. But in the case of the Render API, they need to learn two – hide() and render() – just to output something. All they should need to know is print.
We're making themers understand a complex, unnecessary, and artificially constructed concept: the Render API. Themers don't care how Drupal constructs the page content, they don't care what render arrays are (or if they exist); and they shouldn't have to care.
We're making it unnecessarily difficult to output raw values, using the recommended theming method (i.e. using the Render API). In order to output raw values using the render API, you basically have to override field.tpl.php in the manner illustrated above. This will prove to be too advanced (or simply too much effort) for many themers, who may resort to the type of string-replacement hackery described above.
The only actual method of outputting the raw value directly is fraught with problems:
It requires a long line of code, that drills deep into nested arrays / objects before it can print the value
Those nested arrays / objects are hard even for experienced developers to navigate / debug, let alone newbie themers
It requires themers to concern themselves with field translation and with the i18n API
Guesswork is needed for determining the exact key that will yield the outputtable value, at the end of the nested array (usually 'value', but sometimes not, e.g. 'url' for link fields)
It's highly prone to security issues, as there's no way that novice themers can be expected to understand when to use 'value' vs 'safe_value', when check_plain() / filter_xss_admin() should be called, etc. (even experienced developers often misuse or omit Drupal's string output security, as anyone who's familiar with the Drupal security advisories would know)
In a nutshell: the current system has too high a learning curve, it's unnecessarily complex, and it unnecessarily exposes themers to security risks.
A better way
Now let me tell you another story, about that same enthusiastic fledgling Drupal themer, who wanted to show his byline in a blockquote tag. This time, he's using Drupal 7 core, plus the Template Field Variables module.
First, he opens up his template.php file, and adds the following:
After doing this (and after clearing his cache), he opens up his node (of type 'page') in a browser; and because he's set 'debug' => TRUE (above), he sees this output on page load:
$body =
<p>There was a king who had twelve beautiful daughters. They slept in
twelve beds all in one room; and when they went to bed, the doors were
shut and locked up; but every morning their shoes were found to be
quite worn through as if they had been danced in all night; and yet
nobody could find out how it happened, or where they had been.</p>
<p>Then the king made it known to all the land, that if any person
could discover the secret, and find out where it was that the
princesses danced in the night, he should have the one he liked best
for his wife, and should be king after his ...
$byline =
It's hip to be about something
And now, he has all the info he needs in order to write his new node--page.tpl.php file, which looks like this:
<?php
/* My node--page.tpl.php file. It rocks. */
?>

<?php // La la la, do some funky template stuff. ?>

<?php // No spewing, please, Drupal - just the body field. ?>
<?php print $body; ?>

<?php // La la la, more funky template stuff. ?>

<?php // Output the byline here, pure and simple. ?>
<blockquote><?php print $byline; ?></blockquote>
He sets 'debug' => FALSE in his template.php file, he reloads the page in his browser, and… voila! He's done theming for the day.
About the module
The story that I've told above, describes the purpose and function of the Template Field Variables module better than a plain description can. (As the project description says,) it's a utility module for themers. Its only purpose is to make Drupal template development less painful. It has no front-end. It stores no data. It implements no hooks. In order for it to do anything, some coding is required, but only coding in your theme files.
I've illustrated here the most basic use case of Template Field Variables, i.e. outputting simple text fields. However, the module's real power lies in its ability to let you print out the values of more complex field types, just as easily. Got an image field? Want to print out the URL of the original-size image, plus the URLs of any/all of the resized derivatives of that image… and all in one print statement? Got a date field, and want to output the 'start date' and 'end date' values with minimal fuss? Got a nodereference field, and want to output the referenced node's title within an h3 tag? Got a field with multiple values, and want to loop over those values in your template, just as easily as you output a single value? For all these use cases, Template Field Variables is your friend.
If you never want to again see a template containing:
And if, from this day forward, you only ever want to see a template containing:
<?php print $foo; ?>
Then I really think you should take Template Field Variables for a spin. You may discover, for the first time in your life, that Drupal theming can actually be fun. And sane.
]]>
Flattening many-to-many fields for MySQL to CSV export2012-05-23T00:00:00Z2012-05-23T00:00:00ZJazahttps://greenash.net.au/thoughts/2012/05/flattening-many-to-many-fields-for-mysql-to-csv-export/
Relational databases are able to store, with minimal fuss, pretty much any data entities you throw at them. For the more complex cases – particularly cases involving hierarchical data – they offer many-to-many relationships. Querying many-to-many relationships is usually quite easy: you perform a series of SQL joins in your query; and you retrieve a result set containing the combination of your joined tables, in denormalised form (i.e. with the data from some of your tables being duplicated in the result set).
A denormalised query result is quite adequate, if you plan to process the result set further – as is very often the case, e.g. when the result set is subsequently prepared for output to HTML / XML, or when the result set is used to populate data structures (objects / arrays / dictionaries / etc) in programming memory. But what if you want to export the result set directly to a flat format, such as a single CSV file? In this case, denormalised form is not ideal. It would be much better, if we could aggregate all that many-to-many data into a single result set containing no duplicate data, and if we could do that within a single SQL query.
This article presents an example of how to write such a query in MySQL – that is, a query that's able to aggregate complex many-to-many relationships, into a result set that can be exported directly to a single CSV file, with no additional processing necessary.
Example: a lil' Bio database
For this article, I've whipped up a simple little schema for a biographical database. The database contains, first and foremost, people. Each person has, as his/her core data: a person ID; a first name; a last name; and an e-mail address. Each person also optionally has some additional bio data, including: bio text; date of birth; and gender. Additionally, each person may have zero or more: profile pictures (with each picture consisting of a filepath, nothing else); web links (with each link consisting of a title and a URL); and tags (with each tag having a name, existing in a separate tags table, and being linked to people via a joining table). For the purposes of the example, we don't need anything more complex than that.
Here's the SQL to create the example schema:
CREATE TABLE person (
  pid int(10) unsigned NOT NULL AUTO_INCREMENT,
  firstname varchar(255) NOT NULL,
  lastname varchar(255) NOT NULL,
  email varchar(255) NOT NULL,
  PRIMARY KEY (pid),
  UNIQUE KEY email (email),
  UNIQUE KEY firstname_lastname (firstname(100), lastname(100))
) ENGINE=MyISAM DEFAULT CHARSET=utf8 AUTO_INCREMENT=1;

CREATE TABLE tag (
  tid int(10) unsigned NOT NULL AUTO_INCREMENT,
  tagname varchar(255) NOT NULL,
  PRIMARY KEY (tid),
  UNIQUE KEY tagname (tagname)
) ENGINE=MyISAM DEFAULT CHARSET=utf8 AUTO_INCREMENT=1;

CREATE TABLE person_bio (
  pid int(10) unsigned NOT NULL,
  bio text NOT NULL,
  birthdate varchar(255) NOT NULL DEFAULT '',
  gender varchar(255) NOT NULL DEFAULT '',
  PRIMARY KEY (pid),
  FULLTEXT KEY bio (bio)
) ENGINE=MyISAM DEFAULT CHARSET=utf8;

CREATE TABLE person_pic (
  pid int(10) unsigned NOT NULL,
  pic_filepath varchar(255) NOT NULL,
  PRIMARY KEY (pid, pic_filepath)
) ENGINE=MyISAM DEFAULT CHARSET=utf8;

CREATE TABLE person_link (
  pid int(10) unsigned NOT NULL,
  link_title varchar(255) NOT NULL DEFAULT '',
  link_url varchar(255) NOT NULL DEFAULT '',
  PRIMARY KEY (pid, link_url),
  KEY link_title (link_title)
) ENGINE=MyISAM DEFAULT CHARSET=utf8;

CREATE TABLE person_tag (
  pid int(10) unsigned NOT NULL,
  tid int(10) unsigned NOT NULL,
  PRIMARY KEY (pid, tid)
) ENGINE=MyISAM DEFAULT CHARSET=utf8;
And here's the SQL to insert some sample data into the schema:
INSERT INTO person (firstname, lastname, email) VALUES ('Pete', 'Wilson', 'pete@wilson.com');
INSERT INTO person (firstname, lastname, email) VALUES ('Sarah', 'Smith', 'sarah@smith.com');
INSERT INTO person (firstname, lastname, email) VALUES ('Jane', 'Burke', 'jane@burke.com');

INSERT INTO tag (tagname) VALUES ('awesome');
INSERT INTO tag (tagname) VALUES ('fantabulous');
INSERT INTO tag (tagname) VALUES ('sensational');
INSERT INTO tag (tagname) VALUES ('mind-boggling');
INSERT INTO tag (tagname) VALUES ('dazzling');
INSERT INTO tag (tagname) VALUES ('terrific');

INSERT INTO person_bio (pid, bio, birthdate, gender) VALUES (1, 'Great dude, loves elephants and tricycles, is really into coriander.', '1965-04-24', 'male');
INSERT INTO person_bio (pid, bio, birthdate, gender) VALUES (2, 'Eccentric and eclectic collector of phoenix wings. Winner of the 2003 International Small Elbows Award.', '1982-07-20', 'female');
INSERT INTO person_bio (pid, bio, birthdate, gender) VALUES (3, 'Has purply-grey eyes. Prefers to only go out on Wednesdays.', '1990-11-06', 'female');

INSERT INTO person_pic (pid, pic_filepath) VALUES (1, 'files/person_pic/pete1.jpg');
INSERT INTO person_pic (pid, pic_filepath) VALUES (1, 'files/person_pic/pete2.jpg');
INSERT INTO person_pic (pid, pic_filepath) VALUES (1, 'files/person_pic/pete3.jpg');
INSERT INTO person_pic (pid, pic_filepath) VALUES (3, 'files/person_pic/jane_on_wednesday.jpg');

INSERT INTO person_link (pid, link_title, link_url) VALUES (2, 'The Great Blog of Sarah', 'http://www.omgphoenixwingsaresocool.com/');
INSERT INTO person_link (pid, link_title, link_url) VALUES (3, 'Catch Jane on Blablablabook', 'http://www.blablablabook.com/janepurplygrey');
INSERT INTO person_link (pid, link_title, link_url) VALUES (3, 'Jane ranting about Thursdays', 'http://www.janepurplygrey.com/thursdaysarelame/');

INSERT INTO person_tag (pid, tid) VALUES (1, 3);
INSERT INTO person_tag (pid, tid) VALUES (1, 4);
INSERT INTO person_tag (pid, tid) VALUES (1, 5);
INSERT INTO person_tag (pid, tid) VALUES (1, 6);
INSERT INTO person_tag (pid, tid) VALUES (2, 2);
Querying for direct CSV export
If we were building, for example, a simple web app to output a list of all the people in this database (along with all their biographical data), querying this database would be quite straightforward. Most likely, our first step would be to query the one-to-one data: i.e. query the main 'person' table, join on the 'bio' table, and loop through the results (in a server-side language, such as PHP). The easiest way to get at the rest of the data, in such a case, would be to then query each of the many-to-many relationships (i.e. user's pictures; user's links; user's tags) in separate SQL statements, and to execute each of those queries once for each user being processed.
In that scenario, we'd be writing four different SQL queries, and we'd be executing SQL numerous times: we'd execute the main query once, and we'd execute each of the three secondary queries, once for each user in the database. So, with the sample data provided here, we'd be executing SQL 1 + (3 x 3) = 10 times.
Alternatively, we could write a single query which joins together all of the three many-to-many relationships in one go, and our web app could then just loop through a single result set. However, this result set would potentially contain a lot of duplicate data, as well as a lot of NULL data. So, the web app's server-side code would require extra logic, in order to deal with this messy result set effectively.
In our case, neither of the above solutions is adequate. We can't afford to write four separate queries, and to perform 10 query executions. We don't want a single result set that contains duplicate data and/or excessive NULL data. We want a single query, that produces a single result set, containing one person per row, and with all the many-to-many data for each person aggregated into that person's single row.
Here's the magic SQL that can make our miracle happen:
SELECT        person_base.pid,
              person_base.firstname,
              person_base.lastname,
              person_base.email,
              IFNULL(person_base.bio, '') AS bio,
              IFNULL(person_base.birthdate, '') AS birthdate,
              IFNULL(person_base.gender, '') AS gender,
              IFNULL(pic_join.val, '') AS pics,
              IFNULL(link_join.val, '') AS links,
              IFNULL(tag_join.val, '') AS tags
FROM (
    SELECT        p.pid,
                  p.firstname,
                  p.lastname,
                  p.email,
                  IFNULL(pb.bio, '') AS bio,
                  IFNULL(pb.birthdate, '') AS birthdate,
                  IFNULL(pb.gender, '') AS gender
    FROM          person p
    LEFT JOIN     person_bio pb
    ON            p.pid = pb.pid
) AS person_base
LEFT JOIN (
    SELECT        join_tbl.pid,
                  IFNULL(
                      GROUP_CONCAT(
                          DISTINCT CAST(join_tbl.pic_filepath AS CHAR)
                          SEPARATOR ';;'
                      ),
                      ''
                  ) AS val
    FROM          person_pic join_tbl
    GROUP BY      join_tbl.pid
) AS pic_join
ON            person_base.pid = pic_join.pid
LEFT JOIN (
    SELECT        join_tbl.pid,
                  IFNULL(
                      GROUP_CONCAT(
                          DISTINCT CONCAT(
                              CAST(join_tbl.link_title AS CHAR),
                              '::',
                              CAST(join_tbl.link_url AS CHAR)
                          )
                          SEPARATOR ';;'
                      ),
                      ''
                  ) AS val
    FROM          person_link join_tbl
    GROUP BY      join_tbl.pid
) AS link_join
ON            person_base.pid = link_join.pid
LEFT JOIN (
    SELECT        join_tbl.pid,
                  IFNULL(
                      GROUP_CONCAT(
                          DISTINCT CAST(t.tagname AS CHAR)
                          SEPARATOR ';;'
                      ),
                      ''
                  ) AS val
    FROM          person_tag join_tbl
    LEFT JOIN     tag t
    ON            join_tbl.tid = t.tid
    GROUP BY      join_tbl.pid
) AS tag_join
ON            person_base.pid = tag_join.pid
ORDER BY      lastname ASC,
              firstname ASC;
If you run this in a MySQL admin tool that supports exporting query results directly to CSV (such as phpMyAdmin), then there's no more fancy work needed on your part. Just click 'Export -> CSV', and you'll have your results looking like this:
pid,firstname,lastname,email,bio,birthdate,gender,pics,links,tags
3,Jane,Burke,jane@burke.com,Has purply-grey eyes. Prefers to only go out on Wednesdays.,1990-11-06,female,files/person_pic/jane_on_wednesday.jpg,Catch Jane on Blablablabook::http://www.blablablabook.com/janepurplygrey;;Jane ranting about Thursdays::http://www.janepurplygrey.com/thursdaysarelame/,
2,Sarah,Smith,sarah@smith.com,Eccentric and eclectic collector of phoenix wings. Winner of the 2003 International Small Elbows Award.,1982-07-20,female,,The Great Blog of Sarah::http://www.omgphoenixwingsaresocool.com/,fantabulous
1,Pete,Wilson,pete@wilson.com,Great dude, loves elephants and tricycles, is really into coriander.,1965-04-24,male,files/person_pic/pete1.jpg;;files/person_pic/pete2.jpg;;files/person_pic/pete3.jpg,,sensational;;mind-boggling;;dazzling;;terrific
The query explained
The most important feature of this query, is that it takes advantage of MySQL's ability to perform subqueries. What we're actually doing, is we're performing four separate queries: one query on the main person table (which joins to the person_bio table); and one on each of the three many-to-many elements of a person's bio. We're then joining these four queries, and selecting data from all of their result sets, in the parent query.
The magic function in this query, is the MySQL GROUP_CONCAT() function. This basically allows us to join together the results of a particular field, using a delimiter string, much like the join() array-to-string function in many programming languages (i.e. like PHP's implode() function). In this example, I've used two semicolons (;;) as the delimiter string.
In the case of person_link in this example, each row of this data has two fields ('link title' and 'link URL'); so, I've concatenated the two fields together (separated by a double-colon (::) string), before letting GROUP_CONCAT() work its wonders.
The case of person_tags is also interesting, as it demonstrates performing an additional join within the many-to-many subquery, and returning data from that joined table (i.e. the tag name) as the result value. So, all up, each of the many-to-many relationships in this example is a slightly different scenario: person_pic is the basic case of a single field within the many-to-many data; person_link is the case of more than one field within the many-to-many data; and person_tags is the case of an additional one-to-many join, on top of the many-to-many join.
Final remarks
Note that although this query depends on several MySQL-specific features, most of those features are available in a fairly equivalent form, in most other major database systems. Subqueries vary quite little between the DBMSes that support them. And it's possible to achieve GROUP_CONCAT() functionality in PostgreSQL, in Oracle, and even in SQLite.
It should also be noted that it would be possible to achieve the same result (i.e. the same end CSV output), using 10 SQL query executions and a whole lot of PHP (or other) glue code. However, taking that route would involve more code (spread over four queries and numerous lines of procedural glue code), and it would invariably suffer worse performance (although I make no guarantees as to the performance of my example query, I haven't benchmarked it with particularly large data sets).
This querying trick was originally written in order to export data from a Drupal MySQL database, to a flat CSV file. The many-to-many relationships were referring to field tables, as defined by Drupal's Field API. I made the variable names within the subqueries as generic as possible (e.g. join_tbl, val), because I needed to copy the subqueries numerous times (for each of the numerous field data tables I was dealing with), and I wanted to make as few changes as possible on each copy.
The trick is particularly well-suited to Drupal Field API data (known in Drupal 6 and earlier as 'CCK data'). However, I realised that it could come in useful with any database schema where a "flattening" of many-to-many fields is needed, in order to perform a CSV export with a single query. Let me know if you end up adopting this trick for schemas of your own.
]]>
Enriching user-entered HTML markup with PHP parsing2012-05-10T00:00:00Z2012-05-10T00:00:00ZJazahttps://greenash.net.au/thoughts/2012/05/enriching-user-entered-html-markup-with-php-parsing/
I recently found myself faced with an interesting little web dev challenge. Here's the scenario. You've got a site that's powered by a PHP CMS (in this case, Drupal). One of the pages on this site contains a number of HTML text blocks, each of which must be user-editable with a rich-text editor (in this case, TinyMCE). However, some of the HTML within these text blocks (in this case, the unordered lists) needs some fairly advanced styling – the kind that's only possible either with CSS3 (using, for example, nth-child pseudo-selectors), with JS / jQuery manipulation, or with the addition of some extra markup (for example, some first, last, and first-in-row classes on the list item elements).
Naturally, IE7+ compatibility is required – so, CSS3 selectors are out. Injecting element attributes via jQuery is a viable option, but it's an ugly approach, and it may not kick in immediately on page load. Since the users will be editing this content via WYSIWYG, we can't expect them to manually add CSS classes to the markup, or to maintain any markup that the developer provides in such a form. That leaves only one option: injecting extra attributes on the server-side.
When it comes to HTML manipulation, there are two general approaches. The first is Parsing HTML The Cthulhu Way (i.e. using Regular Expressions). However, you already have one problem to solve – do you really want two? The second is to use an HTML parser. Sadly, this problem must be solved in PHP – which, unlike some otherlanguages, lacks an obvioustool of choice in the realm of parsers. I chose to use PHP5's built-in DOMDocument library, which (from what I can tell) is one of the most mature and widely-used PHP HTML parsers available today. Here's my code snippet.
Markup parsing function
<?php
/**
* Parses the specified markup content for unordered lists, and enriches
* the list markup with unique identifier classes, 'first' and 'last'
* classes, 'first-in-row' classes, and a prepended inside element for
* each list item.
*
* @param $content
* The markup content to enrich.
* @param $id_prefix
* Each list item is given a class with name 'PREFIX-item-XX'.
* Optional.
* @param $items_per_row
* For each Nth element, add a 'first-in-row' class. Optional.
* If not set, no 'first-in-row' classes are added.
* @param $prepend_to_li
* The name of an HTML element (e.g. 'span') to prepend inside
* each liist item. Optional.
*
* @return
* Enriched markup content.
*/
function enrich_list_markup($content, $id_prefix = NULL,
$items_per_row = NULL, $prepend_to_li = NULL) {
// Trim leading and trailing whitespace, DOMDocument doesn't like it.
$content = preg_replace('/^ */', '', $content);
$content = preg_replace('/ *$/', '', $content);
$content = preg_replace('/ *\n */', "\n", $content);
// Remove newlines from the content, DOMDocument doesn't like them.
$content = preg_replace('/[\r\n]/', '', $content);
$doc = new DOMDocument();
$doc->loadHTML($content);
foreach ($doc->getElementsByTagName('ul') as $ul_node) {
$i = 0;
foreach ($ul_node->childNodes as $li_node) {
$li_class_list = array();
if ($id_prefix) {
$li_class_list[] = $id_prefix . '-item-' . sprintf('%02d', $i+1);
}
if (!$i) {
$li_class_list[] = 'first';
}
if ($i == $ul_node->childNodes->length-1) {
$li_class_list[] = 'last';
}
if (!empty($items_per_row) && !($i % $items_per_row)) {
$li_class_list[] = 'first-in-row';
}
$li_node->setAttribute('class', implode(' ', $li_class_list));
if (!empty($prepend_to_li)) {
$prepend_el = $doc->createElement($prepend_to_li);
$li_node->insertBefore($prepend_el, $li_node->firstChild);
}
$i++;
}
}
$content = $doc->saveHTML();
// Manually fix up HTML entity encoding - if there's a better
// solution for this, let me know.
$content = str_replace('–', '–', $content);
// Manually remove the doctype, html, and body tags that DOMDocument
// wraps around the text. Apparently, this is the only easy way
// to fix the problem:
// http://stackoverflow.com/a/794548
$content = mb_substr($content, 119, -15);
return $content;
}
?>
This is a fairly simple parsing routine, that loops through the li elements of the unordered lists in the text, and that adds some CSS classes, and also prepends a child node. There's some manual cleanup needed after the parsing is done, due to some quirks associated with DOMDocument.
Markup parsing example
For example, say your users have entered the following markup:
You can then whip up some CSS to make your designer happy:
#fruit ul {
  list-style-type: none;
}

#fruit ul li {
  display: block;
  width: 150px;
  padding: 20px 20px 20px 45px;
  float: left;
  margin: 0 0 20px 20px;
  background-color: #bbddfb;
  position: relative;
}

#fruit ul li.first-in-row {
  clear: both;
  margin-left: 0;
}

#fruit ul li span {
  display: block;
  position: absolute;
  left: 20px;
  top: 23px;
  width: 15px;
  height: 15px;
  background-color: #191970;
}

#fruit ul li.first, #fruit ul li.last {
  background-color: #968adc;
}

#fruit ul li.fruit-item-03, #fruit ul li.fruit-item-05 {
  background-color: #7bdca6;
}

#fruit ul li.first span, #fruit ul li.last span {
  background-color: #4b0082;
}

#fruit ul li.fruit-item-03 span, #fruit ul li.fruit-item-05 span {
  background-color: #00611c;
}
Your finished product is bound to win you smiles on every front:
How the parsed markup looks when rendered
Obviously, this is just one example of how a markup parsing function might look, and of the exact end result that you might want to achieve with such parsing. Take everything presented here, and fiddle liberally to suit your needs.
In the approach I've presented here, I believe I've managed to achieve a reasonable balance between stakeholder needs (i.e. easily editable content, good implementation of visual design), hackery, and technical elegance. Also note that this article is not at all CMS-specific (the code snippets work stand-alone), nor is it particularly parser-specific, or even language-specific (although code snippets are in PHP). Feedback welcome.
]]>
Django Facebook user integration with whitelisting2011-11-02T00:00:00Z2011-11-02T00:00:00ZJazahttps://greenash.net.au/thoughts/2011/11/django-facebook-user-integration-with-whitelisting/
It's recently become quite popular for web sites to abandon the tasks of user authentication and account management, and to instead shoulder off this burden to a third-party service. One of the big services available for this purpose is Facebook. You may have noticed "Sign in with Facebook" buttons appearing ever more frequently around the 'Web.
The common workflow for Facebook user integration is: user is redirected to the Facebook login page (or is shown this page in a popup); user enters credentials; user is asked to authorise the sharing of Facebook account data with the non-Facebook source; a local account is automatically created for the user on the non-Facebook site; user is redirected to, and is automatically logged in to, the non-Facebook site. Also quite common is for the user's Facebook profile picture to be queried, and to be shown as the user's avatar on the non-Facebook site.
This article demonstrates how to achieve this common workflow in Django, with some added sugary sweetness: maintaning a whitelist of Facebook user IDs in your local database, and only authenticating and auto-registering users who exist on this whitelist.
Install dependencies
I'm assuming that you've already got an environment set up, that's equipped for Django development. I.e. you've already installed Python (my examples here are tested on Python 2.6 and 2.7), a database engine (preferably SQLite on your local environment), pip (recommended), and virtualenv (recommended). If you want to implement these examples fully, then as well as a dev environment with these basics set up, you'll also need a server to which you can deploy a Django site, and on which you can set up a proper public domain or subdomain DNS (because the Facebook API won't actually talk to or redirect back to your localhost, it refuses to do that).
You'll also need a Facebook account, with which you will be registering a new "Facebook app". We won't actually be developing a Facebook app in this article (at least, not in the usual sense, i.e. we won't be deploying anything to facebook.com), we just need an app key in order to talk to the Facebook API.
Here are the Python dependencies for our Django project. I've copy-pasted this straight out of my requirements.txt file, which I install on a virtualenv using pip install -E . -r requirements.txt (I recommend you do the same):
The first requirement, Django itself, is pretty self-explanatory. The next one, django-allauth, is the foundation upon which this demonstration is built. This app provides authentication and account management services for Facebook (plus Twitter and OAuth currently supported), as well as auto-registration, and profile pic to avatar auto-copying. The version we're using here, is my GitHub fork of the main project, which I've hacked a little bit in order to integrate with our whitelisting functionality.
The Facebook Python SDK is the base integration library provided by the Facebook team, and allauth depends on it for certain bits of functionality. Plus, we've installed django-avatar so that we get local user profile images.
Once you've got those dependencies installed, let's get a new Django project set up with the standard command:
django-admin.py startproject myproject
This will get the Django foundations installed for you. The basic configuration of the Django settings file, I leave up to you. If you have some experience already with Django (and if you've got this far, then I assume that you do), you no doubt have a standard settings template already in your toolkit (or at least a standard set of settings tweaks), so feel free to use it. I'll be going over the settings you'll need specifically for this app, in just a moment.
Fire up ye 'ol runserver, open your browser at http://localhost:8000/, and confirm that the "It worked!" page appears for you. At this point, you might also like to enable the Django admin (add 'admin' to INSTALLED_APPS, un-comment the admin callback in urls.py, and run syncdb; then confirm that you can access the admin). And that's the basics set up!
Register the Facebook app
Now, we're going to jump over to the Facebook side of the setup, in order to register our site as a Facebook app, and to then receive our Facebook app credentials. To get started, go to the Apps section of the Facebook Developers site. You'll probably be prompted to log in with your Facebook account, so go ahead and do that (if asked).
On this page, click the button labelled "Create New App". In the form that pops up, in the "App Display Name" field, enter a unique name for your app (e.g. the name of the site you're using this on — for the example app that I registered, I used the name "FB Whitelist"). Then, tick "I Agree" and click "Continue".
Once this is done, your Facebook app is registered, and you'll be taken to a form that lets you edit the basic settings of the app. The first setting that you'll want to configure is "App Domain": set this to the domain or subdomain URL of your site (without an http:// prefix or a trailing slash). A bit further down, in "Website — Site URL", enter this URL again (this time, with the http:// prefix and a trailing slash). Be sure to save your configuration changes on this page.
Next is a little annoying setting that must be configured. In the "Auth Dialog" section, for "Privacy Policy URL", once again enter the domain or subdomain URL of your site. Enter your actual privacy policy URL if you have one; if not, don't worry — Facebook's authentication API refuses to function if you don't enter something for this, so the URL of your site's front page is better than nothing.
Note: at some point, you'll also need to go to the "Advanced" section, and set "Sandbox Mode" to "Disabled". This is very important! If your app is set to Sandbox mode, then nobody will be able to log in to your Django site via Facebook auth, apart from those listed in the Facebook app config as "developers". It's up to you when you want to disable Sandbox mode, but make sure you do it before non-dev users start trying to log in to your site.
On the main "Settings — Basic" page for your newly-registered Facebook app, take note of the "App ID" and "App Secret" values. We'll be needing these shortly.
Configure Django settings
I'm not too fussed about what else you have in your Django settings file (or in how your Django settings are structured or loaded, for that matter); but if you want to follow along, then you should have certain settings configured per the following guidelines:
(You'll need to re-run syncdb after enabling these apps).
(Note: django-allauth also expects the database schema for the email confirmation app to exist; however, you don't actually need this app enabled. So, what you can do, is add 'emailconfirmation' to your INSTALLED_APPS, then syncdb, then immediately remove it).
Set a value for the AVATAR_STORAGE_DIR setting, for example:
AVATAR_STORAGE_DIR = 'uploads/avatars'
Set a value for the LOGIN_REDIRECT_URL setting, for example:
LOGIN_REDIRECT_URL = '/'
Set this:
ACCOUNT_EMAIL_REQUIRED = True
Additionally, you'll need to create a new Facebook App record in your Django database. To do this, log in to your shiny new Django admin, and under "Facebook — Facebook apps", add a new record:
For "Name", copy the "App Display Name" from the Facebook page.
For both "Application id" and "Api key", copy the "App ID" from the Facebook page.
For "Application secret", copy the "App Secret" from the Facebook page.
Once you've entered everything on this form (set "Site" as well), save the record.
Implement standard Facebook authentication
By "standard", I mean "without whitelisting". Here's how you do it:
Add these imports to your urls.py:
from allauth.account.views import logout
from allauth.socialaccount.views import login_cancelled, login_error
from allauth.facebook.views import login as facebook_login
And (in the same file), add these to your urlpatterns variable:
<div class="socialaccount_ballot">
<ul class="socialaccount_providers">
{% if not user.is_authenticated %}
{% if allauth.socialaccount_enabled  %}
{% include "socialaccount/snippets/provider_list.html" %}
{% include "socialaccount/snippets/login_extra.html" %}
{% endif %}
{% else %}
<li><a href="{% url account_logout %}?next=/">Logout</a></li>
{% endif %}
</ul>
</div>
(Note: I'm assuming that by this point, you've set up the necessary URL callbacks, views, templates, etc. to get a working front page on your site; I'm not going to hold your hand and go through all that).
If you'd like, you can customise the default authentication templates provided by django-allauth. For example, I overrode the socialaccount/snippets/provider_list.html and socialaccount/authentication_error.html templates in my test implementation.
That should be all you need, in order to get a working "Login with Facebook" link on your site. So, deploy everything that's been done so far to your online server, navigate to your front page, and click the "Login" link. If all goes well, then a popup will appear prompting you to log in to Facebook (unless you already have an active Facebook session in your browser), followed by a prompt to authorise your Django site to access your Facebook account credentials (to which you and your users will have to agree), and finishing with you being successfully authenticated.
The authorisation prompt during the initial login procedure.
You should be able to confirm authentication success, by noting that the link on your front page has changed to "Logout".
Additionally, if you go into the Django admin (you may first need to log out of your Facebook user's Django session, and then log in to the admin using your superuser credentials), you should be able to confirm that a new Django user was automatically created in response to the Facebook auth procedure. Additionally, you should find that an avatar record has been created, containing a copy of your Facebook profile picture; and, if you look in the "Facebook accounts" section, you should find that a record has been created here, complete with your Facebook user ID and profile page URL.
Facebook account record in the Django admin.
Great! Now, on to the really fun stuff.
Build a whitelisting app
So far, we've got a Django site that anyone can log into, using their Facebook credentials. That works fine for many sites, where registration is open to anyone in the general public, and where the idea is that the more user accounts get registered, the better. But what about a site where the general public cannot register, and where authentication should be restricted to only a select few individuals who have been pre-registered by site admins? For that, we need to go beyond the base capabilities of django-allauth.
Create a new app in your Django project, called fbwhitelist. The app should have the following files (file contents provided below):
models.py :
from django.contrib.auth.models import User
from django.db import models


class FBWhiteListUser(models.Model):
    name            = models.CharField(max_length=100)
    email           = models.EmailField(unique=True)
    social_id       = models.CharField(verbose_name='Facebook user ID',
                                       blank=True, max_length=100)
    active          = models.BooleanField(default=False)

    def __unicode__(self):
        return self.name

    class Meta:
        verbose_name = 'facebook whitelist user'
        verbose_name_plural = 'facebook whitelist users'
        ordering = ('name', 'email')

    def save(self, *args, **kwargs):
        try:
            old_instance = FBWhiteListUser.objects.get(pk=self.pk)
            if not self.active:
                if old_instance.active:
                    self.deactivate_user()
            else:
                if not old_instance.active:
                    self.activate_user()
        except FBWhiteListUser.DoesNotExist:
            pass

        super(FBWhiteListUser, self).save(*args, **kwargs)

    def delete(self):
        self.deactivate_user()

        super(FBWhiteListUser, self).delete()

    def deactivate_user(self):
        try:
            u = User.objects.get(email=self.email)
            if u.is_active and not u.is_superuser and not u.is_staff:
                u.is_active = False
                u.save()
        except User.DoesNotExist:
            pass

    def activate_user(self):
        try:
            u = User.objects.get(email=self.email)
            if not u.is_active:
                u.is_active = True
                u.save()
        except User.DoesNotExist:
            pass
import re
import urllib2

from django import forms
from django.contrib import admin
from django.contrib.auth.models import User

from allauth.facebook.models import FacebookAccount
from allauth.socialaccount import app_settings
from allauth.socialaccount.helpers import _copy_avatar

from utils import slugify

from models import FBWhiteListUser


class FBWhiteListUserAdminForm(forms.ModelForm):
    class Meta:
        model = FBWhiteListUser

    def __init__(self, *args, **kwargs):
        super(FBWhiteListUserAdminForm, self).__init__(*args, **kwargs)

    def save(self, *args, **kwargs):
        m = super(FBWhiteListUserAdminForm, self).save(*args, **kwargs)

        try:
            u = User.objects.get(email=self.cleaned_data['email'])
        except User.DoesNotExist:
            u = self.create_django_user()

            if self.cleaned_data['social_id']:
                self.create_facebook_account(u)

        return m

    def create_django_user(self):
        name = self.cleaned_data['name']
        email = self.cleaned_data['email']
        active = self.cleaned_data['active']
        m = re.search(r'^(?P<first_name>[^ ]+) (?P<last_name>.+)$', name)
        name_slugified = slugify(name)
        first_name = ''
        last_name = ''

        if m:
            d = m.groupdict()
            first_name = d['first_name']
            last_name = d['last_name']

        u = User(username=name_slugified,
                 email=email,
                 last_name=last_name,
                 first_name=first_name)

        u.set_unusable_password()
        u.is_active = active
        u.save()

        return u

    def create_facebook_account(self, u):
        social_id = self.cleaned_data['social_id']
        name = self.cleaned_data['name']
        try:
            account = FacebookAccount.objects.get(social_id=social_id)
        except FacebookAccount.DoesNotExist:
            account = FacebookAccount(social_id=social_id)

        account.link = 'http://www.facebook.com/profile.php?id=%s' % social_id

        req = urllib2.Request(account.link)
        res = urllib2.urlopen(req)

        new_link = res.geturl()
        if not '/people/' in new_link and not 'profile.php' in new_link:
            account.link = new_link

        account.name = name

        request = None
        if app_settings.AVATAR_SUPPORT:
            _copy_avatar(request, u, account)

        account.user = u
        account.save()


class FBWhiteListUserAdmin(admin.ModelAdmin):
    list_display = ('name', 'email', 'active')
    list_filter = ('active',)
    search_fields = ('name', 'email')
    fields = ('name', 'email', 'social_id', 'active')

    def __init__(self, *args, **kwargs):
        super(FBWhiteListUserAdmin, self).__init__(*args, **kwargs)

    form = FBWhiteListUserAdminForm


admin.site.register(FBWhiteListUser, FBWhiteListUserAdmin)
(Note: also ensure that you have an empty __init__.py file in your app's directory, as you do with most all Django apps).
Also, of course, you'll need to add 'fbwhitelist' to your INSTALLED_APPS setting (and after doing that, a syncdb will be necessary).
Most of the code above is pretty basic, it just defines a Django model for the whitelist, and provides a basic admin view for that model. In implementing this code, feel free to modify the model and the admin definitions liberally — in particular, you may want to add additional fields to the model, per your own custom project needs. What this code also does, is automatically create both a corresponding Django user, and a corresponding socialaccount Facebook account record (including Facebook profile picture to django-avatar handling), whenever a new Facebook whitelist user instance is created.
Integrate it with django-allauth
In order to let django-allauth know about the new fbwhitelist app and its FBWhiteListUser model, all you need to do, is to add this to your Django settings file:
If you're interested in the dodgy little hacks I made to django-allauth, in order to make it magically integrate with a specified whitelist app, here's the main code snippet responsible, just for your viewing pleasure (from _process_signup in socialaccount/helpers.py):
# Extra stuff hacked in here to integrate with
# the account whitelist app.
# Will be ignored if the whitelist app can't be
# imported, thus making this slightly less hacky.
whitelist_model_setting = getattr(
    settings,
    'SOCIALACCOUNT_WHITELIST_MODEL',
    None
)
if whitelist_model_setting:
    whitelist_model_path = whitelist_model_setting.split(r'.')
    whitelist_model_str = whitelist_model_path[-1]
    whitelist_path_str = r'.'.join(whitelist_model_path[:-1])
    try:
        whitelist_app = __import__(whitelist_path_str, fromlist=[whitelist_path_str])
        whitelist_model = getattr(whitelist_app, whitelist_model_str, None)
        if whitelist_model:
            try:
                guest = whitelist_model.objects.get(email=email)
                if not guest.active:
                    auto_signup = False
            except whitelist_model.DoesNotExist:
                auto_signup = False
    except ImportError:
        pass
Basically, the hack attempts to find and to query our whitelist model; and if it doesn't find a whitelist instance whose email matches that provided by the Facebook auth API, or if the found whitelist instance is not set to 'active', then it halts auto-creation and auto-login of the user into the Django site. What can I say… it does the trick!
Build a Facebook ID lookup utility
The Django admin interface so far for managing the whitelist is good, but it does have one glaring problem: it requires administrators to know the Facebook account ID of the person they're whitelisting. And, as it turns out, Facebook doesn't make it that easy for regular non-techies to find account IDs these days. It used to be straightforward enough, as profile page URLs all had the account ID in them; but now, most profile page URLs on Facebook are aliased, and the account ID is pretty well obliterated from the Facebook front-end.
So, let's build a quick little utility that looks up Facebook account IDs, based on a specified email. Add these files to your 'fbwhitelist' app to implement it:
facebook.py :
import urllib


class FacebookSearchUser(object):
    @staticmethod
    def get_query_email_request_url(email, access_token):
        """Queries a Facebook user based on a given email address. A valid Facebook Graph API access token must also be provided."""

        args = {
            'q': email,
            'type': 'user',
            'access_token': access_token,
        }
        return 'https://graph.facebook.com/search?' + \
               urllib.urlencode(args)
views.py :
from django.utils.simplejson import loads
import urllib2

from django.conf import settings
from django.contrib.admin.views.decorators import staff_member_required
from django.http import HttpResponse, HttpResponseBadRequest

from fbwhitelist.facebook import FacebookSearchUser


class FacebookSearchUserView(object):
    @staticmethod
    @staff_member_required
    def query_email(request, email):
        """Queries a Facebook user based on the given email address. This view cannot be accessed directly."""

        access_token = getattr(settings, 'FBWHITELIST_FACEBOOK_ACCESS_TOKEN', None)

        if access_token:
            url = FacebookSearchUser.get_query_email_request_url(email, access_token)
            response = urllib2.urlopen(url)
            fb_data = loads(response.read())
            if fb_data['data'] and fb_data['data'][0] and fb_data['data'][0]['id']:
                return HttpResponse('Facebook ID: %s' % fb_data['data'][0]['id'])
            else:
                return HttpResponse('No Facebook credentials found for the specified email.')

        return HttpResponseBadRequest('Error: no access token specified in Django settings.')
urls.py :
from django.conf.urls.defaults import *

from views import FacebookSearchUserView


urlpatterns = patterns('',
    url(r'^facebook_search_user/query_email/(?P<email>[^\/]+)/$',
        FacebookSearchUserView.query_email,
        name='fbwhitelist_search_user_query_email'),
)
Plus, add this to the urlpatterns variable in your project's main urls.py file:
In your MEDIA_ROOT directory, create a file js/fbwhitelistadmin.js, with this content:
(function($) {
    var fbwhitelistadmin = function() {

        function init_social_id_from_email() {
            $('.social_id').append('<input type="submit" value="Find Facebook ID" id="social_id_get_from_email" /><p>After entering an email, click "Find Facebook ID" to bring up a new window, where you can see the Facebook ID of the Facebook user with this email. Copy the Facebook user ID number into the text field "Facebook user ID", and save. If it is a valid Facebook ID, it will automatically create a new user on this site, that corresponds to the specified Facebook user.</p>');
            $('#social_id_get_from_email').live('click', function() {
                var email_val = $('#id_email').val();
                if (email_val) {
                    var url = 'http://fbwhitelist.greenash.net.au/fbwhitelist/facebook_search_user/query_email/' + email_val + '/';
                    window.open(url);
                }

                return false;
            });
        }

        return {
            init: function() {
                if ($('#content h1').text() == 'Change facebook whitelist user') {
                    $('#id_name, #id_email, #id_social_id').attr('disabled', 'disabled');
                }
                else {
                    init_social_id_from_email();
                }
            }
        }
    }();

    $(document).ready(function() {
        fbwhitelistadmin.init();
    });
})(django.jQuery);
And to load this file on the correct Django admin page, add this code to the FBWhiteListUserAdmin class in the fbwhitelist/admin.py file:
    class Media:
        js = ("js/fbwhitelistadmin.js",)
Additionally, you're going to need a Facebook Graph API access token. To obtain one, go to a URL like this:
Replacing the APP_ID, SITE_URL, and APP_SECRET bits with your relevant Facebook credentials, and replacing TEMP_CODE with the code from the URL above. You should then see a plain-text page response in this form:
access_token=ACCESS_TOKEN
And the ACCESS_TOKEN bit is what you need to take note of. Add this value to your settings file:
Of very important note, is the fact that what you've just saved in your settings is a long-life offline access Facebook access token. We requested that the access token be long-life, with the scope=offline_access parameter in the first URL request that we made to Facebook (above). This means that the access token won't expire for a very long time, so you can safely keep it in your settings file without having to worry about constantly needing to change it.
Exactly how long these tokens last, I'm not sure — so far, I've been using mine for about six weeks with no problems. You should be notified if and when your access token expires, because if you provide an invalid access token to the Graph API call, then Facebook will return an HTTP 400 response (bad request), and this will trigger urllib2.urlopen to raise an HTTPError exception. How you get notified, will depend on how you've configured Django to respond to uncaught exceptions; in my case, Django emails me an error report, which is sufficient notification for me.
Your Django admin should now have a nice enough little addition for Facebook account ID lookup:
Facebook account ID lookup integrated into the whitelist admin.
I say "nice enough", because it would also be great to change this from showing the ID in a popup, to actually populating the form field with the ID value via JavaScript (and showing an error, on fail, also via JavaScript). But honestly, I just haven't got around to doing this. Anyway, the basic popup display works as is — only drawback is that it requires copy-pasting the ID into the form field.
Finished product
And that's everything — your Django-Facebook auth integration with whitelisting should now be fully functional! Give it a try: attempt to log in to your Django site via Facebook, and it should fail; then add your Facebook account to the whitelist, attempt to log in again, and there should be no errors in sight. It's a fair bit of work, but this setup is possible once all the pieces are in place.
I should also mention that it's quite ironic, my publishing this long and detailed article about developing with the Facebook API, when barely a month ago I wrote a scathing article on the evils of Facebook. So, just to clarify: yes, I do still loathe Facebook, my opinion has not taken a somersault since publishing that rant.
However— what can I say, sometimes you get clients that want Facebook integration. And hey, them clients do pay the bills. Also, even I cannot deny that Facebook's enormous user base makes it an extremely attractive authentication source. And I must also concede that since the introduction of the Graph API, Facebook has become a much friendlier and a much more stable platform for developers to work with.
]]>
Don't trust Facebook with your data2011-10-04T00:00:00Z2011-10-04T00:00:00ZJazahttps://greenash.net.au/thoughts/2011/10/dont-trust-facebook-with-your-data/
It's been five years since it opened its doors to the general public; and, despite my avid hopes that it DIAF, the fact is that Facebook is not dead yet. Far from it. The phenomenon continues to take the world by storm, now ranking as the 2nd most visited web site in the world (after Google), and augmenting its loyal ranks with every passing day.
I've always hated Facebook. I originally joined not out of choice, but out of necessity, there being no other way to contact numerous friends of mine who had decided to boycott all alternative methods of online communication. Every day since joining, I've remained a reluctant member at best, and an open FB hater to say the least. The recent decisions of several friends of mine to delete their FB account outright, brings a warm fuzzy smile to my face. I haven't deleted my own FB account — I wish I could; but unfortunately, doing so would make numerous friends of mine uncontactable to me, and numerous social goings-on unknowable to me, today as much as ever.
There are, however, numerous features of FB that I have refused to utilise from day one, and that I highly recommend that all the world boycott. In a nutshell: any feature that involves FB being the primary store of your important personal data, is a feature that you should reject outright. Facebook is an evil company, and don't you forget it. They are not to be trusted with the sensitive and valuable data that — in this digital age of ours — all but defines who you are.
Don't upload photos
I do not upload any photos to FB. No exceptions. End of story. I uploaded a handful of profile pictures back in the early days, but it's been many years since I did even that.
People who don't know me so well, will routinely ask me, in a perplexed voice: "where are all your Facebook photos?" As if not putting photos on Facebook is akin to not diving onto the road to save an old lady from getting hit by a five-car road train.
My dear friends, there are alternatives! My photos all live on Flickr. My Flickr account has an annual fee, but there are a gazillion advantages to Flickr over FB. It looks better. It doesn't notify all my friends every time I upload a photo. For a geek like me, it has a nice API (FB's API being anything but nice).
But most importantly, I can trust Flickr with my photos. For many of us, our photos are the most valuable digital assets we possess, both sentimentally, and in information identity monetary terms. If you choose to upload your photos to FB, you are choosing to trust FB with those photos, and you are relinquishing control of them over to FB. I know people who have the only copy of many of their prized personal photos on FB. This is an incredibly bad idea!
FB's Terms of Service are, to say the least, horrendous. They reserve the right to sell, to publish, to data mine, to delete, and to prevent deletion of, anything that you post on FB. Flickr, on the other hand, guarantees in its Terms of Service that it will do none of these things; on the contrary, it even goes so far as to allow you to clearly choose the license of every photo you upload to the site (e.g. Creative Commons). Is FB really a company that you're prepared to trust with such vital data?
Don't tag photos
If you're following my rule above, of not uploading photos to FB, then not tagging your own photos should be unavoidable. Don't tag your friends' photos either!
FB sports the extremely popular feature of allowing users to draw a box around their friends' faces in a photo, and to tag those boxes as corresponding to their friends' FB accounts. For a geek like myself, it's been obvious since the moment I first encountered this feature, that it is Pure Evil™. I have never tagged a single face in a FB photo (although unfortunately I've been tagged in many photos by other people). Boycott this tool!
Why is FB photo tagging Pure Evil™, you ask? Isn't it just a cool idea, that means that when you hover over peoples' faces in a photo, you are conveniently shown their names? No — it has other conveniences, not for you but for the FB corporation, for other businesses, and for governments; and those conveniences are rather more sinister.
Facial recognition software technology has been advancing at a frighteningly rapid pace, over the past several years. Up until now, the accuracy of such technology has been insufficient for commercial or government use; but we're starting to see that change. We're seeing the emergence of tools that are combining the latest algorithms with information on the Web. And, as far as face-to-name information online goes, FB — thanks to the photo-tagging efforts of its users — can already serve as the world's largest facial recognition database.
This technology, combined with other data mining tools and applications, make tagged FB photos one of the biggest potential enemies of privacy and anti- Big Brother in the world today. FB's tagged photo database is a wet dream for the NSA and cohort. Do you want to voluntarily contribute to the wealth of everything they know about everyone? Personally, I think they know more than enough about us already.
Don't send FB messages when you could send an e-mail
This is a simple question of where your online correspondence is archived, and of how much you care about that. Your personal messages are an important digital asset of yours. Are they easily searchable? Are you able to export them and back them up? Do you maintain effective ownership of them? Do you have any guarantee that you'll be able to access them in ten years' time?
If a significant amount of your correspondence is in FB messages, then then the answer to all the above questions is "no". If, on the other hand, you still use old-fashioned e-mail to send privates messages whenever possible, then you're in a much better situation. Even if you use web-based e-mail such as Gmail (which I use), you're still far more in control of your mailbox content than you are with FB.
For me, this is also just a question of keeping all my personal messages in one place, and that place is my e-mail archives. Obviously, I will never have everything sent to my FB message inbox. So, it's better that I keep it all centralised where it's always been — in my good "ol' fashioned" e-mail client.
Other boycotts
Don't use FB Pages as your web site. Apart from being unprofessional, and barely a step above (*shudder*) MySpace (which is pushing up the daisies, thank G-d), this is once again a question of trust and of content ownership. If you care about the content on your web site, you should care about who's caring for your web site, too. Ideally, you're caring for it yourself, or you're paying someone reliable to do so for you. At least go one step up, and use Google Sites — because Google isn't as evil as FB.
Don't use FB Notes as your blog. Same deal, really. If you were writing an old-fashioned paper diary, would you keep it on top of your highest bookshelf at home, or would you chain it to your third cousin's dog's poo-covered a$$? Well, guess what — FB is dirtier and dodgier than a dog's poo-covered a$$. So, build your own blog! Or at least use Blogger or Wordpress.com, or something. But not FB!
Don't put too many details in your FB profile fields. This is more the usual stuff that a million other bloggers have already discussed, about maintaining your FB privacy. So I'll just be quick. Anything that you're not comfortable with FB knowing about, doesn't belong in your FB profile. Where you live, where you work, where you studied. Totally optional information. Relationship status — I recommend never setting it. Apart from the giant annoyance of 10 gazillion people being notified of when you get together or break up with your partner, does a giant evil corporation really need to know your relationship / marital status, either?
Don't friend anyone you don't know in real life. Again, many others have discussed this already. You need to understand the consequences of accepting someone as your friend on FB. It means that they have access to a lot of sensitive and private information about you (although hopefully, if you follow all my advice, not all that much private information). It's also a pretty lame ego boost to add friends whom you don't know in real life.
Don't use any FB apps. I don't care what they do, I don't care how cool they are. I don't want them, I don't need them. No marketplace, thanks! No stupid quizzes, thanks! And please, for the love of G-d, I swear I will donate my left testicle to feed starving pandas in Tibet before I ever play Farmville. No thankyou sir.
Don't like things on FB. I hate the "Like" button. It's a useless waste-of-time gimmick. It also has some (small) potential to provide useful data mining opportunities to the giant evil FB corporation. I admit, I have on occasion liked things. But that goes against my general rule of hating FB and everything on it.
What's left?
So, if you boycott all these things, what's left on FB, you ask? Actually, in my opinion, with all these things removed, what you're left with is the pure essentials of FB, and when viewed by themselves they're really not too bad.
The core of FB is, of course: having a list of friends; sharing messages and external content with groups of your friends (on each others' walls); and being notified of all your friends' activity through your stream. There is also events, which is in my opinion the single most useful feature of FB — they really have done a good job at creating and refining an app for organising events and tracking invite RSVPs; and for informal social functions (at least), there actually isn't any decent competition to FB's events engine available at present. Plus, the integration of the friends list and the event invite system does work very nicely.
What's left, at the core of FB, doesn't involve trusting FB with data that may be valuable to you for the rest of your life. Links and YouTube videos that you share with your friends, have a useful lifetime of about a few days at best. Events, while potentially sensitive in that they reveal your social activity to Big Brother, do at least also have limited usefulness (as data assets) past the date of the event.
Everything else is valuable data, and it belongs either in your own tender loving hands, or in the hands of a provider signficantly more responsible and trustworthy than FB.
]]>
Solr, Jetty, and daemons: debugging jetty.sh2011-02-10T00:00:00Z2011-02-10T00:00:00ZJazahttps://greenash.net.au/thoughts/2011/02/solr-jetty-and-daemons-debugging-jettysh/
I recently added a Solr-powered search feature to this site (using django-haystack). Rather than go to the trouble (and server resources drain) of deploying Solr via Tomcat, I decided instead to deploy it via Jetty. There's a wiki page with detailed instructions for deploying Solr with Jetty, and the wiki page also includes a link to the jetty.sh startup script.
The instructions seem simple enough. However, I ran into some serious problems when trying to get the startup script to work. The standard java -jar start.jar was working fine for me. But after following the instructions to the letter, and after double-checking everything, a call to:
sudo /etc/init.d/jetty start
still resulted in my getting the (incredibly unhelpful) error message:
Starting Jetty: FAILED
My server is running Ubuntu Jaunty (9.04), and from my experience, the start-stop-daemon command in jetty.sh doesn't work on that platform. Let me know if you've experienced the same or similar issues on other *nix flavours or on other Ubuntu versions. Your mileage may vary.
When Jetty fails to start, it doesn't log the details of the failure anywhere. So, in attempting to nail down the problem, I had no choice but to open up the jetty.sh script, and to get my hands dirty with some old-skool debugging. It didn't take me too long to figure out which part of the script I should be concentrating my efforts on, it's the lines of code from 397-425:
##################################################
# Do the action
##################################################
case "$ACTION" in
  start)
    echo -n "Starting Jetty: "

    if (( NO_START )); then
      echo "Not starting jetty - NO_START=1";
      exit
    fi

    if type start-stop-daemon > /dev/null 2>&1
    then
      unset CH_USER
      if [ -n "$JETTY_USER" ]
      then
        CH_USER="-c$JETTY_USER"
      fi
      if start-stop-daemon -S -p"$JETTY_PID" $CH_USER -d"$JETTY_HOME" -b -m -a "$JAVA" -- "${RUN_ARGS[@]}" --daemon
      then
        sleep 1
        if running "$JETTY_PID"
        then
          echo "OK"
        else
          echo "FAILED"
        fi
      fi
To be specific, the line with if start-stop-daemon … (line 416) was clearly where the problem lay for me. So, I decided to see exactly what this command looks like (after all the variables have been substituted), by adding a line to the script that echo'es it:
That's a good start. Now, I have a command that I can try to run manually myself, as a debugging test. So, I took the above statement, pasted it into my terminal, and whacked a sudo in front of it:
Well, that didn't give me any error messages; but then again, no positive feedback, either. To see if this command was successful in launching the Jetty daemon, I tried:
Next, I decided to investigate the man page for the start-stop-daemon command. I'm no sysadmin or Unix guru — I've never dealt with this command before, and I have no idea what its options are.
When I have a Unix command that doesn't work, and that doesn't output or log any useful information about the failure, the first thing I look for is a "verbose" option. And it just so turns out that start-stop-daemon has a -v option. So, next step for me was to add that option and try again:
Unfortunately, no cigar; the result of running that was exactly the same. Still absolutely no output (so much for verbose mode!), and ps aux showed the daemon had not launched.
Next, I decided to read up (in the man page) on the various options that the script was using with the start-stop-daemon command. Turns out that the -b option is rather a problematic one — as the manual says:
Typically used with programs that don't detach on their own. This option will force start-stop-daemon to fork before starting the process, and force it into the background. WARNING: start-stop-daemon cannot check the exit status if the process fails to execute for any reason. This is a last resort, and is only meant for programs that either make no sense forking on their own, or where it's not feasible to add the code for them to do this themselves.
Ouch — that sounds suspicious. Ergo, next step: remove that option, and try again:
Running that command resulted in me seeing a fairly long Java exception report, the main line of which was:
java.io.FileNotFoundException: /path/to/solr/--daemon (No such file or directory)
Great — removing the -b option meant that I was finally able to see the error that was occurring. And… seems like the error is that it's trying to add the --daemon option to the solr filepath.
I decided that this might be a good time to read up on what exactly the --daemon option is. And as it turns out, the start-stop-daemon command has no such option. No wonder it wasn't working! (No such option in the java command-line app, either, or in any other standard *nix util that I was able to find).
I have no idea what this option is doing in the jetty.sh script. Perhaps it's available on some other *nix variants? Anyway, doesn't seem to be recognised at all on Ubuntu. Any info that may shed some light on this mystery would be greatly appreciated, if there are any start-stop-daemon experts out there.
Next step: remove the --daemon option, re-add the -b option, remove the -v option, and try again:
Now that I'd successfully managed to launch the daemon with a manual terminal command, all that remained was to modify the jetty.sh script, and to do some integration testing. So, I removed the --daemon option from the relevant line of the script (line 416), and I tried:
sudo /etc/init.d/jetty start
And it worked. That command gave me the output:
Starting Jetty: OK
And a call to ps aux | grep java was also able to verify that the daemon was running.
Just one final step left in testing: restart the server (assuming that the Jetty startup script was added to Ubuntu's startup list at some point, manually or using update-rc.d), and see if Jetty is running. So, I restarted (sudo reboot), and… bup-bummmmm. No good. A call to ps aux | grep java showed that Jetty had not launched automatically after restart.
I remembered the discovery I'd made earlier, that the -b option is "dangerous". So, I removed this option from the relevant line of the script (line 416), and restarted the server again.
And, at long last, it worked! After restarting, a call to ps aux | grep java verified that the daemon was running. Apparently, Ubuntu doesn't like its startup daemons forking as background processes, this seems to result in things not working.
However, there is one lingering caveat. With this final solution — i.e. both the --daemon and the -b options removed from the start-stop-daemon call in the script — the daemon launches just fine after restarting the server. However, with this solution, if the daemon stops for some reason, and you need to manually invoke:
sudo /etc/init.d/jetty start
Then the daemon will effectively be running as a terminal process, not as a daemon process. This means that if you close your terminal session, or if you push CTRL+C, the process will end. Not exactly what init.d scripts are designed for! So, if you do need to manually start Jetty for some reason, you'll have to use another version of the script that maintains the -b option (adding an ampersand — i.e. the & symbol — to the end of the command should also do the trick, although that's not 100% reliable).
So, that's the long and winding story of my recent trials and tribulations with Solr, Jetty, and start-stop-daemon. If you're experiencing similar problems, hope this explanation is of use to you.
]]>
Jimmy Page: site-wide Django page caching made simple2011-01-31T00:00:00Z2011-01-31T00:00:00ZJazahttps://greenash.net.au/thoughts/2011/01/jimmy-page-site-wide-django-page-caching-made-simple/
For some time, I've been using the per-site cache feature that comes included with Django. This site's caching needs are very modest: small personal site, updated infrequently, with two simple blog-like sections and a handful of static pages. Plus, it runs fast enough even without any caching. A simple "brute force" solution like Django's per-site cache is more than adequate.
However, I grew tired of the fact that whenever I published new content, nothing was invalidated in the cache. I began to develop a routine of first writing and publishing the content in the Django admin, and then SSHing in to my box and restarting memcached. Not a good regime! But then again, I also couldn't bring myself to make the effort of writing custom invalidation routines for my cached pages. Considering my modest needs, it just wasn't worth it. What I needed was a solution that takes the same "brute force" page caching approach that Django's per-site cache already provided for me, but that also includes a similarly "brute force" approach to invalidation. Enter Jimmy Page.
Jimmy Page is the world's simplest generational page cache. It essentially functions on just two principles:
It caches the output of all pages on your site (for which you use its @cache_view decorator).
It invalidates* the cache for all pages, whenever any model instance is saved or deleted (apart from those models in the "whitelist", which is a configurable setting).
* Technically, generational caches never invalidate anything, they just increment the generation number of the cache key, and store a new version of the cached content. But if you ask me, it's easiest to think of this simply as "invalidation".
That's it. No custom invalidation routines needed. No stale cache content, ever. And no excuse for not applying caching to the majority of pages on your site.
If you ask me, the biggest advantage to using Jimmy Page, is that you simply don't have to worry about which model content you've got showing on which views. For example, it's perfectly possible to write routines for manually invalidating specific pages in your Django per-site cache. This is done using Django's low-level cache API. But if you do this, you're left with the constant headache of having to keep track of which views need invalidating when which model content changes.
With Jimmy Page, on the other hand, if your latest blog post shows on five different places on your site — on its own detail page, on the blog index page, in the monthly archive, in the tag listing, and on the front page — then don't worry! When you publish a new post, the cache for all those pages will be re-generated, without you having to configure anything. And when you decide, in six months' time, that you also want your latest blog post showing in a sixth place — e.g. on the "about" page — you have to do precisely diddly-squat, because the cache for the "about" page will already be getting re-generated too, sans config.
Of course, Jimmy Page is only going to help you if you're running a simple lil' site, with infrequently-updated content and precious few bells 'n' whistles. As the author states: "This technique is not likely to be effective in sites that have a high ratio of database writes to reads." That is, if you're running a Twitter clone in Django, then Jimmy Page probably ain't gonna help you (and it will very probably harm you). But if you ask me, Jimmy Page is the way to go for all your blog-slash-brochureware Django site caching needs.
]]>
An inline image Django template filter2010-06-06T00:00:00Z2010-06-06T00:00:00ZJazahttps://greenash.net.au/thoughts/2010/06/an-inline-image-django-template-filter/
Adding image fields to a Django model is easy, thanks to the built-in ImageField class. Auto-resizing uploaded images is also a breeze, courtesy of sorl-thumbnail and its forks/variants. But what about embedding resized images inline within text content? This is a very common use case for bloggers, and it's a final step that seems to be missing in Django at the moment.
Having recently migrated this site over from Drupal, my old blog posts had inline images embedded using image assist. Images could be inserted into an arbitrary spot within a text field by entering a token, with a syntax of [img_assist nid=123 ... ]. I wanted to be able to continue embedding images in roughly the same fashion, using a syntax as closely matching the old one as possible.
So, I've written a simple template filter that parses a text block for tokens with a syntax of [thumbnail image-identifier], and that replaces every such token with the image matching the given identifier, resized according to a pre-determined width and height (by sorl-thumbnail), and formatted as an image tag with a caption underneath. The code for the filter is below.
import re

from django import template
from django.template.defaultfilters import stringfilter

from sorl.thumbnail.main import DjangoThumbnail

from models import InlineImage

register = template.Library()

regex = re.compile(r'\[thumbnail (?P<identifier>[\-\w]+)\]')


@register.filter
@stringfilter
def inline_thumbnails(value):
    new_value = value
    it = regex.finditer(value)
    for m in it:
        try:
            image = InlineImage.objects.get(identifier=identifier)
            thumbnail = DjangoThumbnail(image.image, (500, 500))
            new_value = new_value.replace(m.group(), '<img src="%s%s" width="%d" height="%d" alt="%s" /><p><em>%s</em></p>' % ('http://mysite.com', thumbnail.absolute_url, thumbnail.width(), thumbnail.height(), image.title, image.title))
        except InlineImage.DoesNotExist:
            pass
    return new_value
This code belongs in a file such as appname/templatetags/inline_thumbnails.py within your Django project directory. It also assumes that you have an InlineImage model that looks something like this (in your app's models.py file):
from django.db import models

class InlineImage(models.Model):
    created         = models.DateTimeField(auto_now_add=True)
    modified        = models.DateTimeField(auto_now=True)

    title           = models.CharField(max_length=100)

    image           = models.ImageField(upload_to='uploads/images')
    identifier      = models.SlugField(unique=True)

    def __unicode__(self):
        return self.title
        ordering = ('-created',)
Say you have a model for your site's blog posts, called Entry. The main body text field for this model is content. You could upload an InlineImage with identifier hokey-pokey. You'd then embed the image into the body text of a blog post like so:
<p>You put your left foot in,
You put your left foot out,
You put your left foot in,
And you shake it all about.</p>

[thumbnail hokey-pokey]

<p>You do the Hokey Pokey and you turn around,
That's what it's all about.</p>
To render the blog post content with the thumbnail tokens converted into actual images, simply filter the variable in your template, like so:
The code here is just a simple example — if you copy it and adapt it to your own needs, you'll probably want to add a bit more functionality to it. For example, the token could be extended to support specifying image alignment (left/right), width/height per image, caption override, etc. But I didn't particularly need any of these things, and I wanted to keep my code simple, so I've omitted those features from my filter.
]]>
An autop Django template filter2010-05-30T00:00:00Z2010-05-30T00:00:00ZJazahttps://greenash.net.au/thoughts/2010/05/an-autop-django-template-filter/autop is a script that was first written for WordPress by Matt Mullenweg (the WordPress founder). All WordPress blog posts are filtered using wpautop() (unless you install an additional plug-in to disable the filter). The function was also ported to Drupal, and it's enabled by default when entering body text into Drupal nodes. As far as I'm aware, autop has never been ported to a language other than PHP. Until now.
In the process of migrating this site from Drupal to Django, I was surprised to discover that not only Django, but also Python in general, lacks any linebreak filtering function (official or otherwise) that's anywhere near as intelligent as autop. The built-in Django linebreaks filter converts all single newlines to <br /> tags, and all double newlines to <p> tags, completely irrespective of HTML block elements such as <code> and <script>. This was a fairly major problem for me, as I was migrating a lot of old content over from Drupal, and that content was all formatted in autop style. Plus, I'm used to writing content in that way, and I'd like to continue writing content in that way, whether I'm in a PHP environment or not.
Therefore, I've ported Drupal's _filter_autop() function to Python, and implemented it as a Django template filter. From the limited testing I've done, the function appears to be working just as well in Django as it does in Drupal. You can find the function below.
import re
from django import template
from django.template.defaultfilters import force_escape, stringfilter
from django.utils.encoding import force_unicode
from django.utils.functional import allow_lazy
from django.utils.safestring import mark_safe
register = template.Library()
def autop_function(value):
"""
Convert line breaks into <p> and <br> in an intelligent fashion.
Originally based on: http://photomatt.net/scripts/autop
Ported directly from the Drupal _filter_autop() function:
http://api.drupal.org/api/function/_filter_autop
"""
# All block level tags
block = '(?:table|thead|tfoot|caption|colgroup|tbody|tr|td|th|div|dl|dd|dt|ul|ol|li|pre|select|form|blockquote|address|p|h[1-6]|hr)'
# Split at <pre>, <script>, <style> and </pre>, </script>, </style> tags.
# We don't apply any processing to the contents of these tags to avoid messing
# up code. We look for matched pairs and allow basic nesting. For example:
# "processed <pre> ignored <script> ignored </script> ignored </pre> processed"
chunks = re.split('(</?(?:pre|script|style|object)[^>]*>)', value)
ignore = False
ignoretag = ''
output = ''
for i, chunk in zip(range(len(chunks)), chunks):
prev_ignore = ignore
if i % 2:
# Opening or closing tag?
is_open = chunk[1] != '/'
tag = re.split('[ >]', chunk[2-is_open:], 2)[0]
if not ignore:
if is_open:
ignore = True
ignoretag = tag
# Only allow a matching tag to close it.
elif not is_open and ignoretag == tag:
ignore = False
ignoretag = ''
elif not ignore:
chunk = re.sub('\n*$', '', chunk) + "\n\n" # just to make things a little easier, pad the end
chunk = re.sub('<br />\s*<br />', "\n\n", chunk)
chunk = re.sub('(<'+ block +'[^>]*>)', r"\n\1", chunk) # Space things out a little
chunk = re.sub('(</'+ block +'>)', r"\1\n\n", chunk) # Space things out a little
chunk = re.sub("\n\n+", "\n\n", chunk) # take care of duplicates
chunk = re.sub('\n?(.+?)(?:\n\s*\n|$)', r"<p>\1</p>\n", chunk) # make paragraphs, including one at the end
chunk = re.sub("<p>(<li.+?)</p>", r"\1", chunk) # problem with nested lists
chunk = re.sub('<p><blockquote([^>]*)>', r"<blockquote\1><p>", chunk)
chunk = chunk.replace('</blockquote></p>', '</p></blockquote>')
chunk = re.sub('<p>\s*</p>\n?', '', chunk) # under certain strange conditions it could create a P of entirely whitespace
chunk = re.sub('<p>\s*(</?'+ block +'[^>]*>)', r"\1", chunk)
chunk = re.sub('(</?'+ block +'[^>]*>)\s*</p>', r"\1", chunk)
chunk = re.sub('(?<!<br />)\s*\n', "<br />\n", chunk) # make line breaks
chunk = re.sub('(</?'+ block +'[^>]*>)\s*<br />', r"\1", chunk)
chunk = re.sub('<br />(\s*</?(?:p|li|div|th|pre|td|ul|ol)>)', r'\1', chunk)
chunk = re.sub('&([^#])(?![A-Za-z0-9]{1,8};)', r'&\1', chunk)
# Extra (not ported from Drupal) to escape the contents of code blocks.
code_start = re.search('^<code>', chunk)
code_end = re.search(r'(.*?)<\/code>$', chunk)
if prev_ignore and ignore:
if code_start:
chunk = re.sub('^<code>(.+)', r'\1', chunk)
if code_end:
chunk = re.sub(r'(.*?)<\/code>$', r'\1', chunk)
chunk = chunk.replace('<\\/pre>', '</pre>')
chunk = force_escape(chunk)
if code_start:
chunk = '<code>' + chunk
if code_end:
chunk += '</code>'
output += chunk
return output
autop_function = allow_lazy(autop_function, unicode)
@register.filter
def autop(value, autoescape=None):
return mark_safe(autop_function(value))
autop.is_safe = True
autop.needs_autoescape = True
autop = stringfilter(autop)
Update (31 May 2010): added the "Extra (not ported from Drupal) to escape the contents of code blocks" part of the code.
To use this filter in your Django templates, simply save the code above in a file called autop.py (or anything else you want) in a templatetags directory within one of your installed apps. Then, just declare {% load autop %} at the top of your templates, and filter your markup variables with something like {{ object.content|autop }}.
Note that this is pretty much a direct port of the Drupal / PHP function into Django / Python. As such, it's probably not as efficient nor as Pythonic as it could be. However, it seems to work quite well. Feedback and comments are welcome.
]]>
Taking PHP Fat-Free Framework for a test drive2010-05-06T00:00:00Z2010-05-06T00:00:00ZJazahttps://greenash.net.au/thoughts/2010/05/taking-php-fat-free-framework-for-a-test-drive/Fat-Free is a brand-new PHP framework, and it's one of the coolest PHP projects I've seen in quite a long time. In stark contrast to the PHP tool that I use most often (Drupal), Fat-Free is truly miniscule, and it has no plans to get bigger. It also requires PHP 5.3, which is one version ahead of what most folks are currently running (PHP 5.3 is also required by FLOW3, another framework on my test-drive to-do list). A couple of weeks back, I decided to take Fat-Free for a quick spin and to have a look under its hood. I wanted to see how good its architecture is, how well it performs, and (most of all) whether it offers enough to actually be of use to a developer in getting a real-life project out the door.
I'm going to be comparing Fat-Free mainly with Django and Drupal, because they're the two frameworks / CMSes that I use the most these days. The comparison may at many times feel like comparing a cockroach to an elephant. But like Django and Drupal, Fat-Free claims to be a complete foundation for building a dynamic web site. It wants to compete with the big boys. So, I say, let's bring it on.
Installation
Even if you're a full-time PHP developer, chances are that you don't have PHP 5.3 installed. On Windows, latest stable 5.3 is available to download as an auto-installer (just like latest stable 5.2, which is also still available). On Mac, 5.3 is bundled with Snow Leopard (OS 10.6), but only 5.2 is bundled with Leopard (10.5). As I've written about before, PHP on Mac has a lot of installation issues and annoyances in general. If possible, avoid anything remotely out-of-the-ordinary with PHP on Mac. On Ubuntu, PHP is not bundled, but can be installed with a one-line apt-get command. In Karmic (9.10) and earlier recent versions, the php5 apt package links to 5.2, and the php5-devel apt package links to 5.3 (either way, it's just a quick apt-get to install). In the brand-new Lucid (10.04), the php5 apt package now links to 5.3. Why do I know about installing PHP on all three of these different systems? Let's just say that if you previously used Windows for coding at home, but you've now switched to Ubuntu for coding at home, and you use Mac for coding at work, then you too would be a fruit-loop schizophrenic.
Upgrading from 5.2 to 5.3 shouldn't be a big hurdle for you. Unfortunately, I happened to be in pretty much the worst possible situation. I wanted to install 5.3 on Mac OS 10.5, and I wanted to keep 5.2 installed and running as my default version of PHP (because the bulk of my PHP work is in Drupal, and Drupal 6 isn't 100% compatible with PHP 5.3). This proved to be possible, but only just — it was a nightmare. Please, don't try and do what I did. Totally not worth it.
After I got PHP 5.3 up and running, installing Fat-Free itself proved to be pretty trivial. However, I encountered terrible performance when trying out a simple "Hello, World" demo, off the bat with Fat-Free (page loads of 10+ seconds). This was a disheartening start. Nevertheless, it didn't put me off — I tracked down the source of the crazy lag to a bug with Fat-Free's blacklist system, which I reported and submitted a patch for. A fix was committed the next day. How refreshing! Also felt pretty cool to be trying out a project where it's so new and experimental, you have to fix a bug before you can take it for a test drive.
Routing
As with every web framework, the page routing system is Fat-Free's absolute core functionality. Fat-Free makes excellent use of PHP 5.3's new JavaScript-like support for functions as first-class objects in its routing system (including anonymous functions). In a very Django-esque style, you can pass anonymous functions (along with regular functions and class methods) directly to Fat-Free's route() method (or you can specify callbacks with strings).
Wildcard and token support in routes is comparable to that of the Drupal 6 menu callback system, although routes in Fat-Free are not full-fledged regular expressions, and hence aren't quite as flexible as Django's URL routing system. There's also the ability to specify multiple callbacks/handlers for a single route. When you do this, all the handlers for that route get executed (in the order they're defined in the callback). This is an interesting feature, and it's actually one that I can think of several uses for in Django (in particular).
In the interests of RESTful-ness, Fat-Free has decided that HTTP request methods (GET, POST, etc) must be explicitly specified for every route definition. E.g. to define a simple GET route, you must write:
<?php
F3::route('GET /','home');
?>
I think that GET should be the default request method, and that you shouldn't have to explicitly specify it for every route in your site. Or (in following Django's "configuration over convention" rule, which Fat-Free also espouses), at least have a setting variable called DEFAULT_REQUEST_METHOD, which itself defaults to GET. There's also much more to RESTful-ness than just properly using HTTP request methods, including many aspects of the response — HTTP response codes, MIME types, and XML/JSON response formats spring to mind as the obvious ones. And Fat-Free offers no help for these aspects, per se (although PHP does, for all of them, so Fat-Free doesn't really need to).
Templates
Can't say that Fat-Free's template engine has me over the moon. Variable passing and outputting is simple enough, and the syntax (while a bit verbose) is passable. The other key elements (described below) would have to be one of Fat-Free's weaker points.
Much like Django (and in stark contrast to Drupal), Fat-Free has its own template parser built-in, and you cannot execute arbitrary PHP within a template. In my opinion, this is a good approach (and Drupal's approach is a mess). However, you can more-or-less directly execute a configurable subset of PHP core functions, with Fat-Free's allow() method. You can, for example, allow all date and pcre functions to be called within templates, but nothing else. This strikes me as an ugly compromise: a template engine should either allow direct code execution, or it shouldn't (and I'd say that it always shouldn't). Seems like a poor substitute for a proper, Django-style custom filter system (which Fat-Free is lacking). Of course, Django's template system isn't perfect, either.
Fat-Free's template "directives" (include, exclude, check, and repeat) have an ugly, XML-style syntax. Reminds me of the bad old XTemplate days in Drupal theming. This is more a matter of taste, but nevertheless, I feel that the reasoning behinnd XML-style template directives is flawed (allows template markup to be easily edited in tools like Dreamweaver … *shudder*), and that the reasoning behind custom-style template directives is valid (allows template directives to be clearly distinguished from markup in mostgoodtext editors). What's more, the four directives are hard-coded into Fat-Free's serve() function — no chance whatsoever of having custom directives. Much like the function-calling in templates, this seems like a poor substitue for a proper, Django-style custom tag system.
ORM
Straight off the bat, my biggest and most obvious criticism of Axon, the Fat-Free ORM, is that it has no model classes as such, and that it has no database table generation based on model classes. All that Axon does is generate a model class that corresponds to a simple database table (which it analyses on-the-fly). You can subclass Axon, and explicitly define model classes that way — although with no field types as such, there's little to be gained. This is very much Axon's greatest strength (so simple! no cruft attached!) and its greatest weakness (makes it so bare-bones, it only just meets the definition of an ORM). Axon also makes no attempt to support relationships, and the front-page docs justify this pretty clearly:
Axon is designed to be a record-centric ORM and does not pretend to be more than that … By design, the Axon ORM does not provide methods for directly connecting Axons to each other, i.e. SQL joins – because this opens up a can of worms.
Axon pretty much does nothing but let you CRUD a single table. It can be wrangled into doing some fancier things — e.g. the docs have an example of creating simple pagination using a few lines of Axon code — but not a great deal. If you need more than that, SQL is your friend. Personally, I agree with the justification, and I think it's a charming and well-designed micro-ORM.
Bells and whistles
Page cache: Good. Just specify a cache period, in seconds, as an argument to route(). Pages get cached to a file server-side (by default — using stream wrappers, you could specify pretty much any "file" as a cache source). Page expiry also gets set as an HTTP response header.
Query cache: Good. Just specify a cache period, in seconds, when calling sql(). Query only gets executed once in that time frame.
JS and CSS compressor: Good. Minifies all files you pass to it. Drupal-style.
GZip: all responses are GZipped using PHP's built-in capabilities, whenever possible. Also Drupal-style.
XML sitemap: Good. Super-light sitemap generator. Incredible that in such a lightweight framework, this comes bundled (not bundled with Drupal, although it is with Django). But, considering that every site should have one of these, this is very welcome indeed.
Image resizing: Good. Drupal 7 will finally bundle this (still an add-on in Django). This is one thing, more than perhaps anything else, that gets left out of web frameworks when it shouldn't be. In Fat-Free, thumb() is your friend.
HTTP request utility: Good. Analogous to drupal_http_request(), and similar stuff can be done in Django with Python's httplib/urllib. Server-side requests, remote service calls, here we come.
Static file handler: Good. Similar to Drupal's private file download mode, and (potentially) Django's static media serving. Not something you particularly want to worry about as a developer.
Benchmarking: Good. profile() is your friend. Hopefully, your Fat-Free apps will be so light, that all this will ever do is confirm that everything's lightning-fast.
Throttle: Good. This was removed from Drupal core, and it's absent entirely from Django. Another one of those things that you wouldn't be thinking about for every lil web project, but that could come in pretty handy for your next DDoS incident.
Unit testing: Good. This framework is tiny, but it still has pretty decent unit test support. In contrast to the Drupal 6 to 7 bloat, this just goes to show that unit testing support doesn't have to double your framework's codebase.
Debug / production modes: Good. For hiding those all-too-revealing error messages, mainly.
Error handling: Good. Default 404 / etc callback, can be customised.
Autoload: OK. Very thin wrapper around PHP 5.3's autoloading system. Not particularly needed, since autoload is so quick and easy anyway.
Form handler: OK. Basic validation system, value passing system, and sanitation / XSS protection system. Nice that it's light, but I can't help but yearn for a proper API, like what Drupal or Django has.
Captcha: OK. But considering that the usefulness and suitability of captchas is being increasingly questioned these days, seems a strange choice to include this in such a lightweight framework. Not bundled with Drupal or Django.
Spammer blacklisting: Seems a bit excessive, having it built-in to the core framework that all requests are by default checked against a third-party spam blacklist database. Plus, wasn't until my patch that the EXEMPT setting was added for 127.0.0.1. Nevertheless, this is probably more of a Good Idea™ than it is anything bad.
Fake images: Gimmick, in my opinion. Useful, sure. But really, creating a div with fixed dimensions, specifying fixed dimensions for an existing image, or even just creating real images manually — these are just some of your other layout testing options available. Also, you'll want to create your own custom 'no image specified' image for most sites anyway.
Identicons: Total gimmick. I've never built a site with these (actually, I've never even heard the word 'identicon' before). Total waste of 134 lines of code (but hey, at least it's only 134 — after all, this is Fat-Free).
What's missing?
Apart from the issues that I've already mentioned about various aspects of Fat-Free (e.g. with the template engine, with the form handler, with the ORM), the following things are completely absent from Fat-Free, and they're present in both Drupal and Django, and in my opinion they're sorely missed:
Authentication
Session management
E-mail sending utility
File upload / storage utility
Link / base URL / route reverse utility
CSRF protection
Locales / i18n
Admin interface
RSS / Atom
The verdict
Would I use it for a real project? Probably not.
I love that it's so small and simple. I love that it assists with so many useful tasks in such a straightforward way.
But.
It's missing too many things that I consider essential. Lack of authentication and session management is a showstopper for me. Sure, there are some projects where these things aren't needed at all. But if I do need them, there's no way I'm going to build them myself. Not when 10,000 other frameworks have already built them for me. Same with e-mail sending. No way that any web developer, in the year 2010, should be expected to concern his or her self with MIME header, line ending, or encoding issues.
It's not flexible or extensible enough. A template engine that supports 4 tags, and that has no way of supporting more, is really unacceptable. An ORM that guesses my table structure, and that has no way of being corrected if its guess is wrong, is unacceptable.
It includes some things that are just stupid. I'm sorry, but I'd find it very hard to use a framework that had built-in identicon generation, and to still walk out my front door every day and hold my head up proudly as a mature and responsible developer. OK, maybe I'm dramatising a bit there. But, seriously … do I not have a point?
Its coding style bothers me. In particular, I've already mentioned my qualms re: the XML-style templating. The general PHP 5.3 syntax doesn't particularly appeal to me, either. I've been uninspired for some time by the C++-style :: OO syntax that was introduced in PHP 5.0. Now, the use of the backslash character as a namespace delimiter is the icing on the cake. Yuck! Ever heard of the dot character, PHP? They're used for namespaces / packages in every other programming language in the 'hood. Oh, that's right, you can't use the dot, because it's your string concatenation operator (gee, wasn't that a smart move?). And failing the dot, why the backslash? Could you not have at least used the forward slash instead? Or do you prefer specifying your paths MS-DOS style? Plus the backslash is the universal escaping operator within string literals.
I'm a big fan of the new features in PHP 5.3. However, that doesn't change the fact that those features have already existed for years in other languages, and with much more elegant syntax. I've been getting much more into Python of late, and having become fairly accustomed by now with that elusive, almost metaphysical ideal of "Pythonic code", what I've observed with PHP 5.3 in Fat-Free is really not impressing me.
]]>
Generating unique integer IDs from strings in MySQL2010-03-19T00:00:00Z2010-03-19T00:00:00ZJazahttps://greenash.net.au/thoughts/2010/03/generating-unique-integer-ids-from-strings-in-mysql/
I have an interesting problem, on a data migration project I'm currently working on. I'm importing a large amount of legacy data into Drupal, using the awesome Migrate module (and friends). Migrate is a great tool for the job, but one of its limitations is that it requires the legacy database tables to have non-composite integer primary keys. Unfortunately, most of the tables I'm working with have primary keys that are either composite (i.e. the key is a combination of two or more columns), or non-integer (i.e. strings), or both.
Table with composite primary key.
The simplest solution to this problem would be to add an auto-incrementing integer primary key column to the legacy tables. This would provide the primary key information that Migrate needs in order to do its mapping of legacy IDs to Drupal IDs. But this solution has a serious drawback. In my project, I'm going to have to re-import the legacy data at regular intervals, by deleting and re-creating all the legacy tables. And every time I do this, the auto-incrementing primary keys that get generated could be different. Records may have been deleted upstream, or new records may have been added in between other old records. Auto-increment IDs would, therefore, correspond to different composite legacy primary keys each time I re-imported the data. This would effectively make Migrate's ID mapping tables corrupt.
A better solution is needed. A solution called hashing! Here's what I've come up with:
Remove the legacy primary key index from the table.
Create a new column on the table, of type BIGINT. A MySQL BIGINT field allocates 64 bits (8 bytes) of space for each value.
If the primary key is composite, concatenate the columns of the primary key together (optionally separated by a delimiter).
Calculate the SHA1 hash of the concatenated primary key string. An SHA1 hash consists of 40 hexadecimal digits. Since each hex digit stores 24 different values, each hex digit requires 4 bits of storage; therefore 40 hex digits require 160 bits of storage, which is 20 bytes.
Convert the numeric hash to a string.
Truncate the hash string down to the first 16 hex digits.
Convert the hash string back into a number. Each hex digit requires 4 bits of storage; therefore 16 hex digits require 64 bits of storage, which is 8 bytes.
Convert the number from hex (base 16) to decimal (base 10).
Store the decimal number in your new BIGINT field. You'll find that the number is conveniently just small enough to fit into this 64-bit field.
Now that the new BIGINT field is populated with unique values, upgrade it to a primary key field.
Add an index that corresponds to the legacy primary key, just to maintain lookup performance (you could make it a unique key, but that's not really necessary).
Table with integer primary key.
The SQL statement that lets you achieve this in MySQL looks like this:
ALTER TABLE people DROP PRIMARY KEY;
ALTER TABLE people ADD id BIGINT UNSIGNED NOT NULL FIRST;
UPDATE people SET id = CONV(SUBSTRING(CAST(SHA(CONCAT(name, ',', city)) AS CHAR), 1, 16), 16, 10);
ALTER TABLE people ADD PRIMARY KEY(id);
ALTER TABLE people ADD INDEX (name, city);
Note: you will also need to alter the relevant migrate_map_X tables in your database, and change the sourceid and destid fields in these tables to be of type BIGINT.
Hashing has a tremendous advantage over using auto-increment IDs. When you pass a given string to a hash function, it always yields the exact same hash value. Therefore, whenever you hash a given string-based primary key, it always yields the exact same integer value. And that's my problem solved: I get constant integer ID values each time I re-import my legacy data, so long as the legacy primary keys remain constant between imports.
Storing the 64-bit hash value in MySQL is straightforward enough. However, a word of caution once you continue on to the PHP level: PHP does not guarantee to have a 64-bit integer data type available. It should be present on all 64-bit machines running PHP. However, if you're still on a 32-bit processor, chances are that a 32-bit integer is the maximum integer size available to you in PHP. There's a trick where you can store an integer of up to 52 bits using PHP floats, but it's pretty dodgy, and having 64 bits guaranteed is far preferable. Thankfully, all my environments for my project (dev, staging, production) have 64-bit processors available, so I'm not too worried about this issue.
I also have yet to confirm 100% whether 16 out of 40 digits from an SHA1 hash is enough to guarantee unique IDs. In my current legacy data set, I've applied this technique to all my tables, and haven't encountered a single duplicate (I also experimented briefly with CRC32 checksums, and very quickly ran into duplicate ID issues). However, that doesn't prove anything — except that duplicate IDs are very unlikely. I'd love to hear from anyone who has hard probability figures about this: if I'm using 16 digits of a hash, what are the chances of a collision? I know that Git, for example, stores commit IDs as SHA1 hashes, and it lets you then specify commit IDs using only the first few digits of the hash (e.g. the first 7 digits is most common). However, Git makes no guarantee that a subset of the hash value is unique; and in the case of a collision, it will ask you to provide enough digits to yield a unique hash. But I've never had Git tell me that, as yet.
]]>
jQuery text separator plugin2009-07-10T00:00:00Z2009-07-10T00:00:00ZJazahttps://greenash.net.au/thoughts/2009/07/jquery-text-separator-plugin/
For my premiere debút into the world of jQuery plugin development, I've written a little plugin called text separator. As I wrote on its jQuery project page, this plugin:
Lets you separate a text field into two parts, by dragging a slider to the spot at which you want to split the text. This plugin creates a horizontal slider above a text field. The handle on that slider is as long as its corresponding text field, and its handle 'snaps' to the delimiters in that text field (which are spaces, by default). With JS disabled, your markup should degrade gracefully to two separate text fields.
This was designed for allowing users to enter their 'full name' in one input box. The user enters their full name, and then simply drags the slider in order to mark the split betwen their first and last names. While typing, the slider automatically drags itself to the first delimiter in the input box.
Want to take it for a spin? Try a demo. You'll see something like this:
Text separator screenshot
This plugin isn't being used on any live site just yet, although I do have a project in the pipeline that I hope to use it with (more details on that at some unspecified future time). As far as I know, there's nothing else out there that does quite what this plugin lets you do. But please, don't hesitate to let me know if I'm mistaken in that regard.
The way it works is a little unusual, but simple enough once you get your head around it. The text that you type into the box is split (by delimiter) into "chunks". A hidden span is then created for each chunk, and also for each delimiter found. These hidden spans have all their font attributes set to match those of the input box, thus ensuring that each span is exactly the same size as its corresponding input box text. The spans are absolutely positioned beneath the input box. This is the only way (that I could find) of calculating the width in pixels of all or part of the text typed into an input box.
The max range value for the slider is set to the width of the input box (minus any padding it may have). Then, it's simply a matter of catching / triggering the slider handle's "change" event, and of working out the delimiter whose position is nearest to the position that the handle was moved to. Once that's done, the handle is "snapped" to that delimiter, and the index of the delimiter in question is recorded.
Text separator is designed to be applied to a div with two form <input type="text" /> elements inside it. It transforms these two elements into a single input box with a slider above it. It converts the original input boxes into hidden fields. It also copies the split values back into those hidden fields whenever you type into the box (or move the slider). This means that when you submit the form, you get the same two separate values that you'd expect were the plugin not present. Which reminds me that I should also say: without JS, the page degrades to the two separate input boxes that are coded into the HTML. Try it out for yourself on the demo page (e.g. using the "disable all JavaScript" feature of the Firefox Web Developer addon).
This first version of text separator still has a few rough edges. I really haven't tested how flexible it is just yet, in terms of either styling or behaviour — it probably needs more things pulled out of their hard-coded state, and moved into config options. It still isn't working perfectly on Internet Explorer (surprise!): the hidden spans don't seem to be getting the right font size, and so the position that the slider snaps to isn't actually corresponding to the position of the delimiters. Also a bit of an issue with the colour of the input box in Safari. Feedback and patches are welcome, preferably on the plugin's jQuery project page.
In terms of what text separator can do for the user experience and the usability of a web form, I'd also appreciate your feedback. Personally, I really find that it's a pain to have to enter your first and last names into separate text fields, on the registration forms of many sites. I know that personally, I would prefer to enter my full name into a text separator-enabled form. Am I on the right track? Will a widget like this enhance or worsen something like a registration form? Would you use it on such forms for your own sites? And I'd also love to hear your ideas about what other bits of data this plugin might be useful for, apart from separating first and last names.
I hope that you find this plugin useful. Play on.
]]>
Hook soup2009-06-17T00:00:00Z2009-06-17T00:00:00ZJazahttps://greenash.net.au/thoughts/2009/06/hook-soup/
Of late, I seem to keep stumbling upon Drupal hooks that I've never heard of before. For example, I was just reading a blog post about what you can't modify in a _preprocess() function, when I saw mention of hook_theme_registry_alter(). What a mouthful. I ain't seen that one 'til now. Is it just me, or are new hooks popping up every second day in Drupal land? This got me wondering: exactly how many hooks are there in Drupal core right now? And by how much has this number changed over the past few Drupal versions? Since this information is conveniently available in the function lists on api.drupal.org, I decided to find out for myself. I counted the number of documented hook_foo() functions for Drupal core versions 4.7, 5, 6 and 7 (HEAD), and this is what I came up with (in pretty graph form):
Drupal hooks by core version
And those numbers again (in plain text form):
Drupal 4.7: 41
Drupal 5: 53
Drupal 6: 72
Drupal 7: 183
Aaaagggghhhh!!! Talk about an explosion — what we've got on our hands is nothing less than hook soup. The rate of growth of Drupal hooks is out of control. And that's not counting themable functions (and templates) and template preprocessor functions, which are the other "magically called" functions whose mechanics developers need to understand. And as for hooks defined by contrib modules — even were we only counting the "big players", such as Views — well, let's not even go there; it's really too massive to contemplate.
In fairness, there are a number of good reasons why the amount of hooks has gone up so dramatically in Drupal 7:
Splitting various "combo" hooks into a separate hook for each old $op parameter, the biggest of these being the death of hook_nodeapi()
The rise and rise of the _alter() hooks
Birth of fields in core
Birth of file API in core
Nevertheless, despite all these good reasons, the number of core hooks in HEAD right now is surely cause for concern. More hooks means a higher learning curve for people new to Drupal, and a lot of time wasted in looking up API references even for experienced developers. More hooks also means a bigger core codebase, which goes against our philosophy of striving to keep core lean, mean and super-small.
In order to get a better understanding of why D7 core has so many hooks, I decided to do a breakdown of the hooks based on their type. I came up with the "types" more-or-less arbitrarily, based on the naming conventions of the hooks, and also based on the purpose and the input/output format of each hook. The full list of hooks and types can be found further down. Here's the summary (in pretty graph form):
Hook breakdown by type
And those numbers again (in plain text form):
Type
No. of hooks
misc action
44
info
30
alter
27
delete
20
insert
13
load
12
update
10
validate
6
form
4
misc combo
4
prepare
4
view
4
presave
3
check
2
As you can see, most of the hooks in core are "misc action" hooks, i.e. they allow modules to execute arbitrary (or not-so-arbitrary) code in response to some sort of action, and that action isn't covered by the other hook types that I used for classification. For the most part, the misc action hooks all serve an important purpose; however, we should be taking a good look at them, and seeing if we really need a hook for that many different events. DX is a balancing act between flexibility-slash-extensibility, and flexibility-slash-extensibility overload. Drupal has a tendency to lean towards the latter, if left unchecked. Also prominent in core are the "info" and "alter" hooks which, whether they end in the respective _info or _alter suffixes or not, return (for info) or modify (for alter) a more-or-less non-dynamic structured array of definitions. The DX balancing act applies to these hooks just as strongly: do we really need to allow developers to define and to change that many structured arrays, or are some of those hooks never likely to be implemented outside of core?
I leave further discussion on this topic to the rest of the community. This article is really just to present the numbers. If you haven't seen enough numbers or lists yet, you can find some more of them below. Otherwise, glad I could inform you.
(D7 list accurate as of 17 Jun 2009; type breakdown for D7 list added arbitrarily by yours truly)
]]>
Installing the uploadprogress PECL extension on Leopard2009-05-28T00:00:00Z2009-05-28T00:00:00ZJazahttps://greenash.net.au/thoughts/2009/05/installing-the-uploadprogress-pecl-extension-on-leopard/
The uploadprogress PECL extension is a PHP add-on that allows cool AJAX uploading like never before. Version 3 of Drupal's FileField module is designed to work best with uploadprogress enabled. As such, I found myself installing a PECL extension for the first time. No doubt, many other Drupal developers will soon be finding themselves in the same boat.
Unfortunately, for those of us on Mac OS X 10.5 (Leopard), installing uploadprogress ain't all smooth sailing. The problem is that the extension must be compiled from source in order to be installed; and on Leopard machines, which all run on a 64-bit processor, it must be compiled as a 64-bit binary. However, the gods of Mac (in their infinite wisdom) decided to include with Leopard (after Xcode is installed) a C compiler that still behaves in the old-school way, and that by default does its compilation in 32-bit mode. This is a right pain in the a$$, and if you're unfamiliar with the consequences of it, you'll likely see a message like this coming up in your Apache error log when you try to install uploadprogress and restart your server:
PHP Warning: PHP Startup: Unable to load dynamic library '/usr/local/php5/lib/php/extensions/no-debug-non-zts-20060613/uploadprogress.so' - (null) in Unknown on line 0
Hmmm… (null) in Unknown on line 0. WTF is that supposed to mean? (You ask). Well, it means that the extension was compiled for the wrong environment; and when Leopard tries to execute it, a low-level error called a segmentation fault occurs. In short, it means that your binary is $#%&ed.
But fear not, Leopard PHP developers! Here are some instructions for how to install uploadprogress by compiling it as a 64-bit binary:
Download and extract the latest tarball of the source code for uploadprogress.
If using the Entropy PHP package (which I would highly recommend for all Leopard users), follow the advice from this forum thread (2nd comment, by Taracque), and change all your php binaries in /usr/bin to be symlinks to the proper versions in /usr/local/php5/bin.
cd to the directory containing the extracted tarball that you downloaded, e.g. cd /download/uploadprogress-1.0.0
Type: sudo phpize
Analogous to these instructions on SOAP, type: MACOSX_DEPLOYMENT_TARGET=10.5 CFLAGS="-arch x86_64 -g -Os -pipe -no-cpp-precomp" CCFLAGS="-arch x86_64 -g -Os -pipe" CXXFLAGS="-arch x86_64 -g -Os -pipe" LDFLAGS="-arch x86_64 -bind_at_load" ./configure This is the most important step, so make sure you type it in correctly! (If you get any sort of "permission denied" errors with this, then type sudo su before running it, and type exit after running it).
Type: sudo make
Type: sudo make install
Add the line extension=uploadprogress.so to your php.ini file (for Entropy users, this can be found at /usr/local/php5/lib/php.ini )
Restart apache by typing: sudo apachectl restart
If all is well, then a phpinfo() check should output an uploadprogress section, with a listing for the config variables uploadprogress.file.contents_template, uploadprogress.file.filename_template, and uploadprogress.get_contents. Your Drupal status report should be happy, too. And, of course, FileField will totally rock.
]]>
Self-referencing symlinks can hang your IDE2009-04-15T00:00:00Z2009-04-15T00:00:00ZJazahttps://greenash.net.au/thoughts/2009/04/self-referencing-symlinks-can-hang-your-ide/
One of my current Drupal projects (live local) has been giving me a headache lately, due to a small but very annoying problem. My PHP development tools of choice, at the moment, are Eclipse PDT and TextMate. Both of these generally work great for me. I prefer TextMate if I have the choice (better config options + much more usable), but I switch to Eclipse whenever I need a good debugger (or a bit of contextual help / autocomplete). However, they haven't been working well for me in this case. Every time I try to load in the source code for this one particular project, the IDE either hangs indefinitely (in Eclipse), or it slows down to a crawl (in TextMate). I've been tearing my hair out, trying to work out the cause of this problem, which has forced me to edit individual files for several weeks, and which has meant that I can't have a debugger or an IDE workspace for this project. Finally, I've nailed it: self-referencing symlinks are the culprit.
The project is a Drupal multisite setup, and like most multisite setups, it uses a bunch of symlinks in order for multiple subdomains to share a single codebase. For each subdomain, I create a symlink that points to the directory in which it resides; in effect, each symlink points to itself. When Apache comes along, it treats a symlink as the "directory" for a subdomain, and it follows it. By the time Drupal is invoked, we're in the root of the Drupal codebase shared by all the subdomains. Everything works great. All our favourite friends throw a party. Champagne bottles pop.
The bash command to create the symlinks is pretty simple — for each symlink, it looks something like this:
ln -s . subdomain
Unfortunately, a symlink like this does not play well with certain IDEs that try to walk your filesystem. When they hit such a symlink, they get stuck infinitely recursing (or at least, they keep recursing for a long time before they give up). The solution? Simple: delete such symlinks from your development environment. If this is what's been dragging your system down, then removing them will instantly cure all your woes. For each symlink, deleting it is as simple as:
rm subdomain
(Don't worry, deleting a symlink doesn't also delete the thing that it's pointing at).
It seems obvious, now that I've worked it out; but this annoying "slow-down" of Eclipse and TextMate had me stumped for quite a while until today. I've only recently switched to Mac, and I've only made the switch because I'm working at Digital Eskimo, which is an all-out Mac shop. I'm a Windows user most of the time (God help me), and Eclipse on Windows never gave me this problem. I use the new Vista symbolic links functionality, which actually works great for me (and which is possibly the only good reason to upgrade from XP to Vista). Eclipse on Windows apparently doesn't try to follow Vista symlinks. This is probably why it took me so long so figure it out (that, and Murphy's Law) — I already had the symlinks when I started the project on Windows, and Eclipse wasn't hanging on me then.
I originally thought that the cause of the problem was Git. Live local is the first project that I've managed with Git, and I know that Git has a lot of metadata, as well as compressed binary files for all the non-checked-out branches and tags of a repository. These seemed likely candidates for making Eclipse and TextMate crash, especially since neither of these tools have built-in support for Git. But I tried importing the project without any Git metadata, and it was still hanging forever. I also thought maybe it was some of the compressed JavaScript in the project that was to blame (e.g. jQuery, TinyMCE). Same story: removing the compressed JS files and importing the directory was still ridiculoualy slow.
IDEs should really be smart enough to detect self-referencing or cyclic symlinks, and to stop themselves from recursing infinitely over them. There is actually a bug filed for TextMate already, so maybe this will be fixed in future versions of TextMate. Couldn't find a similar bug report for Eclipse. Anyway, for now, you'll just have to be careful when using symlinks in your (Drupal or other) development environment. If you have symlinks, and if your IDE is crashing, then try taking out the symlinks, and see if all becomes merry again. Also, I'd love to hear if other IDEs handle this better (e.g. Komodo, PHPEdit), or if they crash just as dismally when faced with symlinks that point to themselves.
]]>
Deployment and migration: hot at DrupalCon DC2009-03-19T00:00:00Z2009-03-19T00:00:00ZJazahttps://greenash.net.au/thoughts/2009/03/deployment-and-migration-hot-at-drupalcon-dc/
There was no shortage of kick-a$$ sessions at the recent DrupalCon DC. The ones that really did it for me, however, were those that dealt with the thorny topic of deployment and migration. This is something that I've been thinking about for quite a long time, and it's great to see that a lot of other Drupal people have been doing likewise.
The thorniness of the topic is not unique to Drupal. It's a tough issue for any system that stores a lot of data in a relational database. Deploying files is easy: because files can be managed by anynumber of modern VCSes, it's a snap to version, to compare, to merge and to deploy them. But none of this is easily available when dealing with databases. The deployment problem is similar for all of the popular open source CMSes. There are also solutions available for many systems, but they tend to vary widely in their approach and in their effectiveness. In Drupal's case, the problem is exacerbated by the fact that a range of different types of data are stored together in the database (e.g. content, users, config settings, logs). What's more, different use cases call for different strategies regarding what to stage, and what to "edit live".
Context, Spaces and Exportables
The fine folks from Development Seed gave a talk entitled: "A Paradigm for Reusable Drupal Features". I understand that they first presented the Context and Spaces modules about six months ago, back in Szeged. At the time, these modules generated quite a buzz in the community. Sadly, I wasn't able to make it to Szeged; just as well, then, that I finally managed to hear about them in DC.
Context and Spaces alone don't strike me as particularly revolutionary tools. The functionality that they offer is certainly cool, and it will certainly change the way we make Drupal sites, but I heard several people at the conference describe them as "just an alternative to Panels", and I think that pretty well sums it up. These modules won't rock your world.
Exportables, however, will.
The concept of exportables is simply the idea that any piece of data that gets stored in a Drupal database, by any module, should be able to be exported as a chunk of executable PHP code. Just think of the built-in "export" feature in Views. Now think of export (and import) being as easy as that for any Drupal data — e.g. nodes, users, terms, even configuration variables. Exportables isn't an essential part of the Context and Spaces system, but it has been made an integral part of it, because Context and Spaces allows for most data entities in core to be exported (and imported) as exportables, and because Context and Spaces wants all other modules to similarly allow for their data entities to be handled as exportables.
The "exportables" approach to deployment has these features:
The export code can be parsed by PHP, and can then be passed directly to Drupal's standard foo_save() functions on import. This means minimal overhead in parsing or transforming the data, because the exported code is (literally) exactly what Drupal needs in order to programmatically restore the data to the database.
Raw PHP code is easier for Drupal developers to read and to play with than YetAnotherXMLFormat or MyStrangeCustomTextFormat.
Exportables aren't tied directly to Drupal's database structure — instead, they're tied to the accepted input of its standard API functions. This makes the exported data less fragile between Drupal versions and Drupal instances, especially compared to e.g. raw SQL export/import.
Exportables generally rely on data entities that have a unique string identifier. This makes them difficult to apply, because most entities in Drupal's database currently only have numeric IDs. Numeric, auto-incrementing IDs are hard for exportables to deal with, because they cause conflict when deploying data from one site to another (numeric IDs are not unique between Drupal instances). The solution to this is to encourage the wider use of string-based, globally unique IDs in Drupal.
Exportables can be exported to files, which can then be managed using a super-cool VCS, just like any other files.
Using exportables as a deployment and migration strategy for Drupal strikes me as ingenious in its simplicity. It's one of those solutions that it's easy to look at, and say: "naaaaahhhh… that's too simple, it's not powerful enough"; whereas we should instead be looking at it, and saying: "woooaaahhh… that's so simple, yet so powerful!" I have high hopes for Context + Spaces + Exportables becoming the tool of choice for moving database changes from one Drupal site to another.
Deploy module
Greg Dunlap was one of the people who hosted the DC/DC Staging and Deployment Panel Discussion. In this session, he presented the Deploy module. Deploy really blew me away. The funny thing was, I'd had an idea forming in my head for a few days prior to the conference, and it had gone something like this:
"Gee, wouldn't it be great if there was a module that just let you select a bunch of data items [on a staging Drupal site], through a nice easy UI, and that deployed those items to your live site, using web services or something?"
Well, that's exactly what Deploy does! It can handle most of the database-stored entities in Drupal core, and it can push your data from one Drupal instance to another, using nothing but a bit of XML-RPC magic, along with Drupal's (un)standard foo_get() and foo_save() functions. Greg (aka heyrocker) gave a live demo during the session, and it was basically a wet dream for anyone who's ever dealt with ongoing deployment and change management on a Drupal site.
Deploy is very cool, and it's very accessible. It makes database change deployment as easy as a point-and-click operation, which is great, because it means that anyone can now manage a complex Drupal environment that has more than just a single production instance. However, it lacks most of the advantages of exportables; particularly, it doesn't allow exporting to files, so you miss out on the opportunity to version and to compare the contents of your database. Perhaps the ultimate tool would be to have a Deploy-like front-end built on top of an Exportables framework? Anyway, Deploy is a great piece of work, and it's possible that it will become part of the standard toolbox for maintainers of small- and medium-sized Drupal sites.
Other solutions
The other solutions presented at the Staging and Deployment Panel Discussion were:
Sacha Chua from IBM gave an overview of her "approach" to deployment, which is basically a manual one. Sacha keeps careful track of all the database changes that she makes on a staging site, and she then writes a code version of all those changes in a .install file script. Her only rule is: "define everything in code, don't have anything solely in the database". This is a great rule in theory, but in practice it's currently a lot of manual work to rigorously implement. She exports whatever she can as raw PHP (e.g. views and CCK types are pretty easy), and she has a bunch of PHP helper scripts to automate exporting the rest (and she has promised to share these…), but basically this approach still needs a lot of work before it's efficient enough that we can expect most developers to adopt it.
Kathleen Murtagh presented the DBScripts module, which is her system of dealing with the deployment problem. The DBScripts approach is basically to deploy database changes by dumping, syncing and merging at the MySQL / filesystem level. This is hardly an ideal approach: dealing with raw SQL dumps can get messy at the best of times. However, DBScripts is apparently stable and can perform its job effectively, so I guess that Kathleen knows how to wade through that mess, and come out clean on the other side. DBScripts will probably be superseded by alternative solutions in the future; but for now, it's one of the better options out there that actually works.
Shaun Haber from Warner Bros Records talked about the scripts that he uses for deployment, which are (I think?) XML-based, and which attempt to manually merge data where there may potentially be conflicting numeric IDs between Drupal instances. These scripts were not demo'ed, and they sound kinda nasty — there was a lot of talk about "pushing up" IDs in one instance, in order to merge in data from another instance, and other similarly dangerous operations. The Warner Records solution is custom and hacky, but it does work, and it's a reflection of the measures that people are prepared to take in order to get a viable deployment solution, for lack of an accepted standard one as yet.
There were also other presentations given at DC/DC, that dealt with the deployment and migration topic:
Moshe Weitzman and Mike Ryan (from Cyrve) gave the talk "Migration: not just for the birds", where they demo'ed the cool new Table Wizard module, a generic tool that they developed to assist with large-scale data migration from any legacy CMS into Drupal. Once you've got the legacy data into MySQL, Table Wizard takes care of pretty much everything else for you: it analyses the legacy data and suggests migration paths; it lets you map legacy fields to Drupal fields through a UI; and it can test, perform, and re-perform the actual migration incrementally as a cron task. Very useful tool, especially for these guys, who are now specialising in data migration full-time.
I unfortunately missed this one, but Chris Bryant gave the talk "Drupal Patterns — Managing and Automating Site Configurations". Along with Context and Spaces, the Patterns module is getting a lot of buzz as one of the latest-and-greatest tools that's going to change the way we do Drupal. Sounds like Patterns is taking a similar approach to Context and Spaces, except that it's centred around configuration import / export rather than "feature" definitions, and that it uses YAML/XML rather than raw PHP Exportables. I'll have to keep my eye on this one as well.
Come a long way
I have quite a long history with the issue of deployment and migration in Drupal. Back in 2006, I wrote the Import / Export API module, whose purpose was primarily to help in tackling the problem once and for all. Naturally, it didn't tackle anything once and for all. The Import / Export API was an attempt to solve the issue in as general a way as possible. It tried to be a full-blown Data API for Drupal, long before Drupal even had a Data API (in fact, Drupal still doesn't have a proper Data API!). In the original version (for Drupal 4.7), the Schema API wasn't even available.
The Import / Export API works in XML by default (although the engine is pluggable, and CSV is also supported). It bypasses all of Drupal's standard foo_load() and foo_save() functions, and deals directly with the database — which, at the end of the day, has more disadvantages than advantages. It makes an ambitious attempt to deal with non-unique numeric IDs across multiple instances, allowing data items with conflicting IDs to be overwritten, modified, ignored, etc — inevitably, this is an overly complex and rather fragile part of the module. However, when it works, it does allow any data between any two Drupal sites to be merged in any shape or form you could imagine — quite cool, really. It was, at the end of the day, one hell of a learning experience. I'm confident that we've come forward since then, and that the new solutions being worked on are a step ahead of what I fleshed out in my work back in '06.
In my new role as a full-time developer at Digital Eskimo, and particularly in my work on live local, I've been exposed to the ongoing deployment challenge more than ever before. Sacha Chua said in DC that (paraphrased):
"Manually re-doing your database changes through the UI of the production site is currently the most common deployment strategy for Drupal site maintainers."
And, sad as that statement sounds, I can believe it. I feel the pain. We need to sort out this problem once and for all. We need a clearer separation between content and configuration in Drupal, and site developers need to be able to easily define where to draw that line on a per-site basis. We need a proper Data API so that we really can easily and consistently migrate any data, managed by any old module, between Drupal instances. And we need more globally unique IDs for Drupal data entities, to avoid the nightmare of merging data where non-unique numeric IDs are in conflict. When all of that happens, we can start to build some deployment tools for Drupal that seriously rock.
]]>
Listing every possible combination of a set2008-10-17T00:00:00Z2008-10-17T00:00:00ZJazahttps://greenash.net.au/thoughts/2008/10/listing-every-possible-combination-of-a-set/
The problem is simple. Say you have a set of 12 elements. You want to find and to list every possible unique combination of those elements, irrespective of the ordering within each combination. The number of elements making up each combination can range between 1 and 12. Thanks to the demands of some university work, I've written a script that does just this (written in PHP). Whack it on your web server (or command-line), give it a spin, hack away at it, and use it to your heart's content.
List of all possible combinations
The most important trick with this problem was to find only the possible combinations (i.e. unique sets irrespective of order), rather than all possible permutations (i.e. unique sets where ordering matters). With my first try, I made a script that first found all possible permutations, and that then culled the list down to only the unique combinations. Since the number of possible permutations is monumentally greater than the number of combinations for a given set, this quickly proved unwieldy: the script was running out of memory with a set size of merely 7 elements (and that was after I increased PHP's memory limit to 2GB!).
The current script uses a more intelligent approach in order to only target unique combinations, and (from my testing) it's able to handle a set size of up to ~15 elements. Still not particularly scalable, but it was good enough for my needs. Unfortunately, both permutations and combinations increase factorially in relation to the set size; and if you know anything about computational complexity, then you'll know that an algorithm which runs in factorial time is about the least scalable type of algorithm that you can write.
This script produces essentially equivalent output to this "All Combinations" applet, except that it's an open-source customisable script instead of a closed-source proprietary applet. I owe some inspiration to the applet, simply for reassuring me that it can be done. I also owe a big thankyou to Dr. Math's Permutations and Combinations, which is a great page explaining the difference between permutations and combinations, and providing the formulae used to calculate the totals for each of them.
]]>
A count of Unicode characters grouped by script2008-10-14T00:00:00Z2008-10-14T00:00:00ZJazahttps://greenash.net.au/thoughts/2008/10/a-count-of-unicode-characters-grouped-by-script/
We all know what Unicode is (if you don't, then read all about it and come back later). We all know that it's big. Hey, of course it's big: its aim is to allow for the representation of characters from every major language script in the world. That's gotta be a lot of characters, right? It's reasonably easy to find out how many unicode characters there are in total: e.g. the Wikipedia page (linked above) states that: "As of Unicode 5.1 there are 100,507 graphic [assigned] characters." I got a bit curious today, and — to my disappointment — after some searching, I was unable to find a nice summary of how many characters there are in each script that Unicode supports. And thus it is that I present to you my count of all assigned Unicode characters (as of v5.1), grouped by script and by category.
The raw data
Fact: Unicode's "codespace" can represent up to 1,114,112 characters in total.
Fact: As of today, 100,540 of those spaces are in use by assigned characters (excluding private use characters).
The Unicode people provide a plain text listing of all supported Unicode scripts, and the number of assigned characters in each of them. I used this listing in order to compile a table of assigned character counts grouped by script. Most of the hard work was done for me. The table is almost identical to the one you can find on the Wikipedia Unicode scripts page, except that this one is slightly more updated (for now!).
Unicode script name
Category
ISO 15924 code
Number of characters
Common
Miscellaneous
Zyyy
5178
Inherited
Miscellaneous
Qaai
496
Arabic
Middle Eastern
Arab
999
Armenian
European
Armn
90
Balinese
South East Asian
Bali
121
Bengali
Indic
Beng
91
Bopomofo
East Asian
Bopo
65
Braille
Miscellaneous
Brai
256
Buginese
South East Asian
Bugi
30
Buhid
Philippine
Buhd
20
Canadian Aboriginal
American
Cans
630
Carian
Ancient
Cari
49
Cham
South East Asian
Cham
83
Cherokee
American
Cher
85
Coptic
European
Copt
128
Cuneiform
Ancient
Xsux
982
Cypriot
Ancient
Cprt
55
Cyrillic
European
Cyrl
404
Deseret
American
Dsrt
80
Devanagari
Indic
Deva
107
Ethiopic
African
Ethi
461
Georgian
European
Geor
120
Glagolitic
Ancient
Glag
94
Gothic
Ancient
Goth
27
Greek
European
Grek
511
Gujarati
Indic
Gujr
83
Gurmukhi
Indic
Guru
79
Han
East Asian
Hani
71578
Hangul
East Asian
Hang
11620
Hanunoo
Philippine
Hano
21
Hebrew
Middle Eastern
Hebr
133
Hiragana
East Asian
Hira
89
Kannada
Indic
Knda
84
Katakana
East Asian
Kana
299
Kayah Li
South East Asian
Kali
48
Kharoshthi
Central Asian
Khar
65
Khmer
South East Asian
Khmr
146
Lao
South East Asian
Laoo
65
Latin
European
Latn
1241
Lepcha
Indic
Lepc
74
Limbu
Indic
Limb
66
Linear B
Ancient
Linb
211
Lycian
Ancient
Lyci
29
Lydian
Ancient
Lydi
27
Malayalam
Indic
Mlym
95
Mongolian
Central Asian
Mong
153
Myanmar
South East Asian
Mymr
156
N'Ko
African
Nkoo
59
New Tai Lue
South East Asian
Talu
80
Ogham
Ancient
Ogam
29
Ol Chiki
Indic
Olck
48
Old Italic
Ancient
Ital
35
Old Persian
Ancient
Xpeo
50
Oriya
Indic
Orya
84
Osmanya
African
Osma
40
Phags-pa
Central Asian
Phag
56
Phoenician
Ancient
Phnx
27
Rejang
South East Asian
Rjng
37
Runic
Ancient
Runr
78
Saurashtra
Indic
Saur
81
Shavian
Miscellaneous
Shaw
48
Sinhala
Indic
Sinh
80
Sundanese
South East Asian
Sund
55
Syloti Nagri
Indic
Sylo
44
Syriac
Middle Eastern
Syrc
77
Tagalog
Philippine
Tglg
20
Tagbanwa
Philippine
Tagb
18
Tai Le
South East Asian
Tale
35
Tamil
Indic
Taml
72
Telugu
Indic
Telu
93
Thaana
Middle Eastern
Thaa
50
Thai
South East Asian
Thai
86
Tibetan
Central Asian
Tibt
201
Tifinagh
African
Tfng
55
Ugaritic
Ancient
Ugar
31
Vai
African
Vaii
300
Yi
East Asian
Yiii
1220
Regional and other groupings
The only thing that I added to the above table myself, was the data in the "Category" column. This data comes from the code charts page of the Unicode web site. This page lists all of the scripts in the current Unicode standard, and it groups them into a number of categories, most of which describe the script's regional origin. As far as I can tell, nobody's collated these categories with the character-count data before, so I had to do it manually.
Into the "Miscellaneous" category, I put the "Common" and the "Inherited" scripts, which contain numerous characters that are shared amongst multiple scripts (e.g. accents, diacritical marks), as well as a plethora of symbols from many domains (e.g. mathematics, music, mythology). "Common" also contains the characters used by the IPA. Additionally, I put Braille (the "alphabet of bumps" for blind people) and Shavian (invented phonetic script) into "Miscellaneous".
From the raw data, I then generated a summary table and a pie graph of the character counts for all the scripts, grouped by category:
Category
No of characters
% of total
African
915
0.91%
American
795
0.79%
Ancient
1724
1.71%
Central Asian
478
0.48%
East Asian
84735
84.28%
European
2455
2.44%
Indic
1185
1.18%
Middle Eastern
1254
1.25%
Miscellaneous
5978
5.95%
Philippine
79
0.08%
South East Asian
942
0.94%
Unicode character count by category
Attack of the Han
Looking at this data, I can't help but gape at the enormous size of the East Asian character grouping. 84.3% of the characters in Unicode are East Asian; and of those, the majority belong to the Han script. Over 70% of Unicode's assigned codespace is occupied by a single script — Han! I always knew that Chinese contained thousands upon thousands of symbols; but who would have guessed that their quantity is great enough to comprise 70% of all language symbols in known linguistic history? That's quite an achievement.
And what's more, this is a highly reduced subset of all possible Han symbols, due mainly to the Han unification effort that Unicode imposed on the script. Han unification has resulted in all the variants of Han — the notable ones being Chinese, Japanese, and Korean — getting represented in a single character set. Imagine the size of Han, were its Chinese / Japanese / Korean variants represented separately — no wonder (despite the controversy and the backlash) they went ahead with the unification!
Broader groupings
Due to its radically disproportionate size, the East Asian script category squashes away virtually all the other Unicode script categories into obscurity. The "Miscellaneous" category is also unusually large (although still nowhere near the size of East Asian). As such, I decided to make a new data table, but this time with these two extra-large categories excluded. This allows the size of the remaining categories to be studied a bit more meaningfully.
For the remaining categories, I also decided to do some additional grouping, to further reduce disproportionate sizes. These additional groupings are my own creation, and I acknowledge that some of them are likely to be inaccurate and not popular with everyone. Anyway, take 'em or leave 'em: there's nothing official about them, they're just my opinion:
I grouped the "African" and the "American" categories into a broader "Native" grouping: I know that this word reeks of arrogant European colonial connotations, but nevertheless, I feel that it's a reasonable name for the grouping. If you are an African or a Native American, then please treat the name academically, not personally.
I also brought the "Indic", "Central Asian", and "Philippine" categories together into an "Indic" grouping. I did this because, after doing some research, it seems that the key Central Asian scripts (e.g. Mongolian, Tibetan) and the pre-European Philippine scripts (e.g. Tagalog) both have clear Indic roots.
I left the "Ancient", "South-East Asian", "European" and "Middle Eastern" groupings un-merged, as they don't fit well with any other group, and as they're reasonably well-proportioned on their own.
Here's the data for the broader groupings:
Grouping
No of characters
% of total
Ancient
1724
17.54%
Indic
1742
17.73%
Native
1710
17.40%
European
2455
24.98%
Middle Eastern
1254
12.76%
South-Eastern
942
9.59%
Unicode character count by grouping
And there you have it: a breakdown of the number of characters in the main written scripts of the world, as they're represented in Unicode. European takes the lead here, with the Latin script being the largest in the European group by far (mainly due to the numerous variants of the Latin alphabet, with accents and other symbols used to denote regional languages). All up, a relatively even spread.
I hope you find this interesting — and perhaps even useful — as a visualisation of the number of characters that the world's main written scripts employ today (and throughout history). If you ever had any doubts about the sheer volume of symbols used in East Asian scripts (but remember that the vast majority of them are purely historic and are used only by academics), then those doubts should now be well and truly dispelled.
It will also be interesting to see how this data changes, over the next few versions of Unicode into the future. I imagine that only the more esoteric categories will grow: for example, ever more obscure scripts will no doubt be encoded and will join the "Ancient" category; and my guess is that ever more bizarre sets of symbols will join the "Miscellaneous" category. There may possibly be more additions to the "Native" category, although the discovery of indigenous writing systems is far less frequent than the discovery of indigenous oral languages. As for the known scripts of the modern world, I'd say they're well and truly covered already.
]]>
Randfixedsum ports in C# and PHP2008-09-24T00:00:00Z2008-09-24T00:00:00ZJazahttps://greenash.net.au/thoughts/2008/09/randfixedsum-ports-in-cs-and-php/
For a recent programming assignment that I was given at university, I was required to do some random number generation. I decided to write my program in such a way that it needed a set of random numbers (with a fixed set size), each of which had to be within a fixed range, and all of which had to add up to a fixed total. In other words, what I needed was a function that let me say: "give me 50 random numbers, and make sure that each of those numbers is between 1 and 20, and also make sure that the total of all those numbers is 200... and remember, despite all that, they have to be random!" Only problem? Finding a function that returns such data is extremely difficult.
Fortunately, I stumbled across the ingenious randfixedsum, by Roger Stafford. Randfixedsum — as its name suggests — does exactly what I was looking for. The only thing that was stopping me from using it, is that it's written in Matlab. And I needed it in C# (per the requirements of my programming assignment). And that, my friends, is the story of why I decided to port it! This was the first time I've ever used Matlab (actually, I used Octave, a free alternative), and it's pretty different to anything else I've ever programmed with. So I hope I've done a decent job of porting it, but let me know if I've made any major mistakes. I also ported the function over to PHP, as that's my language of choice these days. Download, tinker, and enjoy.
My ported functions produce almost identical output to the Matlab original. The main difference is that my versions only return a 1-dimensional set of numbers, as opposed to an n-dimensional set. Consequently, they also neglect to return the volume of the set, since this is always equal to the length of the set when there's only one dimension. I didn't port the n-dimensions functionality, because in my case I didn't need it — if you happen to need it, then you're welcome to port it yourself. You're also welcome to "port my ports" to whatever other languages take your fancy. Porting them from vector-based Matlab to procedural-based C# and PHP was the hard part. Porting them to any other procedural or OO language from here is the easy part. Please let me know if you make any versions of your own — I'd love to take a look at them.
]]>
Legislation and programming: two peas in a pod2008-08-27T00:00:00Z2008-08-27T00:00:00ZJazahttps://greenash.net.au/thoughts/2008/08/legislation-and-programming-two-peas-in-a-pod/
The language of law and the language of computers hardly seem like the most obvious of best buddies. Legislation endeavours to be unambiguous, and yet it's infamous for being plagued with ambiguity problems, largely because it's ultimately interpreted by subjective and unpredictable humang beings. Computer code doesn't try to be unambiguous, it simply is unambiguous — by its very definition. A piece of code, when supplied with any given input, is quite literally incapable of returning inconsistent output. A few weeks ago, I finished an elective subject that I studied at university, called Legal Method and Research. The main topic of the subject was statutory interpretation: that is, the process of interpreting the meaning of a single unit of law, and applying a given set of facts to it. After having completed this subject, one lesson that I couldn't help but take away (being a geek 'n' all) was how strikingly similar the structure of legislation is to the structure of modern programming code. This is because at the end of the day, legislation — just like code — needs to be applied to a real case, and it needs to yield a Boolean outcome.
I'm now going to dive straight into a comparison of statutory language and programming code, by picking out a few examples of concepts that exist in both domains with differing names and differing forms, but with equivalent underlying purposes. I'm primarily using concept names from the programming domain, because that's the domain that I'm more familiar with. Hopefully, if legal jargon is more your thing, you'll still be able to follow along reasonably well.
Boolean operators
In the world of programming, almost everything that computers can do is founded on three simple Boolean operations: AND, OR, and NOT. The main use of these operators is to create a compound condition — i.e. a condition that can only be satisfied by meeting a combination of criteria. In legislation, Boolean operators are used just as extensively as they are in programming, and they also form the foundation of pretty much any statement in a unit of law. They even use exactly the same three English words.
In law:
FREEDOM OF INFORMATION ACT 1989 (NSW)
Transfer of applications
Section 20: Transfer of applications
An agency to which an application has been made may transfer the application to another agency:
if the document to which it relates:
is not held by the firstmentioned agency but is, to the knowledge of the firstmentioned agency, held by the other agency, or
is held by the firstmentioned agency but is more closely related to the functions of the other agency, and
if consent to the application being transferred is given by or on behalf of the other agency.
Every unit of data (i.e. every variable, constant, etc) in a computer program has a type. The way in which a type is assigned to a variable varies between programming languages: sometimes it's done explicitly (e.g. in C), where the programmer declares each variable to be "of type x"; and sometimes it's done implicitly (e.g. in Python), where the computer decides at run-time (or at compile-time) what the type of each variable is, based on the data that it's given. Regardless of this issue, however, in all programming languages the types themselves are clearly and explicitly defined. Almost all languages also have primitive and structured data types. Primitive types usually include "integer", "float", "boolean" and "character" (and often "string" as well). Structured types consist of attributes, and each attribute is either of a primitive type, or of another structured type.
Legislation follows a similar pattern of clearly specifying the "data types" for its "variables", and of including definitions for each type. Variables can be of a number of different types in legislation, however "person" (and sub-types) is easily the most common. Most Acts contain a section entitled "definitions", and it's not called that for nothing.
In law:
SALES TAX ASSESSMENT ACT 1992 (Cth) No. 114
Section 5: General definitions
In this Act, unless the contrary intention appears:
...
"eligible Australian traveller" means a person defined to be an eligible Australian traveller by regulations made for the purposes of this definition;
<?php
class Person {
  protected PersonType personType;

  /* ... */
}

class EligibleAustralianTraveller extends Person {
  private RegulationSet regulationSet;

  /* ... */
}
?>
Also related to defined types is the concept of graphs. In programming, it's very common to think of a set of variables as nodes, which are connected to each other with lines (or "edges"). The connections between nodes often makes up a significant part of the definition of a structured data type. In legislation, the equivalent of nodes is people, and the equivalent of connecting lines is relationships. In accordance with the programming world, a significant part of most definitions in legislation are concerned with the relationship that one person has to another. For example, various government officers are defined as being "responsible for" those below them, and family members are defined as being "related to" each other by means such as marriage and blood.
Exception handling
Many modern programming languages support the concept of "exceptions". In order for a program to run correctly, various conditions need to be met; if one of those conditions should fail, then the program is unable to function as intended, and it needs to have instructions for how to deal with the situation. Legislation is structured in a similar way. In order for the law to be adhered to, various conditions need to be met; if one of those conditions should fail, then the law has been "broken", and consequences should follow.
Legislation is generally designed to "assume the worst". Law-makers assume that every requirement they dictate will fail to be met; that every prohibition they publish will be violated; and that every loophole they leave unfilled will be exploited. This is why, to many people, legislation seems to spend 90% of its time focused on "exception handling". Only a small part of the law is concerned with what you should do. The rest of it is concerned with what you should do when you don't do what you should do. Programming and legislation could certainly learn a lot from each other in this area — finding loopholes through legal grey areas is the equivalent of hackers finding backdoors into insecure systems, and legislation is as full of loopholes as programs are full of security vulnerabilities. Exception handling is also something that's not implemented particularly cleanly or maintainably in either domain.
In law:
HUMAN TISSUE ACT 1982 (Vic)
Section 24: Blood transfusions to children without consent
Where the consent of a parent of a child or of a person having authority to consent to the administration of a blood transfusion to a child is refused or not obtained and a blood transfusion is administered to the child by a registered medical practitioner, the registered medical practitioner, or any person acting in aid of the registered medical practitioner and under his supervision in administering the transfusion shall not incur any criminal liability by reason only that the consent of a parent of the child or a person having authority to consent to the administration of the transfusion was refused or not obtained if-
in the opinion of the registered medical practitioner a blood transfusion was-
a reasonable and proper treatment for the condition from which the child was suffering; and
<?php
class Transfusion {
  public static void main() {
    try {
      this.giveBloodTransfusion();
    }
    catch (ConsentNotGivenException e) {
      this.isDoctorLiable = e.isReasonableJustification;
    }
  }

  private void giveBloodTransfusion() {
    this.performTransfusion();

    if (!this.consentGiven) {
      throw new ConsentNotGivenException();
    }
  }
}
?>
Final thoughts
The only formal academic research that I've found in this area is the paper entitled "Legislation As Logic Programs", written in 1992 by the British computer scientist Robert Kowalski. This was a fascinating project: it seems that Kowalski and his colleages were actually sponsored, by the British government, to develop a prototype reasoning engine capable of assisting people such as judges with the task of legal reasoning. Kowalski has one conclusion that I can't help but agree with wholeheartedly:
The similarities between computing and law go beyond those of linguistic style. They extend also to the problems that the two fields share of developing, maintaining and reusing large and complex bodies of linguistic texts. Here too, it may be possible to transfer useful techniques between the two fields.
(Kowalski 1992, part 7)
Legislation and computer programs are two resources that are both founded on the same underlying structures of formal logic. They both attempt to represent real-life, complex human rules and problems, in a form that can be executed to yield a Boolean outcome. And they both suffer chronically with the issue of maintenance: how to avoid bloat; how to keep things neat and modular; how to re-use and share components wherever possible; how to maintain a stable and secure library; and how to keep the library completely up-to-date and on par with changes in the "real world" that it's trying to reflect. It makes sense, therefore, that law-makers and programmers (traditionally not the most chummy of friends) really should engage in collaborative efforts, and that doing so would benefit both groups tremendously.
There is, of course, one very important thing that almost every law contains, and that judges must evaluate almost every day. One thing that no computer program contains, and that no CPU in the world is capable of evaluating. That thing is a single word. A word called "reasonable". People's fate as murderers or as innocents hinges on whether or not there's "reasonable doubt" on the facts of the case. Police are required to maintain a "resonable level" of law and order. Doctors are required to exercise "reasonable care" in the treatment of their patients. The entire legal systems of all the civilised world depend on what is possibly the most ambiguous and ill-defined word in the entire English language: "reasonable". And to determine reasonableness requires reasoning — the outcome is Boolean, but the process itself (of "reasoning") is far from a simple yes or no affair. And that's why I don't expect to see a beige-coloured rectangular box sitting in the judge's chair of my local court any time soon.
]]>
Drupal and Apache in Vista: some tips2008-06-05T00:00:00Z2008-06-05T00:00:00ZJazahttps://greenash.net.au/thoughts/2008/06/drupal-and-apache-in-vista-some-tips/
I bought a new laptop at the start of this year, and since then I've experienced the "privilege"pile of festering camel dung that is being a user of Windows Vista. As with most things in Vista, installing Drupal and Apache is finickier than it used to be, back on XP. When I first went through the process, I encountered a few particularly weird little gotchas, and I scribbled them down for future reference. Here are some things to look out for, when the inevitable day comes in which you too will shine the light of Drupal upon the dark and smelly abyss of Vista:
Don't use the stop / start / restart Apache controls in the start menu (start > programs > Apache > control), as they are unreliable; use services.msc insetad (start > run > "services.msc").
Don't edit httpd.conf through the filesystem — use the 'edit httpd.conf' icon in the start menu instead (start > programs > Apache > configure), as otherwise your saved changes may not take effect.
If you're seeing the error message "http request status - fails" on Drupal admin pages, then try editing your 'c:\windows\system32\drivers\etc\hosts' file, and taking out the IPv6 mapping of localhost, as this can confuse the Windows mapping of 127.0.0.1 to localhost (restart for this to take effect).
Don't use Vista! If, however, you absolutely have no choice, then refer to steps 1-3.
]]>
The Net, ten years ago2008-03-09T00:00:00Z2008-03-09T00:00:00ZJazahttps://greenash.net.au/thoughts/2008/03/the-net-ten-years-ago/
Internet access is available anywhere these days — even on tropical islands in south-east Asia. Several weeks ago, I was on the island of Ko Tao in southern Thailand. Myself and several of my mates were discussing our views on the price of Internet usage. Most of us were in agreement that the standard Ko Tao rate of 2 baht per minute (about AUD$5 per hour) — which was standard across all of the island's many cafés — was exhorbitant, unacceptable and unjustifiable. One bloke, however, had visited the island ten years previously. He thought that the rate was completely fair — as he remembered that ten years earlier, the entire island had boasted only a single place offering access; and that back then, they were charging 60B/min! Nowadays, the standard rate in most parts of Thailand is about ½B/min, or even ¼B/min if you know where to look. This massive price difference got me thinking about what else regarding the 'Net has changed between 1998 and 2008. And the answer is: heck, what hasn't?
After my recent series of blog posts discussing serious environmental issues, I figured it's time to take a break, and to provide a light interlude that makes you laugh instead of furrow your eyebrows. So let me take you on a trip down memory lane, and pay a tribute to those golden days when text was ASCII, and download speeds were one digit.
What it was like...
IRC was all the rage. High-school teenie-boppers knew their /msg from their /part, and they roamed the public chat networks without fear of 80-year-old paedophiles going by the alias "SexySue_69". ICQ was a new and mysterious technology, and MSN had barely hit the block.
56kbps dial-up Internet was lightning fast, and was only for the rich and famous. All the plebs were still on regular old 14.4. Downloading a single MP3 meant that your entire afternoon was gone.
IE3 and Netscape 3 were the cutting-edge browsers of choice. Ordinary non-geeky netizens knew what Mosaic and Lynx were. "Firefox" was (probably) a Japanese Anime character from Final Fantasy VII.
Most of our computers were running the latest-and-greatest offering from Microsoft, remembered (with horror) for all eternity as "Windows 98". Fans of the Apple Macintosh (and yes, its full name was still used back then) were equally fortunate to be using Mac OS 9.
On the web design front, table-based layouts were the only-based layouts around.
If you wanted to show that you were really cool and that you could make your website stand out, you used the HTML<blink> tag.
Long before MySpace, personal home pages on Angelfire and GeoCities was what all your friends were making.
Life-changing interactive technologies such as ActiveX and RealPlayer were hitting the scene.
There was no Google! If you wanted to search the 'Net, then you had a choice of using such venerable engines as Lycos, Excite, or even HotBot.
AOL were still mailing out their "Get started with AOL" CDs all over the world for free. Bored young high-schoolers worldwide were using this as a gateway to discovering the excellent utility of CDs as damage-inflicting frisbees.
Forget BitTorrent: back then, unlimited quantities of pirated music were still available on Napster! Search, click, wait 2 hours, and then listen to your hearts' content.
There was no spam! Receiving an e-mail entitled "Make millions without working" or "Hot girls waiting to meet you" were still such a novelty, that it was worth printing them out and showing them to your mates, who would then debate whether or not the said "hot girls" were genuine and were worth responding to.
People (no — I mean real people) still used newsgroups. They were worth subscribing to, replying to, and keeping up with.
Blasphemies such as Word's "Save as HTML" feature, or Microsoft FrontPage 98, were still considered "professional web design tools".
The Internet was still called the "Information Superhighway".
What it's still like
There's still Porn™. And plenty of it.
The same people who still look at porn, are still reading Slashdot every day. And they're still running the same version of Slackware Linux, on a machine that they claim hasn't needed a reboot since 1993. And they're still spilling fat gobs of pizza sauce all over their DVORAK keyboards. Which they still believe will take off one day.
There are still n00bz. In fact, there are more now than there ever were before.
]]>
An undo button for Drupal2006-05-24T00:00:00Z2006-05-24T00:00:00ZJazahttps://greenash.net.au/thoughts/2006/05/an-undo-button-for-drupal/
Every time that you perform any action in a desktop application, you can hit the trusty 'undo' button, to un-wreak any havoc that you may have just wreaked. Undo and redo functionality comes free with any text-based desktop application that you might develop, because it's a stock standard feature in virtually every standard GUI library on the planet. It can also be found in most other desktop applications, such as graphics editors, animation packages, and even some games. Programming this functionality into applications such as live client-side editors is extremely easy, because the data is all stored directly in temporary memory, and so keeping track of the last 'however many' changes is no big deal.
One of the biggest shortcomings of web applications in general, is that they lack this crucial usability (and arguably security) feature. This is because web applications generally work with databases (or with other permanent storage systems, such as text files) when handling data between multiple requests. They have no other choice, since all temporary memory is lost as soon as a single page request finishes executing. However, despite this, implementing an 'undo' (and 'redo') system in Drupal should be a relatively simple task - much simpler, in fact, than you might at first think.
Consider this: virtually all data in Drupal is stored in a database - generally, a single database; and all queries on that database are made through the db_query() function, which is the key interface in Drupal's database abstraction layer. Also, all INSERT, UPDATE, and DELETE queries in Drupal are (supposed to be) constructed with placeholders for actual values, and with variables passed in separately, to be checked before actually getting embedded into a query.
It would therefore be a simple task to change the db_query() function, so that it recorded all INSERT, UPDATE, and DELETE queries, and the values that they affect, somewhere in the database (obviously, the queries for keeping track of all other queries would have to be excluded from this, to prevent infinite loops from occurring). This could even be done with Drupal's existing watchdog system, but a separate system with its own properly-structured database table(s) would be preferable.
Once this base system is in place, an administrative front-end could be developed, to browse through the 'recently executed changes' list, to undo or redo the last 'however many' changes, and to set the amount of time for which changes should be stored (just as can be done for logs and statistics already in Drupal), among other things. Because it is possible to put this system in place for all database queries in Drupal, undo and redo functionality could apply not just to the obvious 'content data' (e.g. nodes, comments, users, terms / vocabularies, profiles), but also to things that are more 'system data' (e.g. variables, sequences, installed modules / themes).
An 'undo / redo' system would put Drupal at the bleeding edge of usability in the world of web applications. It would also act as a very powerful in-built data auditing and monitoring system, which is an essential feature for many of Drupal's enterprise-level clientele. And, of course, it would provide top-notch data security, as it would virtually guarantee that any administrative blunder, no matter how fatal, can always be reverted. Perhaps there could even be a special 'emergency undo' interface (e.g. an 'undo.php' page, similar to 'update.php'), for times when a change has rendered your site inaccessible. Think of it as Drupal's 'emergency boot disk'.
This is definitely something to add to my todo list, hopefully for getting done between now and the 4.8 code freeze. However, with my involvement in the Google Summer of Code seeming very likely, I may not have much time on my hands for it.
]]>
A plain-text program design standard2005-10-07T00:00:00Z2005-10-07T00:00:00ZJazahttps://greenash.net.au/thoughts/2005/10/a-plain-text-program-design-standard/
I've been working on a project at University, in which my team had to produce a large number of software design documents, in order to fulfil the System Architecture objectives of the project. The documents included UML class diagrams, UML sequence diagrams, class-based system specifications, and more.
The design phase of our project is now finished, but all of these documents now have to be translated into working code. This basically involves taking the high-level design structure specified in the design documents, and converting it into skeleton code in the object-oriented programming language of our choice. Once that's done, this 'skeleton code' of stubs has to actually be implemented.
Of course, all of this is manual work. Even though the skeleton code is virtually the same as the system specifications, which in turn are just a text-based representation of the graphical class diagram, each of these artefacts are created using separate software tools, and each of them must be created independently. This is not the first Uni project in which I've had to do this sort of work; but due to the scale of the project I'm currently working on, it really hit me that what we have to do is crazy, and that surely there's a better, more efficient way of producing all these equivalent documents.
Wouldn't it be great if I could write just one design specification, and if from that, numerous diagrams and skeleton code could all be auto-generated? Wouldn't it make everyone's life easier if the classes and methods and operations of a system only needed to be specified in one document, and if that one document could be processed in order to produce all the other equivalent documents that describe this information? What the world needs is a plain-text program design standard.
I say plain-text, because this is essential if the standard is to be universally accessible, easy to parse and process, and open. And yes, by 'standard', I do mean 'open standard'. That is: firstly, a standard in which documents are text rather than binary, and can be easily opened by many existing text editors; and secondly (and more importantly), a standard whose specification is published on the public domain, and that can therefore be implemented and interfaced to by any number of third-party developers. Such a standard would ideally be administered and maintained by a recognised standards body, such as the ISO, ANSI, the OMG, or even the W3C.
I envision that this standard would be of primary use in object-oriented systems, but then again, it could also be used for more conventional procedural systems, and maybe even for other programming paradigms, such as functional programming (e.g. in Haskell). Perhaps it could even be extended to the database arena, to allow automation between database design tasks (e.g. ERD diagramming) and SQL CREATE TABLE statements.
This would be the 'dream standard' for programmers and application developers all over the world. It would cut out an enormous amount of time that is wasted on repetitive and redundant work that can potentially be automated. To make life simpler (and for consistency with all the other standards of recent times), the standard would be an XML-based markup language. At its core would simply be the ability to define the classes, attributes, and operations of a system, in both a diagram-independent and a language-independent manner.
Here's what I imagine a sample of a document written to such a standard might look like (for now, let's call it ODML, or Object Design Markup Language):
(Sorry about the underscores, guys - due to technical difficulties in getting indenting spaces to output properly, I decided to resort to using them instead.)
From this simple markup, programs could automatically generate design documents, such as class diagrams and system specifications. Using the same markup, skeleton code could also be generated for any OO language, such as Java, C#, C++, and PHP.
I would have thought that surely something this cool, and this important, already exists. But after doing some searching on the Web, I was unable to find anything that came even remotely near to what I've described here. However, I'd be most elated to learn that I simply hadn't searched hard enough!
When I explained this idea to a friend of mine, he cynically remarked that were such a standard written, and tools for it developed, it would make developers' workloads greater rather than smaller. He argued that this would be the logical expected result, based on past improvements in productivity. Take the adoption of the PC, for example: once people were able to get more work done in less time, managers the world over responded by simply giving people more work to do! The same applies to the industrial revolution of the 19th century (once workers had machines to help them, they could produce more goods); to the invention of the electric light bulb (if you have light to see at night, then you can work 24/7); and to almost every other technological advancement that you can think of. I don't deny that an effective program design standard would quite likely have the same effect. However, that's an unavoidable side effect of any advancement in productivity, and is no reason to shun the introduction of the advancement.
A plain-text program design standard would make the programmers and system designers of the world much happier people. No question about it. Does such a thing exist already? If so, where the hell do I get it? If not, I hope someone invents it real soon!
]]>
Web 2.0, and other nauseating buzzwords2005-10-01T00:00:00Z2005-10-01T00:00:00ZJazahttps://greenash.net.au/thoughts/2005/10/web-2-0-and-other-nauseating-buzzwords/
Attending the Web Essentials 2005 conference (others' thoughts on WE05) was the best thing I've done this year. I'm not kidding. The Navy SEALs, the heart surgeons, and the rocket scientists (i.e. the best of the best) in web design all spoke there. Among my favourites were: Tantek Çelik, the creator of the famous Box Model hack (a.k.a. the Tan hack) and markup guru; Eric CSS Meyer (his middle initials speak for themselves); Jeffrey Veen, whose partner Jesse James Garrett coined the 2005 Acronym of the Year (AJAX), and who is one of the more enthusiastic speakers I've ever heard; and Doug Bowman, who is blessed with an artistic talent, that he couples with a devotion to web standards, and with a passionate sense of vision.
Since Jakob Nielsen was absent, one thing I didn't get out of the conference was a newfound ability to write short sentences (observe above paragraph). :-)
But guys, why did you have to overuse that confounded, annoying buzzword Web 2.0? Jeff in particular seemed to really shove this phrase in our faces, but I think many of the other speakers did also. Was it just me, or did this buzzword really buzz the hell out of some people? I know I'm more intolerant than your average geek when it comes to buzzwords, but I still feel that this particular one rates exceptionally poor on the too much marketing hype to handle scale. It's so corny! Not to mention inaccurate: "The Web™" isn't something that's "released" or packaged in nice, easy-to-manage versions, any more than it's a single technology, or even (arguably) a single set of technologies.
AJAX I can handle. It stands for something. It's real. It's cool. "Blog" I can handle (ostensibly this is a "blog entry" - although I always try to write these thoughts as formal articles of interest, rather than as mere "today I did this..." journal entries). It's short for "web log". That's even more real, and more cool. "Podcast" I can tolerate. It's a fancy hip-hop way of saying "downloadable audio", but I guess it is describing the emerging way in which this old technology is being used. But as for ye, "Web 2.0", I fart in your general direction. The term means nothing. It represents no specific technology, and no particular social phenomenon. It's trying to say "we've progressed, we're at the next step". But without knowing about the things it implies - the things that I can handle, like RSS, CSS, "The Semantic Web", and Accessibility - the phrase itself is void.
Most of all, I can't handle the undertone of "Web 2.0" - it implies that "we're there" - as if we've reached some tangible milestone, and from now on everything's going to be somehow different. The message of this mantra is that we've been climbing a steep mountain, and that right now we're standing on a flat ledge on the side of the mountain, looking down at what we've just conquered. This is worse than void, it is misleading. We're not on a ledge: there are no ledges! We're on the same steep mountainside we've been on for the past 10 years. We can look down at any old time, and see how far we've come. The point we're at now is the same gradient as the rest of the mountain.
And also (back to WE05), what's with the MacOcracy? In the whole two days of this conference, scarcely a PC was to be seen. Don't get me wrong, I'm not voicing any anxious concern as to why we web developers aren't doing things the beloved Microsoft way. I have as little respect for Windows, et al. as the next geek. But I still use it. Plenty of my friends (equally geeky) are also happy to use it.
I've always had some "issues" with using Mac, particularly since the arrival of OS X. Firstly, my opinion is that Mac is too user-friendly for people in the IT industry. Aren't we supposed to be the ones that know everything about computers? Shouldn't we be able to use any system, rather than just the easiest and most usable system available? But hey, I guess a lot of web designers really are just that - designers - rather than actual "IT people". And we all know how designers love their Macs.
Secondly, Macs have increasingly become something of a status symbol and a fashion icon. To be seen with a Mac is to be "hip". It's a way of life: having an iBook, an iPod, an iCal. Becoming an iPerson. Well, I get the same nauseous feeling - the same gut reaction that is a voice inside me screaming "Marketing Hype!" - whenever I hear about the latest blasted iWhatever. Mac has been called the "BMW" of Operating Systems. What kind of people drive BMWs? Yeah, that's right - do you want to be that kind of person? I care a lot about not caring about that. All that image stuff. Keeping away from Macs is a good way to do that.
Lastly (after this, I'm done paying out Macs, I promise!), there's the whole overdone graphical slickness thing in OS X. The first time I used the beloved "dock" in Mac OS X, I nearly choked on my disgust. Talk about overcapitalisation! Ever hear the joke about what happened when the zealot CEO, the boisterous marketing department, and the way-too-much-time-on-their-hands graphics programmers got together? What happened was the OS X dock! Coupled with the zip-away minimising, the turning-cube login-logout, and all the rest of it, the result is an OS that just presents one too many animations after another!
Maybe I just don't get it. Sorry, strike that. Definitely I don't get it. Buzzwords, shiny OSes, all that stuff - I thought web development was all about semantics, and usability, and usefulness - the stuff that makes sense to me. Why don't you just tell me to go back to my little corner, and to keep coding my PHP scripts, and to let the designers get on with their designing, and with collecting their well-designed hip-hop gadgets. Which I will do, gladly.
Anyway, back to the conference. I discovered by going to Web Essentials that I am in many ways different to a lot of web designers out there. In many other ways, I'm also quite similar. I share the uncomfortable and introverted character of many of my peers. We share a love of good, clean, plain text code - be it programming or markup - and the advantages of this over binary formats. We share a love of sometimes quirky humour. We share the struggle for simplicity in our designs. We share the desire to learn from each other, and consequentially we share each others' knowledge. We share, of course, a love of open standards, and of all the benefits that they entail. And we share a love of food, in high quality as well as high quantity. We share the odd drink or 12 occasionally, too.
]]>
Aussie Daylight Savings PHP function2005-03-27T00:00:00Z2005-03-27T00:00:00ZJazahttps://greenash.net.au/thoughts/2005/03/aussie-daylight-savings-php-function/
Want to know how the GreenAsh clock always tells you, with perfect accuracy, the time in Sydney Australia? Our secret is a little PHP function that modifies the clock according to the rules of NSW Daylight Savings Time. No, in case you were wondering, we don't stay up until 2am twice each year, ready to change the site's time zone configuration at exactly the right moment! A simple little bit of programming does that for us. And unlike a human, computer code doesn't fall asleep waiting for the clock to tick over.
The function that we use is based on the rules of NSW Daylight Savings Time, as explained at Lawlink's Time in NSW page (they also have another excellent page that explains the history of Daylight Saving in NSW, for those that are interested). The current set-up for Daylight Saving is as follows:
Starts: 2am, last Sunday in October.
Ends: 3am, last Sunday in March.
What happens during Daylight Saving: clocks go forward one hour.
And that's really all there is to it! So without further ado, I present to you the PHP function that GreenAsh uses in order to calculate whether or not it is currently DST.
<?php
/**
 * Determine if a date is in Daylight Savings Time (AEST - NSW).
 * By Jaza, 2005-01-03 (birthday function).
 *
 * @param $timestamp
 * the exact date on which to make the calculation, as a UNIX timestamp (should already be set to GMT+10:00).
 * @return
 * boolean value of TRUE for DST dates, and FALSE for non-DST dates.
 */
function daylight_saving($timestamp) {
  $daylight_saving = FALSE;
  $current_month = gmdate('n', $timestamp);
  $current_day = gmdate('d', $timestamp);
  $current_weekday = gmdate('w', $timestamp);
  // Daylight savings is between October and March
  if($current_month >= 10 || $current_month <= 3) {
    $daylight_saving = TRUE;
    if($current_month == 10 || $current_month == 3) {
      // It starts on the last Sunday of October, and ends on the last Sunday of March.
      if($current_day >= 25) {
        if($current_day - $current_weekday >= 25) {
          if($current_weekday == 0) {
            // Starts at 2am in the morning.
            if(gmdate('G', $timestamp) >= 2) {
              $daylight_saving = $current_month == 10 ? TRUE : FALSE;
            } else {
              $daylight_saving = $current_month == 10 ? FALSE : TRUE;
            }
          } else {
            $daylight_saving = $current_month == 10 ? TRUE : FALSE;
          }
        } else {
          $daylight_saving = $current_month == 10 ? FALSE : TRUE;
        }
      } else {
        $daylight_saving = $current_month == 10 ? FALSE : TRUE;
      }
    }
  }
  return $daylight_saving;
}
?>
It's not the world's most easy-to-read or easy-to-maintain function, I know, but it does the job and it does it well. If you're worried about its reliablility, let me assure you that it's been in operation on our site for almost a full calendar year now, so it has been tested to have worked for both the start and the end of Daylight Savings.
So until they change the rules about Daylight Savings again (they're talking about doing this at the moment, I think), or until there's one year where they change the rules just for that year, because of some special circumstance (like in 2000, when they started Daylight Savings early so that it would be in effect for the Sydney Olympics), this function will accurately and reliably tell you whether or not a given date and time falls within the NSW Daylight Savings period.
I wrote this function myself, because I couldn't find any PHP on the net to do it for me. I'm posting the code here to avoid this hassle for other webmasters in the future. Feel free to use it on your own site, to modify it, or to put it to other uses. As long as you acknowledge me as the original author, and as long as you don't sell it or do any other un-GPL-like things with it, the code is yours to play with!
]]>
Vive la HTML2005-01-30T00:00:00Z2005-01-30T00:00:00ZJazahttps://greenash.net.au/thoughts/2005/01/vive-la-html/
HTML - otherwise known as HyperText Markup Language - is the simplest, the most powerful, the most accessible, and the most convertible electronic document format on the planet. Invented in 1991 by Tim Berners-Lee, who is considered to be the father of the World Wide Web, HTML is the language used to write virtually every web page in existence today.
HTML, however, is not what you see when you open a web page in your browser (and I hope that you're using one of the manygoodbrowsers out there, rather than the one bad browser). When you open a web page, the HTML is transformed into a (hopefully) beautiful layout of fonts, images, colours, and all the other elements that make up a visually pleasing document. However, try viewing the source code of a web page (this one, for example). You can usually do this by going to the 'view' pull-down menu in your browser, and selecting 'source' or 'page source'.
What you'll see is a not-so-beautiful plain text document. You may notice that many funny words in this document are enclosed in little things called chevrons (greater-than signs and less-than signs), like so:
<p><strong>Greetings</strong>, dear reader!</p>
The words in chevrons are called tags. In HTML, to make anything look remotely fancy, you need to use tags. In the example above, the word "greetings" is surrounded by a 'strong' tag, to make it appear bold. The whole sentence is enclosed in a 'p' tag, to indicate that those words form a single paragraph. The result of this HTML, when transformed using a web browser, is:
Greetings, dear reader!
So now you all know what HTML is (in a nutshell - a very small nutshell). It is a type of document that you create in plain text format. This is different to other formats, such as Microsoft Word (where you need a special program, i.e. Word, to produce a document, because the document is not stored as plain text). You can use any text editor - even one as simple as Windows Notepad - to write an HTML document. HTML uses special elements, called tags, to describe the structure and (in part) the styling of a document. When you open an HTML document using a web browser, the plain text is transformed into what is commonly known as a 'web page'.
Now, what would be your reaction if I said that everyone, from this point onwards, should write (almost) all of their documents in raw HTML? What would you say if I told you to ditch Word, where you can make text bold or italics or underlined by pushing a button, and instead to writedocumentslike this? Would you think I'm nuts? Probably. Obsessive plain-text geeky purist weirdo? I don't deny it. If you've lost hope already, feel free to leave. Or if you think perhaps - just perhaps - there could be a light at the end of this tunnel, then keep reading.
<matrixramble>
Morpheus: You take the blue pill, the story ends, you wake up in your bed and believe whatever you want to believe. [Or] you take the red pill, you stay in Wonderland, and I show you how deep the rabbit hole goes.
Remember, all I'm offering is the truth, nothing more.
The Matrix (1999)
You may also leave now if you've never heard that quote before, or if you've never quoted it yourself. Or if you don't believe that this world has, indeed, "been pulled over your eyes to blind you from the truth... ([and] that you are a slave)".
</matrixramble>
Just kidding. Please kindly ignore the Matrix ramble above.
Anyway, back to the topic. At the beginning of this article, I briefly mentioned a few of the key strengths of HTML. I will now go back to these in greater detail, as a means of convincing you that HTML is the most appropriate format in which to write (almost) all electronic documents.
It's simple
As far as text-based, no-nonsense computer languages go, HTML is really simple. If you want to write plain text, just write it. If you want to do something fancier (e.g. make the plain text look nice, embed an image, structure the text as a table), then you use tags. All tags have a start (e.g. ), and a finish (e.g. ) - although some tags have their start and their finish together (e.g. ). There are over 100 tags, but you don't need to memorise them - you can just look them up, or use special editors to insert them for you. Most tags are self-explanatory.
HTML is not only simple to write, it is also simple to read. You'd be surprised how easy it is to read and to edit an HTML document in its raw text form, if you just know the incredibly simple format of a tag (which I've already told you). And unlike with non-text-based formats, such as Word and PDF, anyone can edit the HTML that you write, and vice versa. Have you ever been unable to open a Word document, because you're running the wrong version of Microsoft Office? How about not being able to open a PDF document, because your copy of Adobe Acrobat is out of date? Problems such as these simply do not happen with HTML: it's plain text, you can open it with the oldest and most basic programs in existence!
As far as simplicity goes, there are no hidden catches. HTML is not a programming language (something that can only be used by short guys with big glasses in dark smelly rooms). It is a markup language. It requires no maths (luckily for me), no logic or problem-solving skills, and very little general technical knowledge. All you need to know is a few tags, and where to write them amidst the plain text of your document, and you're set to go!
It's powerful
The Golden Rule of Geekdom is to never, ever, underestimate the power of plain text. Anyone who considers themself to 'be in computers', or 'in IT', will tell you that:
Text-based things are almsot always more powerful than their graphical equivalents, in the world of computers (e.g. Unix vs Windows/Mac);
All graphical tools - whether they be for document writing, or for anything else - are generating code beneath their shiny exterior, and this code is usually stored as text (characters); and
Generated code is seldom to be trusted - (wholly or partly) hand-written code is (if the hand-writer knows what he/she is doing) cleaner, more efficient, and more reliable.
HTML is no exception to these rules. It is as powerful as other document formats in most ways (although not in all ways, even I admit). It is far cleaner and more efficient than most other formats with similar capabilities (e.g. Rich Text Format - try reading that in plain text!). And best of all, it leaves no room for fear or paranoia that the underlying code of your document is wretched, because you can read that code yourself!
If you're worried that HTML is not powerful enough to meet your needs, go visit a web page. Any web page will do: you're looking at one now, but as any astronomer can tell you, there are plenty of stars in the sky to choose from. Look at the text formatting, the page layout, the use of images, the input forms, and everything else that makes up a modern piece of the Internet. Not bad, huh?
Now look at the source code for that web page. That's right: the whole thing was written with HTML.
Note that many sites embed other technologies, such as Flash, JavaScript, and Java applets within their HTML - but the backbone of the page is almost always HTML. Also note that almost all modern web sites use HTML in conjunction with CSS - that's Cascading Style Sheets, a topic beyond the scope of this article - to produce meticulously crafted designs by controlling how each tag renders itself. When HTML, CSS, and JavaScript are combined together, they form a technology known as DHTML (Dynamic HTML), the power of which is far beyond anything possible in formats such as Word and PDF.
It's accessible
The transition from paper-based to online documents is one of the biggest, and potentially most beneficial changes, in what has been dubbed the 'information revolution'. Multiple copies of documents can now be made electronically, saving millions of sheets of paper every year. Backup is as easy as pushing a button, to copy a document from one electronic storage device to another. Information can now be put online, and read by millions of people around the world in literally a matter of seconds. But unless we make this transition the right way, we will reap only a fraction of the benefits that we could.
Electronic documents are potentially the most accessible pieces of information the world has ever seen. When designed and written properly, not only can they be distributed globally in a matter of seconds, they can also be viewed by anyone, using any device, in any form, and in any language. Unfortunately, just because a document is in electronic form, that alone does not guarantee this Utopian level of accessibility. In fact, as with anything, perfection can never be a given. But by providing a solid foundation with which to write accessible documents, this goal becomes much more plausible. And the best foundation for accessible electronic documents, is an accessible electronic document format. Enter HTML.
HTML was designed from the ground up as an accessible language. By its very definition - as the language used to construct the World Wide Web - it is essential that the exact same HTML document is able to be viewed easily by different people from all around the world, using different hardware and software, and sometimes with radically different presentation requirements.
The list below describes some of the key issues concerning accessibility, as well as how HTML caters for these issues, compared with its two main rivals, Word and PDF.
Screen size
Even amongst regular PC users - the group that forms the largest majority in the online world - everyone has a different screen size. An accessible document format needs to be able to display equally well on an 11" little squeak as on a 23" big boy. This issue has become even more crucial in recent years, with the advent of Internet-enabled pocket devices such as PDA's and mobile (cell) phones. HTML handles this fine, as it is able to display a document with variable margins, user-defined font sizes, and so on. Word handles this reasonably well, largely due to its different 'views' such as a 'layout view' and 'online view', many of which are suited to variable screen sizes. PDF fails miserably in this regard, because it is designed specifically to display a document as it appears in printed form, and is totally incapable of handling variable margins.
Cross-platform compatibility
Electronic documents should be usable on any operating system, as well as on any hardware. HTML can be viewed on absolutely any desktop system (e.g. Windows, Mac, Linux, Solaris, FreeBSD, OS/2), and also on PDAs, mobile phones, WebTVs, Internet fridges... you name it, HTML works on it. PDF - as it's name suggests, with the 'P' for 'Portable' - is also pretty good in this regard, since it's able to run on all major systems, although it isn't so easy to view on smaller devices, as is HTML. Word is compatible only with Windows and Mac PCs - which is so lame it's not even worth commenting on, really.
Language barriers
This is one of the more frustrating aspects of accessibility, as it is one where technology has not yet caught up to the demands of the globalised world. Automated translation is far from perfect at the moment, however it is there, and it does work (but could work better). HTML documents are translated on-the-fly every day, through services such as Altavista's BabelFish, and Google's Language tools. This is made easier through HTML's ability to store the language of a document in a special metadata format. PDF and Word documents are not as readily translatable, although plug-ins are available to give them translating capabilities.
Users with poor eyesight
Many computer users require all documents to be displayed to them with large font sizes, due to their poor vision. HTML achieves this through a mechanism known as relative font sizes. This means that instead of specifying the exact size of text, authors of HTML documents are instead able to use 'fuzzy' terms, such as 'medium' and 'large' (as well as other units of size, e.g. em's). Users can then set the base size themselves: if their vision is impaired, they can increase the base size, and all text on the page will be enlarged accordingly. Word and PDF do not offer this, although they make up for it somewhat with their zoom functionality. However, this can often be cumbersome to use, and often results in horizontal scrolling.
Blind users
This is where HTML really shines above all other document formats. HTML is the only format that, when used properly, can actually be narrated to blind users through a screen reader, with little or no loss in meaning compared with users that are absorbing the document visually. Because HTML has so much structure and semantic information, screen readers are able to determine what parts of the document to emphasise, they can process complex tabular information in auditory form, and they can interpret metadata such as page descriptions and keywords. And if the page uses proper navigation by way of hyperlinks, blind users can even skip straight to the content they want, by performing the equivalent of a regular user's 'click' action. Word and PDF lag far behind in this regard: screen readers can do little more than read out their text in a flat monotone.
It's convertible
Just like a Porsche Boxster... only not quite so sexy. This final advantage of HTML is one that I've found particularly useful, and is - in my opinion - the fundamental reason why all documents should be written in HTML first.
HTML documents can be converted to Word, PDF, RTF, and many other formats, really easily. You can open an HTML document directly in Word, and then just 'Save As...' it in whatever format takes your fancy. The reverse, however, is not nearly so simple. If you were to type up a document in Word, and then use Word's 'Save as HTML' function to convert it to a web page, you would be greeted with an ugly sight indeed. Well, perhaps not such an ugly sight if viewed in a modern web browser; but if you look at the source code that Word generates, you might want to have a brown paper bag (or a toilet) very close by. Word generates revolting HTML code. Remember what I said about never trusting generated code?
Have a look at the following example. The two sets of HTML code below will both display the text "Hello, world!" when viewed in a web browser. Here is the version generated by Word:
This is really important. The ability to convert a document from one format to another, cleanly and efficiently, is something that everyone needs to be able to do, in this modern day and age. This is relevant to everyone, not just to web designers and computer professionals. Sooner or later, your boss is going to ask you to put your research paper online, so he/she can tell his/her friends where to go if they want to read it. And chances are, that document won't have been written originally in HTML. So what are you going to do? Will you convert it using Word, and put up with the nauseating filth that it outputs? Will you just convert it to PDF, and whack that poorly accessible file on the net? Why not just save yourself the hassle, and write it in HTML first. That way, you can convert it to any other format at the click of a button (cleanly and efficiently), and when the time comes to put it online - and let me tell you, it will come - you'll be set to go.
A great (free) text editor for those using Micro$oft Windows. Fully supports HTML (as well as many other markup and programming languages), with highlighting of tags, automatic indenting, and expandable/collapsible hierarchies. Even if you never plan to write a line of HTML in your life, this is a great program to have lying around anyway.
Another great (and free) plain-text HTML editor for Windows, although this one is much more complex and powerful than Notepad++. HTML-kit aims to be more than just a text editor (although it does a great job of that too): it is a full-featured development environment for building a respectable web site. It has heaps of cool features, such as markup validation, automatic code tidying, and seamless file system navigation. Oh yeah, and speaking of validation...
The World Wide Web Consortium - or W3C - are the folks that actually define what HTML is, as in the official standard. Remember I mentioned Tim Berners-Lee, bloke that invented HTML? Yeah, well he's the head of the W3C. Anyway, they provide an invaluable tool here that checks your HTML code, and validates it to make sure that it's... well, valid! A must for web developers, and for anyone that's serious about learning and using HTML.
This site is devoted to teaching you HTML, and lots of it. The tutorials are pretty good, but I find the A-Z tag reference the most useful thing about this site. It's run by Richard Rutter, one of the world's top guns in web design and all that stuff.